Roy B
-
Joined
-
Last visited
-
Days Won
188
Everything posted by Roy B
-

Results - NIR Shaleway - WORLD FINAL 2023 - Saturday 9th September 2023
Roy B replied to nic's topic in Essential Information
Final Focus: H90 leads away. H214 into the lead. 457 and H76 take a wild ride up the back straight fence and come to rest locked together in turn 3. H56 and 368 do likewise at the opposite end of the track. Caution for stranded cars. H214 heads the restart. 6 and 541 batttle through the turns with Pascal gaining the upper hand. A crash involving 78, H76, H311, 415 blocks the outside line of turn 1. 97 fires 55 into the pile bringing out the caution. H214 & H90 head the restart. H214 fires 540 into the turn 1 fence with a monster hit. 97 makes light work of the field and blasts his way past H410 and 212 to take a race winning lead. With the left rear brake disc glowing orange in the closing stages Ryan backs it off such was his big lead. -
Results - NIR Shaleway - WORLD FINAL 2023 - Saturday 9th September 2023
Roy B replied to nic's topic in Essential Information
Consolation 2 Catch Up: 580 leads away. 499 and 45 collide in turn 1 with Nige hitting the fence. Another big pile up in the turn brings out the early caution. 515 & 5 retire with blown tyres. 345 is on the telehandler with the right rear wheel off. 499 heads the restart. 127, 166 and 289 end up in a heap on the exit of turn 2 bringing out the caution. 499 and 249 head the restart. Joff jumps the start into the lead with H61 closing in lap by lap. Koen is through with a big hit on Joff into turn 3. Joff tries to return the favour into turn 1 but is unable to close the gap. With H61 away and gone H124 is next to give the 249 a hit into turn 1 with a lap to go passing him up the inside. This time Joff is having none of it and lines him up entering turn 3 and fires him up the fence. A spectacular end to the race and the best move of the two days so far 👍 -
Results - NIR Shaleway - WORLD FINAL 2023 - Saturday 9th September 2023
Roy B replied to nic's topic in Essential Information
Consolation 1 Catch Up: H296 leads away. 211 rides up the back straight fence and slows 555 who is close behind. 78 is taking no prisoners and is flying through the field. Caution. H296 heads the restart. 457 is piling on the coals and moves into the lead with 2 to go. -
Results - NIR Shaleway - WORLD FINAL 2023 - Saturday 9th September 2023
Roy B replied to nic's topic in Essential Information
World Final Recall: 216 gets a great start and leaves the field behind. 84 is shoved wide by the pack as they all jostle through turn 4 coming to the green. Entering turn 1 a big pile up ensues ending with 16 upside down and 20 pointing skywards on top. All ok. Red flag. Complete re-start. Green flag and 216 leads into turn 1. 587 hits an infield tyre at the end of the back straight which holds up 515. NZ26v baulks 216 in turn 2 which lets 84 and 217 through. Lee puts a hit in on Tom into turn 3 but both remain in position. Caution for stranded cars. This restart is 84, 217 and 16. Lee drives Tom into the turn 1 fence but loses positions. 16 through to the lead. 259 firing them in is up to 4th. Caution for stranded cars. 16, 84, H618 and 259 head this restart. 84 is soon through to the lead passing the wingless 16 car on the exit of turn 4. Another pile up in turn 1 brings out the caution. A number of front runners come to grief sliding into the stationary cars. 84, 16 and 20 head the next restart. 55 is moving towards the front. At halfway 84 has a big lead. 55 passes 20 to move into 2nd. Liam retires with a smoky car soon after. 25 and NZ34 tangle in turn 2 trapping 16 and costing Mat track position. Tom takes a dominant victory with all challengers vanquished 👍 -
Results - NIR Shaleway - WORLD FINAL 2023 - Saturday 9th September 2023
Roy B replied to nic's topic in Essential Information
. -
Results - NIR Shaleway - WORLD FINAL 2023 - Saturday 9th September 2023
Roy B replied to nic's topic in Essential Information
Heat Three Happenings: 548 leads away. 45 and 345 tangle exiting turn 4 coming to the green. A big pile up in turn 1 brings out the caution. H627 heads the restart. A pile up in turn 3 is no problem for 97 as Ryan blasts it through. H248 fires 548 and H627 into the turn 1 fence and takes over the top spot. 97 is up to 2nd by halfway and soon into a race winning lead. -
Results - NIR Shaleway - WORLD FINAL 2023 - Saturday 9th September 2023
Roy B replied to nic's topic in Essential Information
Heat Two Happenings: 67 leads away. A pile up of 'B' graders in turn 3 occurs coming to the green flag. Caution for a spun and stalled H226 on the home straight. 67 heads the complete restart. This is short-lived as a pile up involving a majority of 'H' cars blocks the track. 67 heads the restart. H54 challenges for the lead but collects a marker tyre on the exit of turn 2. 67 drifts wide in turn 3 and comes to a stop. H511 through to the lead. Caution for H296 and H179 in turn 1. H511 & H311 head this restart. H47 closes in and takes 2nd from H311. A last bender through turn 3 from H47 on H511 doesn't come off with Danny riding the fence. -
Results - NIR Shaleway - WORLD FINAL 2023 - Saturday 9th September 2023
Roy B replied to nic's topic in Essential Information
Welcome to WF day folks. Consi Semi-Final Recap: 212 leads away. All the cars are sliding around on the heavily watered track and bouncing off the fence. 2 spins exiting turn 3 on the first lap. 212 keeps ahead with 526 in 2nd. 526 slides wide in turn 1 and 268 moves through. 212 retires with a flat right rear. 268 in the lead rides over the front end of 457 in turn 1 but keeps in front. Caution for stranded cars. 268 and 526 head the restart. Within a couple of laps 326 rolls in a coming together with 463 on the back straight. Red flag. 268, 289 and 21 head this restart. 235 and 526 spin in turns 1 and 2. At 3 to go 268 drifts wide in turn 3 allowing 289 through for a short-lived lead until Richard retakes the place and the race victory. -
Results - Northampton Overseas - Friday 8th September 2023
Roy B replied to nic's topic in Essential Information
GN Notes: 214 leads away. Chaos into turn 1. A big hit from 226, and a pile up brings out an early caution. 6 takes the lead after the restart. 47 is stationary in the middle of turn 2 for a number of laps. Incidents at both ends of the track with cars bouncing off each other and the fence. Caution for stranded cars. 6 heads this restart. 38 is taken around by 295 in turn 2. 152 blitzes the field to climb to 2nd behind race winner Pascal Spigt. That's it folks. Back tomorrow 👍 -
Results - Northampton Overseas - Friday 8th September 2023
Roy B replied to nic's topic in Essential Information
Final Focus: 161 leads away. 100 takes over up front. 141 gives NZ1 a whack into turn 1. 36 and 26 come to a stop in turn 1. 152 takes on 61 in a short duel and moves up a position. At halfway 100 has half a lap lead over 152. At two to go Joey pulls off with a flat. Gert-Jan takes the win. -
Results - Northampton Overseas - Friday 8th September 2023
Roy B replied to nic's topic in Essential Information
Consolation Catch Up: 214 leads away. 179 goes around on the home straight. 627 is slow on the back straight causing the following cars to take evasive action. 36 spins on the back straight. 26 and 34 lock together on the exit of turn 2. 296 stranded on the home straight brings out the caution. 214 heads the restart. NZ1 is carrying a lot of speed into the bends and is spectacular to watch. He soon takes the lead. 152 fires him into turn 3 and takes over up front. Asher is on a charge for revenge but a caution is called for a stranded car. 152 from NZ1 on the restart. Gert-Jan gets away as Asher tangles with 627 in turn 2. 717 gets in the way of the leader going through turn 3 but the 152 keeps ahead of a rapid 124 in his new car. As the flag falls 717 gets clipped by 124 and rides up the fence by the starter. -
Results - Northampton Overseas - Friday 8th September 2023
Roy B replied to nic's topic in Essential Information
Heat Two Happenings: 296 leads away. 215 loops it in turn 4. 621 takes over up front early on. 54 into the lead after 621 overcooks it in turn 1 and backs it into the fence. 179 and 6 are locked together and stuck in the middle of turn 2. 229 and NZ1 engage in battle with Asher really throwing the Polley car into the bends. NZ1 takes too much speed into turn 1 and spins collecting 229 in the process. The New Zealander suffers a flat right rear in the incident and retires to the infield along with 229. Caution. 54 heads the restart. 661 spins it on the home straight. 152 retires with a flat right rear. By halfway Sierd has extended his lead. 6 and 625 battle through turn 3 in a clash of bumpers. 496 half spins exiting turn 2 delaying 54. The closing laps sees 141 fire a few into turn 3 with a big hit. 54 takes the win. -
Results - Northampton Overseas - Friday 8th September 2023
Roy B replied to nic's topic in Essential Information
Welcome to the WF three-dayer folks. Heat One Happenings: 717 leads away. 214 into the lead on lap 1. 248 spins it on the home straight. 161 takes the lead from 717 through turn 1. 27 stops against the fence in turn 1. 161 still leads at halfway. 100 uses 317 as a snooker ball to remove 161 from the lead into turn 3. They reverse positions through turn 1 only for 100 to repeat the move through turn 3. Joey sets off for the win. 61 comes on strong towards the end with a big side hit on 317 in turn 3. -
2023 F2 World Final - Nutts Corner - Saturday 2nd September
Roy B replied to Roy B's topic in Essential Information
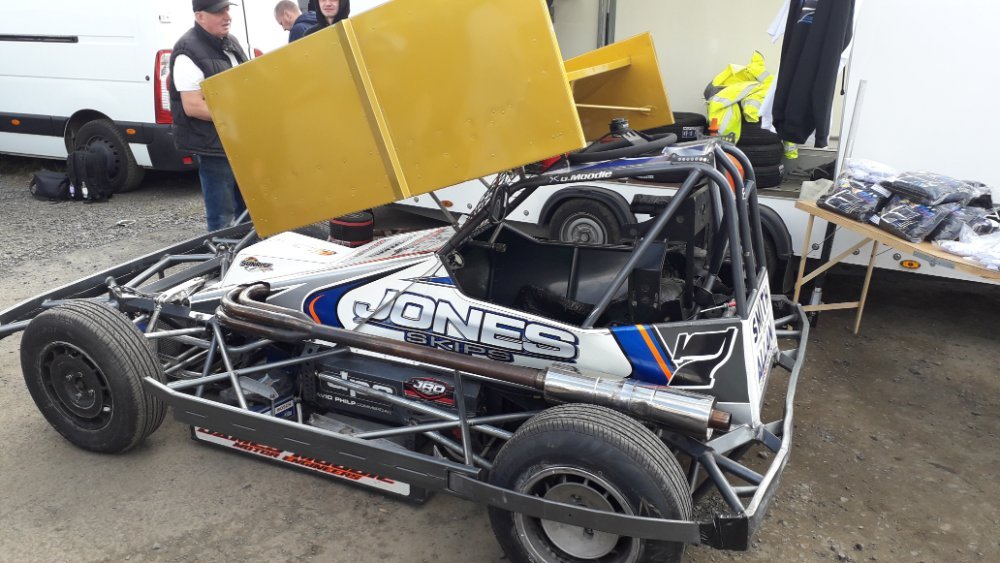
Gold wing fitted
-
2023 F2 World Final - Nutts Corner - Saturday 2nd September
Roy B replied to Roy B's topic in Essential Information
2023 F2 World Final Result: 7 3 918 24 560 B96 968 992 801 & 578. That's it for this year folks. This time next week we should know the 2023 F1 World Champ 👍 -
2023 F2 World Final - Nutts Corner - Saturday 2nd September
Roy B replied to Roy B's topic in Essential Information
7 away again on this 3rd start. The 183 challenge is over as soon as he clips the inner kerb into turn 1 whilst dive-bombing the Flying Fifer. Gordon increases his lead up front as the field circulate in single file. The latter half of the race sees a good battle develop between 918, 24 and 560. A caution with 1 lap remaining after a big hit from 127 on 183 into turn 1. The pair repeat the move into turn 3 with Matt driving Charlie up the fence. A wheel is ripped off the 183 car. The one lap restart is 7 - 3 - 918 - 560 - 24. This leading bunch bang into each other nose to tail coming to the flag. Liam's jumps out of gear and Gordon creates a gap. Entering turn 3 for the last time the 3 car tries a high speed last bender but misses and whacks the fence. Gordon Moodie is the 2023 World Champ! Top 3: 7 3 918 -
2023 F2 World Final - Nutts Corner - Saturday 2nd September
Roy B replied to Roy B's topic in Essential Information
The remaining cars all move forward and grid up. The second start sees the 7 car away again with the gap to 183 too great for Charlie to mount a first bend challenge. Caution for a stranded 184 and 718. 915 out of the race. The single file restart will give Guinchy another chance to take the 7 car on. -
2023 F2 World Final - Nutts Corner - Saturday 2nd September
Roy B replied to Roy B's topic in Essential Information
Gordon is away off the front and leaves the field behind. 560 through into 2nd with Guinchy stuck on the outside losing places. Caution called to remove stranded cars after the first lap pile ups further down the field. Complete restart called. Damaged cars are not allowed to be worked on. The race will restart minus a few of the top lads: 647, 226, 16, 783 and 776 are all out. -
2023 F2 World Final - Nutts Corner - Saturday 2nd September
Roy B replied to Roy B's topic in Essential Information
Drivers start your engines! -
2023 F2 World Final - Nutts Corner - Saturday 2nd September
Roy B replied to Roy B's topic in Essential Information
World Final grid: 7 183 560 3 H154 718 16 783 647 880 918 467 127 992 915 776 B96 998 890 980 24 801 924 216 390 226 100 285 74 243 184 968 517 213 175 H115 844 578 1 -
2023 F2 World Final - Nutts Corner - Saturday 2nd September
Roy B replied to Roy B's topic in Essential Information
Last Chance Race: Closed grid: 368 10 - C 80 733 844 931 - B 588 454 12 795 482 728 517 578 210 - A 419 315 975 736 191 547 184 387 - S 674 618 979 325 968 86 213 Top 6 into the WF. Result: 184 968 517 213 844 578. No further places given. -
2023 F2 World Final - Nutts Corner - Saturday 2nd September
Roy B replied to Roy B's topic in Essential Information
The times from both runs sees the following grid positions: Row 3 - H154 718 Row 6 - 918 467 Row 9 - B96 998 Row 12 - 924 216 Row 15 - 74 243 Row 18 - 175 H115 Owing to mechanical trouble H115 missed the time trials. -
Welcome to Nutts Corner folks. Time Trial Contestants: 74 Jonny Stirling 175 Steven Wright 216 Thomas Greer 243 Martin Stewart 467 Aidan McFerran 718 Gavin Fegan 918 Shea Fegan 924 Jack Morrow 998 Graham Fegan B96 Jan Bekkers H154 Kay Lenssen First run: H154 - 14.84 B96 - 14.96 718 - 14.91 918 - 15.00 998 - 15.03 467 - 15.05 924 - 15.12 216 - 15.15 243 - 15.39 74 - 15.54 175 - 15.96 Second run: 718 - 14.92 467 - 14.94 H154 - 14.94 918 - 14.94 998 - 15.00 B96 - 15.01 924 - 15.04 216 - 15.07 74 - 15.32 243 - 15.35 175 - 15.75
-
Pics in the gallery. Many thanks to Nic for taking them 👍
-
Results - Bradford - Saturday 26th August 2023
Roy B replied to nic's topic in Essential Information
Pics in the gallery 👍