

Roy B
-
Joined
-
Last visited
-
Days Won
188
Everything posted by Roy B
-
Continued from above: A beauty from Niven’s T.P.Niven from Palnackie, Scotland 1926: Where it all began During the General Strike of 1926 Thomas Paisley Niven used his life savings to purchase a petrol lorry and the firm was born. 1933: Firm growth The firm began hauling milk in 1927. Following the creation of the Milk Marketing Board in 1933 Tom continued to grow the firm specialising in the haulage of milk. 1948: Surviving the war After WW2 Tom’s children Jim, John and Doreen became involved in the business. 1960: Expansion The firm continued to expand after gaining a contract to haul panels for radiator firm Stelrad. This partnership remains today with T.P. Niven and Stelrad celebrating 61 years of working together in 2021. 1983: New management Current managing director Jim Niven Jnr took over the company at the age of 23. Throughout his management period the firm has seen significant growth to where it is today. 1994: Lockerbie Depot With the continual success in milk haulage T.P.Niven expanded with a new depot in Lockerbie to aid their operation. This depot remains integral to the company’s distribution today. 2000: Millenium The start of the new millennium saw the fleet expand again with TPN gaining the contract for Scottish store deliveries for nationwide store Pets at Home. 2011: Palletline An opportunity to become part of the Palletline Network arose in 2011 covering the DG and KA postcodes. This allowed T.P.Niven to diversify their services to smaller consignments, and access clients that were unavailable to the company by their full load business. 2016: Taking TPN south of the border The firm gained a new contract with the Organic Milk Supply Cooperative. This came with a dedicated milk collection depot in Charlton Adam, Somerset. 2019 – Present day: Moving milk for 90 years T.P.Niven’s formidable reputation in milk haulage gained the First Milk contract for Scotland adding three new depots in Mauchline, Campbelltown and Stranraer. For me the truck of the show was a classic Brit though, with STAS Trailers’ newly restored ERF EC14 Olympic getting a lot of attention. An early model on an L-reg, it featured a rarer angled dash. A cracking bit of kit. Plenty of pics from the show in the gallery. Here’s a couple of YouTube items: Over to Ireland where we find out the result of a Bridgestone v Michelin 55,000 mile truck tyre trial, with the added bonus of a look at the new trucks in stock at T. Nolan & Sons in Co.Kerry. If you need a proper laugh check out this lad’s YouTube channel : Chris Allen-Professional Struggler. He’s a mobile HGV mechanic and has a great old school attitude to the job with a crackin’ personality. If you’re offended by swearing then it won’t be for you though. He has his lad helping him on this vid so his language is somewhat restrained! It’s heart-warming to see them spending quality time together with his son getting involved and learning, and not a computer in sight. We’ll make our way now to our final stop this week. We’re going into the centre of London to one of the city’s most famous landmarks – Piccadilly Circus. It’s the tube station, and what’s under it that we’ll be looking at to be more precise. Let’s see how it all came to be: PICCADILLY CIRCUS: THE HEART OF LONDON Piccadilly Circus is one of London’s most popular tourist destinations and home to one of the city’s most distinctive Underground stations. Originally opened in 1906, the station was completely remodelled in the 1920s. The new station, designed by architect Charles Holden, became the Underground’s flagship in the heart of London. There were three separate entrances. The Haymarket entrance with its ornate office doorway in the centre. The Jermyn Street entrance before the Haymarket Hotel was added on top After the hotel was added No expense was spared in delivering the station’s extraordinary design features, reflecting a time when London was still perceived as the capital of the British Empire. Today, the station continues to be a busy hub, serving over 40 million passengers a year. Piccadilly Circus reflects the different periods of the Underground: the rapid expansion of Tube railways in the early 1900s, the golden age of design in the 1920s and 1930s, the Underground as a place of shelter during the Second World War, and refurbishment in the 1980s to keep pace with demand. PICCADILLY OPENS Piccadilly Circus station opened on the Baker Street & Waterloo Railway (now the Bakerloo line) on 10 March 1906, followed by the Great Northern & Piccadilly Railway (now the Piccadilly line) on 15 December the same year. The booking hall, entrances and platforms were designed by architect Leslie Green. From the booking hall, eight lifts (four for each line) transported passengers to platform level. The booking hall looking out towards Piccadilly The view looking in In 1914, Piccadilly Circus became the first Underground station to operate two automatic landing operated lifts (previously serviced manually by lift operators), quickly followed by two more. The Bakerloo line part of the station also required four lifts as this was at a lower level. This was the highest number of lifts at any station in Edwardian times. The lift hall with the Bakerloo set to the right Continues below:

-
Continued from above: A Bedford TK and a Volvo F12 from Stuart and Eddie Holt. Holt’s are a Yorkshire transport company taking pride in its heritage. Established in 1935 they became the premier name for haulage in East Yorkshire. Over the years, their reputation for outstanding service ensured that they were able to apply their regional success to the national stage. Their Yorkshire-based transport services diversified as they accessed the wider UK market, and in 2001 they established Palletforce with a group of national hauliers. Though they have grown to become one of the leading general haulage firms in the UK, they have not lost their personal touch. Owned and run by the Holt family, the company has survived many years in the UK market, largely as a result of its friendly, family-oriented approach to business. Some of today’s fleet. On the road It was tippers and technology inside, with the tankers parked outside up in the stunning Tanker Village on the Majestic Hotel’s front lawns. The trucks on show were almost all brand new, and it was interesting to see so many tippers that had yet to shift a single load. Iveco, Volvo, Merc and Renault all had sizeable manufacturer displays. The most technically advanced piece of equipment was the Vol-Tar volumetric asphalt plant which was mounted to a Renault Range-T eight-legger. Volumetric concrete mixers have been around for years, but this was the first mobile batching plant seen for tar. One fascinating stand was Jost GB. They are the leading global producer and supplier of commercial vehicle components. Featured at the show was their new automatic trailer coupling system enabling drivers to couple and uncouple via remote control. The system automates the entire process, including air, electrics, and brakes. The fifth wheel is the mothership containing the sensors, connector, lube system and pneumatic release valve. Fitted to the underside of the trailer, the star of the show is the KKS connector. This controls all the mechanical, electrical, and pneumatic connections between the truck and trailer, eliminating the need for vulnerable air, electrics and ABS/EBS spiral lines. During cornering, cable and hose handling takes place in the trailer floor, with resetting taking place automatically once the vehicle is travelling in a straight line again. Hand cranking is a thing of the past with an electric auxiliary drive that deploys the landing legs automatically. All components can be retro fitted to most vehicles/trailers. It all sounds good to me but how’s it going to perform after it’s taken a few deluges and got covered in salt and grit in our winter. Time will tell I suppose. To the tankers now. A well looked after 7yr old R490 Continues below:
-
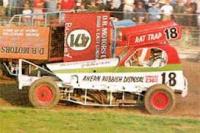
Continued from above: Taunton – Monday 9th August 2021 The Nostalgia Trophy was the feature prize at this meeting. The trophy was presented to the sport by former racer Mick Whittle. His own link with nostalgia is very strong indeed, as he has built a number of cars for the Heritage Stock Car class, and is also responsible for the stunning re-make of the Ivor Greenwood ‘side-saddle’ car. Never one to rest easy, Mick had been busy constructing another new car with a strong tilt to history, and he had planned to have that very car here on display the following Monday. The Grand Parade was led off by a younger member of the Darby family in honour of a fine achievement the previous weekend. It had been a summer to remember for Ministox racer Harry Darby (577). Having captured the Devon title at the start of June he comprehensively won the English Open at St. Day at the beginning of July. However, an even bigger success came his way when he claimed the British Championship at Cowdenbeath a week prior to this meeting. Harry on track later in the meeting A heavy downpour soaked the track before start time, although the sky lightened by the time of the evening’s Finals, and a dry line was starting to appear. 26 cars raced to a two-thirds format. Heat 1: John Brereton (948) and Adrian Watts (222) spun out in turn one whilst Jack Bunter (128) made the most of his white grade start to lead the opening half of the race until he was caught and passed by Ryan Sheahan (325). A tremendous battle between Justin Fisher (315) and Tommy Farrell (667) raged behind which culminated in an attempted hit from 315 on the rear of 667 which only succeeded in Fisher spinning himself out. Sheahan claimed the victory from Bunter, and a fast closing Matt Stoneman (127). Result: 325, 128, 127, 35, 895, 667, 315, 915, 27 and 988. Heat 2: Hitting the front early was Paul Rice (850) who ran unchallenged to the flag. However, there was plenty going on behind. Archie Farrell (970) on his Brisca F2 debut was caught out on numerous occasions by the track conditions spinning multiple times. Ben Borthwick (418) and Charlie Fisher (35) were enjoying a fine battle, the two swapping places frequently for the minor placings whilst Justin Fisher made amends for his opening race spin by pushing Bunter aside on the last bend for second place. Result: 890, 315, 128, 24, 736, 418, 35, 27, 988 and 895. Heat 3: Rice was again the man to beat, but behind him a chaos filled race unfolded with the majority of the field involved in either a collision, or a spin at some point. This included many of the star graders with Tommy Farrell and Borthwick tangling in turn two, whilst Stoneman hooked together with Matt Hatch (320) on the back straight. Result: 890, 325, 736, 24, 915, 418, 127, 667, 194 and 948. Final: Rice looked like he was on for the hat-trick as he stormed through the field, but trouble lay ahead. Justin Fisher smoothly climbed through the pack to relieve Rice of the lead who then got caught out by what looked like oil dropped in turn one and crashed into a pile up of cars. Jon Palmer (24) joined the growing list of casualties also being caught out. Fisher continued to avoid the chaos to stretch his lead. At one stage he was half a lap ahead of his closest pursuer and consistently set the fastest lap. His son Charlie had spun around in the pit bend early on but such was the nature of the race he found himself back up to fourth by race end. An excellent charge in the final few laps saw him follow home podium finishers Sheahan and Borthwick. Fisher remarked in the post-race interview that he was unsure why the car was going so well as he was not known for his wet track form around Smeatharpe. He was even more pleased for the fourth place finish for his son, Charlie. Result: 315, 325, 418, 35, 988, 127, 398, 667, 27 and 33. GN: Rice duly completed his hat-trick with victory in this one. It was a good reward for the hard work in the pits to repair his car after it had required a double tractor tow off the circuit following the Final. Without a caution, Fisher’s fifth place finish from the lap handicap cemented the pace he had shown during the evening. Result: 890, 128, 736, 418, 315, 667, 27, 35, 762 and 895. Let’s head up country now to North Yorkshire and the spa town of Harrogate. We’re here to have a look around the last ever Tip-Ex/Tank-Ex event to be held at the Convention Centre. The show is a unique event aimed at operators, and all the big players in tanker and tipper technology had their latest products on display. The 2021 event was bigger than ever with more than 100 exhibitors and extra floor space, both inside and out. Leading truck manufacturers, body-builders, trailer, tanker, tipping gear and load handling companies were all represented with their latest models. Workshop equipment also featured heavily, as did all the accessories, kit and compliance services needed to keep fleets safe and efficient on the road. From telematics and cameras to walking floors and hydraulic tipping gear - there was something for everyone. Taking place right in the middle of scenic Harrogate, trucks were also parked outside the front of the hall, with a road closed off to accommodate displays. Stand-out vehicles in this area were: Matt Waller’s Baerlocher 45ft Feldbinder tipping tanker and Merc Actros 2551 A classic post-war Foden Some golden oldie Cooper’s Continues below:
-
Hi there folks, This week we’ll be heading to Taunton for another two Monday evening F2 fixtures, before making our way to Harrogate to have a look around the last Tip-Ex/Tank-Ex show to be held in the town. It is the UK’s only dedicated event for the tipper, bulk transport and tanker sectors. We then leave here and finish below the streets of London. Join me at Piccadilly Circus Underground Station as we cover the story of one of the most iconic stations on the network. We’ll go behind secret doors, and to passageways and lift shafts closed to the public since 1929. Taunton – Monday 2nd August 2021 The second of the quintet of Monday evening fixtures here at Smeatharpe was also the fourth in an eight day spell in the West-Country. With Skegness the following evening being the last World Championship qualifying round numbers (22 cars) were a little below the level normally accustomed to here. Dave Williams (32) and Jamie Ward-Scott (881) added a northern flavour to proceedings, with the former set for a track debut. There was also a Brisca F2 debut planned for former Ministox and Stock Rod racer Archie Farrell (970). A stunning new WRC car for James Rygor (783 ) also made its debut here. Heat 1: Mike Cocks (762), Jack Bunter (128) and Richard Andrews (605) set the early pace in this one. Charlie Lobb (988) had risen to second behind Bunter when a caution was called for Ian England (398) who had ended up across the front of Charlie Fisher (35) and sent into the back-straight wall. Bunter made a good restart as Paul Rice (890) and Ben Goddard (895) demoted Lobb. Bunter got out of shape which allowed Rice and Goddard to get ahead where they proceeded to exchange hits, and the lead on several occasions. This brought Tommy Farrell (667) into play. He got inside the 890 car and then pushed 895 aside for the lead with two to go which he held to the end. Result: 667, 315, 890, 895, 522, 736, 988, 128, 460 and 320. Heat 2: Andrews led away, but Lobb soon took up the running under pressure from Josh Weare (736), in the ex-Luke Wrench (560) car, whilst Rice also passed Andrews before half-way. This quartet remained in that order to the flag with Andrews fending off a last-bend lunge from Jon Palmer (24) who had missed Heat 1 with mechanical troubles. In the end Palmer was docked two places for jumping the start, promoting Goddard and Farrell to fifth and sixth. The star grade had been depleted by Justin Fisher (315) and Chris Mikulla (722) – on his first appearance of the season – crashing into the Honiton bend wall, and gearbox trouble for James Rygor’s (783) brand new car. Result: 988, 736, 890, 605, 895, 667, 24, 128, 398 and 762. Gearbox trouble for 783 Final: Andrews led the field away until a spin put Bunter ahead from Lobb, Cocks and England, but Farrell and Palmer were the fastest men on track as they worked their way up. Palmer hit Farrell wide from a long way back into the pit bend just before half-way in what could have been a race-defining move as he began picking off those in front. Lobb had pulled clear, and Palmer was up to second when the 24 car went straight on into the Honiton bend wall with five to go, as a result of a puncture. That handed Lobb a big lead and he duly reeled off the remaining laps to claim his maiden Brisca F2 Final victory for the Pat Hudson Trophy in memory of a long serving member of the Autospeed team. Farrell survived a last-bend hit from Justin Fisher for second, with Mikulla, England and Bunter completing the top six. Result: 988, 667, 315, 522, 398, 128, 736, 895, 320 and 35. JP went straight on into the Honiton bend fence during the Final GN: Having suffered mechanical issues for most of the meeting, Ward-Scott led away as Andrews and Bunter tangled on the first bend. Weare moved ahead, with Charlie Fisher also passing Ward-Scott as star men Farrell, Justin Fisher and Palmer charged through the field. Justin Fisher nudged his son Charlie wide for second with Farrell following through the gap as Weare pulled clear. Palmer shoved the younger Fisher wide for fourth with two to go then tried a huge lunge on Farrell for third on the last bend. It didn’t come off however, and allowed Charlie back inside as Weare took a resounding win from Justin F and Farrell. Lobb rose to eighth from the lap handicap without the need of a yellow flag situation. Result: 736, 315, 667, 35, 24, 895, 881, 762, 988 and 526. Pics in gallery from this meeting. Continues below:
-
Continued from above: On to Trams in Trouble now: This week it’s the turn of Blackpool English Electric Series II Railcoach 616. It is pictured in Rigby Road depot after a major accident with a twin-car set at the Cabin in July 1970. In October 1971 the bodywork was scrapped down to the basic wooden frame, this was carried out in the body shop at Rigby Road works. The tram later became the first production OMO car 616 / 1. After it was converted to one man operation. The story of Blackpool’s OMO trams: Following the closure of the inland routes by 1963, there was a need for Blackpool Corporation Transport to cut costs on operation of the tramway during the winter period when the number of passengers carried was drastically less than during the summer months. There were three initial experiments carried out using existing members of the fleet to see if costs could be saved. Initially, there was an experimental conversion of Brush Car 638 to one person operation. The initial experiment was a failure as the door was placed too far back, the driver had to swivel round to collect money from passengers and with the narrow entrance door, it would make loading slower. 638's seating capacity would also have been reduced, the capacity was only 48 prior to the experiment taking place. It was soon converted back to a two person car. Here it is with a fire in the trolley tower at the Pleasure Beach. Next up Railcoach 611 was converted. It was built to look like a twin car Railcoach to try and boost capacity (56 seats as opposed to 48 seats on ordinary Railcoaches). They also lengthened Railcoach 618 to allow a greater capacity. These experiments were unsuccessful as the expensive 2 man crew was still needed and the same number of service trams would still be required. In the late 1960's / early 1970's, many bus companies had begun to dispense with conductors and convert their vehicles to One Person Operation so the logical decision was for them to follow suite and use OPO on their trams on winter services. The issue they had, however was that none of the fleet of trams were capable of OPO operation in their then present form and with the failed OPO experiment on Brush Car 638, a new idea was needed. A brand new fleet of OPO trams built from scratch was out of the question, both on the grounds of cost and the probable need to import new trams from abroad as Blackpool was the only remaining tramway in the UK at the time, so the only real solution was to rebuild some of the existing fleet. The single deck fleet at that time consisted of 3 Series 1 EE Railcoaches, 10 Series 2 EE Railcoaches, 10 twin car motors and 17 Brush Cars. BCT then formulated a plan to turn their remaining Railcoaches (excluding towing Railcoaches 671 - 680) and Brush Cars to One Person Operation. However on further examination, they found that the Brush Cars could not be easily converted due to their less substantial framework. This ruled out their use in the conversion programme and they remained in their present form. (In hindsight this was probably lucky as following the OMO car's demise there would have been very few crew cars left to maintain the service). The conversion from Railcoach to OMO would require extension of the underframe and tapered ends to be fabricated. Series 2 EE Railcoach 616, which was in store following a collision with a Twin Car in 1970, was chosen as the prototype for conversion. Work on the conversion began with the removal of the distinctive pointed cab ends. The existing underframe was strengthened as was the remainder of the frame. The underframe was extended and tapered ends were created. The new tapered extension not only served as the entrance to the tram (on the left hand side of the tapered area) but also on the right hand side was a small driving cab containing the E.E Z6 controller and the braking system from its previous life as an EE Railcoach. Uniquely for the Blackpool fleet however, was the placement of the controller and brake. The controller was placed on the right hand side of the cab, with the braking systems situated so they could be operated by the left hand. This was the opposite of the layout on the other trams in the fleet. The reason for this was to give sufficient room for the collection of fares by the driver. In the passenger saloons, back to back bus seating was fitted and the bare bulb lighting that was becoming standard on refurbishments of the time was also fitted. The central entrance doorways were retained but to be used as exits only. With so many of the series 1 EE Railcoaches having been scrapped in the 1960's and ten of the twenty EE Series 2 Railcoaches having been converted for twin car operation, there was very few Railcoaches available for conversion that were in a serviceable condition that of the first 5 conversions, one was accident damaged (616), three were stored requiring an overhaul (608, 610 and 620) and one was an ex works tram (609, or works car 5). These five trams were chosen to be converted first to allow as many Railcoaches as possible to remain in service for as long as possible. From early October, the OMO trams began to find use on specials with OMO 2 being first to be used. From the 30th of October 1972 OMO 1 - 4 were introduced to the winter timetable on the Starr Gate to Fleetwood Service, OMO 5 would join them in November 1972. OMO 5 required more work to be done to it than the other trams as the underframe and body frame required more straightening and strengthening work than the others, this additional work probably aided OMO 5's survival in service and ultimately its preservation. The original livery for the OMO trams was Plum and Custard to distinguish them from the regular crew trams. Initially the OMO trams were to be called the 'Sea Spray' class but the OMO name was more commonly used (as well as the nickname 'coffins' which were used by the crews due to the shape). Following the introduction of OMO 1-5, the remaining conversions would require Series 2 Railcoaches to be withdrawn from service. 617 and 619 were withdrawn from service in 1972 and would become OMO 6 and OMO 7. OMO 6 had a distinctive shape as straightening works carried out on the original 1935 part of the underframe led to the cab ends pointing upwards slightly. Both OMO 6 and OMO 7 entered service in 1973. The next batch of Railcoaches, 612, 613 and 614 were withdrawn in 1973, becoming OMO 8, OMO 9 and OMO 10, and entering service during 1974. The OMO cars operated along-side the Brush Cars and remaining Railcoaches until there was enough OMO's to run the whole service (in approximately 1975). Soon after introduction it was realised that the Plum and Custard livery wasn't really suitable as it had started to fade quickly and all cars were repainted in a red and white livery. It is thought that the OMO's were painted a different livery from the rest of the ordinary fleet to allow passengers to distinguish between pay on entry and the normal conductor operated trams. The last remaining 'real Railcoach' 615 became OMO 11, and the experimental Railcoaches 611 and 618, became OMO 12 and 13 respectively. The last OMO (13) entered service in 1976, and the main difference between it and the rest was that it was fitted with an inverter and flourescent lighting. However, it was withdrawn and scrapped after only 8 years in service. This particular tram was unpopular with drivers due to a number of faults and problems. It was soon discovered that the OMO's could not cope with the extra length and their bodies began to droop badly at each end resulting in continual remedial work having to take place. By 1988, there were enough Centenary cars to replace them and many of the 13 cars were withdrawn upon reaching 100,000 miles travelled. Withdrawal started with 13 in 1984 followed by 2, 3, 4, 6 and 9 which were all scrapped soon after withdrawal. OMO 7 survived following withdrawal and was converted to a replica Vanguard tram which was supposed to be similar to those which operated in Blackpool in the 1920's. However, due to a number of problems with the Centenary cars, some of the OMO cars that were in the best condition had a reprieve from withdrawal, 1, 5, 8, 10, 11 and 12 remained in service after the Centenary cars entered service. Two of them however, would be withdrawn by the end of the 1980's with OMO 1 being withdrawn following a compressor fire, and an accident in the depot in 1989, and OMO 12 being withdrawn as surplus to requirements in 1988. By 1991, there was only four OMO's available for service these being 5, 8, 10 and 11. OMO 8 was withdrawn in 1992 and stored in the depot, and 5 was given an experimental invertor, however this caused problems with the electrics of this tram and the lights would not work meaning this car could not be used after dark and soon had its original equipment restored. In 1993 both cars 1 and 12 were stripped of any remaining useful parts and scrapped. By March 1993, the remaining serviceable OMO's: 5, 10 and 11 were withdrawn, with Brush cars, and the 3 ex towing car Railcoaches taking over their winter duties. Following withdrawal. 11 served as a test car for new bogies and motors for what was to become the experimental Roadliner 611 tram before moving to Carnforth for further trials. After the trials were complete, 11 returned to Blackpool where it was stripped to its shell and stored at the rear of the depot until it was scrapped in 2000. OMO's 5 and 8 remained stored, whilst 10 was sold and became a static coffee shop in a conference centre in Reading in 1996. In 2000 OMO 5, which had been stripped of its windows and doors to be reused on the Brush Cars, was transferred to Clay Cross Stores, part of Crich Tramway Museum, to await restoration. In 2005, 8 became part of the LTT fleet and has since been repainted into its original livery of plum and custard, and received windows from OMO 10 which was scrapped in 2005. OMO 8 was transferred to the LTT depot for further work to take place on the tram. It made its return to service in preservation with Blackpool Transport on 29th September 2010. OMO 8 was then returned to store requiring a major overhaul and replacement underframe. OMO 5 remains at Clay Cross awaiting restoration. OMO's 5 and 8 remained stored, whilst 10 was sold and became a static coffee shop in a conference centre in Reading in 1996. In 2000 OMO 5, which had been stripped of its windows and doors to be reused on the Brush Cars, was transferred to Clay Cross Stores, part of Crich Tramway Museum, to await restoration. In 2005, 8 became part of the LTT fleet and has since been repainted into its original livery of plum and custard, and received windows from OMO 10 which was scrapped in 2005. OMO 8 was transferred to the LTT depot for further work to take place on the tram. It made its return to service in preservation with Blackpool Transport on 29th September 2010. OMO 8 was then returned to store requiring a major overhaul and replacement underframe. OMO 5 remains at Clay Cross awaiting restoration. Finally if you’re still with me here’s this week’s Miscellaneous pics: Taylor Walker & Co was an old-established London brewery company operating from the Barley Mow Brewery in Limehouse. Around the beginning of 1938, they took delivery of seven Leylands. There were two twin-steer Beaver Six (later called Steer) an Octopus, and four Beaver TSC12A’s including this one. It was almost certainly not bodied by Leyland, as this photo was taken on 5th April 1938, three months after the chassis was delivered. It was described as an ‘Express Van’ and had moderately streamlined features. However, all of those roller shutters must have proved to be an absolute nightmare to operate once they had become well-worn through repeated use! The company had been founded in Stepney in 1730 as Salmon & Hare, being renamed in 1816. They moved to Fore Street, Limehouse in 1823 and into the Barley Mow Brewery in 1889. The company was taken over by the Cannon Brewery in 1930 and again by Ind Coope in 1959, after which the brewery was closed and demolished in the mid-1960’s. After a number of changes in ownership, the Taylor Walker name was revived around 2010 but disappeared again after acquisition by Greene King in 2015. An early Octopus ready for delivery to Aitken of Linlithgow outside Joseph Wilkinson’s body shop on McDonald Road, Edinburgh. How about this – ‘A Leyland Whale’! A most unusual Leyland Bull with a ‘cabriolet-style’ cab, hauling a whale on a raft. Haulier John Wilkinson was the brother of Joseph Wilkinson whose works is featured in the previous pic. Next time: A further two Monday evening visits to Smeatharpe, a trip to a North Yorkshire town to have a look around a specialist trade show which was the last to be held there before it moves south for 2022, and a look underground at a place that was considered to be the very centre of the British Empire.
-
Continued from above: Scorched earth The two men extricated themselves from the shattered cockpit and walked along one of the streams until they reached the Hayfield to Glossop road. A passing lorry driver stopped and picked them up and took them to a nearby pub where Lt Houpt telephoned Burtonwood to report the accident. They were then retrieved by an ambulance from Burtonwood and their injuries were then treated. These were mainly cuts & bruises but Lt Houpt did suffer a broken jaw. The undercarriage is still in the flight retracted position within the wing This undercarriage leg and wheel has been thrown clear of the aircraft on impact The split pins inside are like new Part of a fire damaged frame Continues below:
-
Continued from above: View across the bridge To the platform Peak Rail operate the line and this was once the southern terminus point of all their trains. This station is only used in the event of any operational difficulties with obtaining access to Matlock Platform 2. This station consists of a temporary wooden platform, together with a small waiting shelter. The station is located a good 10-minute walk from the main Matlock Town Centre, access to which is via the footpath alongside the riverbank or by using the A6 by-pass road a short distance from Sainsbury’s store and near to the A6 roundabout. Whether it’s simply a nostalgic journey back to a bygone age or a discovery of the sights and sounds for very first time of a steam or diesel locomotive Peak Rail allows you to experience the thrill of its preserved railway whilst travelling through the delightful Derbyshire countryside. The Midland Railway route linking Derby and Manchester across the Derbyshire Peak District must rate as one of the most spectacular lines ever to have existed in the country. Whatever the merits and claims of other lines, the railway, which carved through Derbyshire’s great limestone hills, has been described as the most scenic line in Britain. Because of the terrain, numerous tunnels and other impressive civil engineering features including the magnificent viaducts at Millers Dale and Monsal Dale had to be constructed. The railway was not conceived as a single entity by one company but was in fact the result of the ambitions of several separate companies who for their own individual reasons, built the line at different times over a period of some 20 years. Nevertheless, the eventual result of these ventures was a mainline providing a direct route between Derby and Manchester. The first section of the route between Derby and Ambergate was opened to traffic on 11th May 1840 as part of the “North Midland Railway” line to Rotherham via Chesterfield. North-westwards from Ambergate to Rowsley was constructed by a company with the lengthy title of the “Manchester, Buxton, Matlock and Midland Junction Railway” (M.B.M. & M.J.R.). June 4th, 1849 was the official opening day of the Ambergate-Rowsley section, with passenger and coal traffic commencing running on 20th August. The original scheme was to build a line from Cheadle to Ambergate with the Manchester and Birmingham Railway and the Midland Railway providing financial support as both companies expected to gain from this link. However, the L.N.W.R. having been formed by an amalgamation of various railway companies, found it had a shareholding in the M.B.M. & M.J.R., a line that it was not interested in as it would be a source of competition. Eventually in 1871 the M.B.M. & M.J.R. was absorbed into the Midland Railway system. Before this date the Midland had already constructed a line from Rowsley to Manchester, although this did not follow the route intended by the M.B.M. & M.J.R. owing to the opposition of the Duke of Devonshire to the idea of a railway through Chatsworth Park. In its efforts to gain a through route to Manchester, the Midland Railway had surveyed several possible routes to achieve this end. A line from Duffield to Rowsley was commenced but was terminated at Wirksworth. One outrageous proposal, however, was the upgrading of the Cromford and High Peak Railway to main line status which would have resulted in Derby-Manchester expresses going over gradients as steep as 1:8. The section of the Rowsley-Manchester line was commenced in September 1860. Heading north from the new Rowsley station was Haddon Hall, ancestral home of the Duke of Rutland. The Duke was unwilling to allow the railway to cross his estate on the surface, so the company was forced to go underground. Haddon Tunnel at 1058 yards is the longest between Matlock and Buxton; it is in fact a covered way being on average only 12 feet deep. A cutting would have sufficed to preserve the view from Haddon Hall, but the Duke did not want to see smoke and steam rising above his stately gardens. (We’ll be having an explore of this majestic tunnel in a future post). The Duke used Bakewell station for boarding and alighting from trains and it was therefore a far grander affair than one would expect of a small market town. His coat-of-arms was built into stonework on the platform façade. The Duke of Devonshire used Hassop station which was 2 miles from the village from which it took its name. The next station along the line towards Buxton was Longstone, later named Great Longstone, which served the occupants of nearby Thornbridge Hall. Heading farther northwards, the railway passes through the 533 yards Headstone Tunnel, and from this the line bursts spectacularly on to Monsal Dale viaduct. The structure has five spans each of 50 feet. Although resented by a few prominent people when built, it now blends perfectly well with the surrounding countryside. The station at Monsal was provided for tourists, as there are very few dwellings in the area. The down platform was cut of the stone hillside while the up platform was built on wooden piles, as the valley is so sheer at this point. Cressbrook and Litton tunnels at 471 yards and 515 yards respectively follow in quick succession. Climbing at 1 in 105, the line reached a summit east of Millers Dale before falling into the station here. Before Millers Dale station is entered, two viaducts stand. The southern-most was built when the line was opened while the northernmost was opened in 1905. Millers Dale was originally two platforms plus a bay for the Buxton branch. When the second viaduct was completed, two platforms were added making a total of five. This might seem, again, to be a very large station for what was only a small hamlet with few inhabitants, but this was because people wishing to travel to the Spa town of Buxton had to change trains at this point. Such was the practice of the Romans for building settlements on the tops of hills, that there was no other means of providing rail communications other than a branch to this important Spa town. However, in recompense the Midland provided a fine station building, which possessed a handsome façade and this, was copied by the L.N.W.R. terminus next door. From Millers Dale innumerable problems were encountered with the next section towards the junction at Peak Forest. With the River Wye occupying the valley floor, three tunnels were constructed, Chee Tor No. 1, Chee Tor No. 2 and Rusher Cutting. Such was the shortage of space at this point; the track bed was hewn into a shelf in the valley side. Moving northwards, the branch to Buxton deviates from the main line to Manchester at Millers Dale Junction. Here the smallest station in Britain was sited at Blackwell Mill Halt. This was built to provide transport for the nearby railway cottages. Only a few trains a week stopped here to enable the wives to collect their shopping from Buxton. From Peak Forest, this line enters Wye Dale and the 191 yards Pic Tor Tunnel and into Ashwood Dale. A further tunnel here exactly 100 yards long brings the line on to Ashwood Dale viaduct and into Buxton Midland Station. 1st January 1923 marked the first major change in the administration of the railways in the Peak District. From that day the railways of England were grouped into four companies. As far as the Peak District was concerned, the lion’s share went to the L.M.S. From a local point of view nothing much changed. Red carriages with gold lettering still formed the Midland expresses. On some occasions, an L.N.W.R. locomotive hauling Midland coaches could be seen, a sight unheard of before 1923 and one that would have virtually caused civil war. The amalgamation meant that competing routes could be rationalised. The two Buxton stations were placed under one stationmaster; the former L.N.W.R. platforms were numbered 1, 2 and 3, and the Midland ones relegated to 4, 5 and 6. Departures for Manchester could be arranged alternately instead of simultaneously, but the longer journey time via Millers Dale resulted in alternate departures from Buxton becoming simultaneous arrivals in Manchester. Throughout its long career, the Peak Line was used by many fast expresses including the “Peak Express”, the “Palatine” and the “Midland Pullman”, providing evidence of the significance of this railway. Impressive locomotives were frequently observed traversing its metals including Samuel Johnson’s superb 4-2-2 express engines, while in later years, Jubilees, Patriots and the occasional Royal Scot handled the heaviest passenger traffic over this steeply graded line. Before the eventual demise of the route, Britannia’s and the Blue Midland Pullman gave glory to the twilight years. Freight traffic was also of great importance throughout its history. Following the demise of the Lancashire coalfields during the inter-war years, much of the coal to power the industry of the north-west had to be transferred across the Peak District from the East Midlands. The increased volume of freight resulted in large numbers of Stanier 2-8-0’s, the large Beyer-Garratts and in later years 9F’s could be seen blasting their way up the inclines with their seemingly endless coal trains. Because of the severe gradients encountered on this line, particularly from Rowsley northwards, banking engines were often required, supplied from Rowsley engine shed, to ensure a clear flow of traffic over the main line. Except for a few short downward stretches, the line from Rowsley climbs at an average of 1 in 100 over its entire length, making life for the engine crews particularly difficult, especially in wintertime when the weather can be extremely severe. From Rowsley the line climbs almost 600 feet on its journey to Buxton. In 1962 came the publication of “The Reshaping of Britain’s Railways”, more commonly called the “Beeching Report”. The recommendations of this weighty volume included the closure of two-thirds of the unprofitable lines, to leave the remaining system to pay its way. The first implementation of the report’s proposals was to be the closure of both Buxton branches to passengers. The protests of the local inhabitants deferred these closures. The closure of the Ambergate-Chinley section began in 1954 when Dove Holes tunnel was found to be unsafe. The line was closed at night in order to carry out repairs and trains never again ran at night over this section. Freight traffic was diverted via Chesterfield before local passenger services ceased in March 1967, with the closure of the following stations: Millers Dale, Bakewell, Rowsley, Darley Dale and Matlock Bath. However, through trains from St. Pancras to Manchester continued for another year. Since that time trains still run as far as Matlock and freight trains travel along Ashwood Dale from quarries in the Peak Forest area. When in 1968 the last of the direct St. Pancras-Manchester express service was transferred away from the Peak Line and the track quickly lifted, it seemed like the days of rail access to the Peak District had gone forever. Rail enthusiasts on their own initiative got together to form the “Peak Railway Society”. After an initial meeting, membership quickly grew to over a thousand people and then later a commercial operating company “Peak Rail Operations” was formed with the aim of restoring the Peak Line for recreational and community use. The long uphill struggle then began to convince local authorities of the viability of restoring and maintaining a 20-mile railway. Shops were opened at Buxton and Matlock and members attended many fund-raising and publicity events to inform the public of the society’s aims. In 1981 the former Buxton Midland site was purchased and turned from what was derelict ground into a thriving Steam Centre. In 1986 P.R.S. and P.R.O. merged to form Peak Rail Limited to provide a more co-ordinated approach with a tighter management structure. Eventually in 1987 a special local authorities joint working party agreed to recommend to their respective constituent authorities’ acceptance of Peak Rails “Fifteen year Financial and Operating Plan”. This comprehensive document detailed the phased plan for reconstruction and operation of the railway identifying sources of finance, method reconstruction, analysis of potential business markets and the pattern of services, with due regard to environmental protection. October 1988 saw the successful launch of the first major share issue converting P.R.L. into “Peak Rail plc”. The proceeds of this issue were used to fund the rebuilding of the railway from Darley Dale to Matlock (Riverside) which opened to public services in 1992. Insufficient finance delayed further construction so the Buxton Steam Centre was closed, and parts of the land sold, which allowed building to continue northwards. A second share issue provided the funding required to reach Rowsley (South) in 1997 and allowed the redevelopment of the former Rowsley engine shed site. Following some years of consolidation Peak Rail has prospered and completed its southern objectives in 2011, when the major redevelopment of the former Cawdor Quarry in Matlock allowed the railway to extend its services into Matlock Station giving Peak Rail a town centre terminus and a cross platform link with the national rail service. However, the ambition to complete the re-opening of the railway through the Peak District National Park to Buxton remains alive. Consequently, Peak Rail is currently in discussions with various commercial interests, together with the relevant national and local authorities about the possibilities of re-opening the railway as a freight diversionary route which would allow Peak Rail to extend its services northwards. The lines rich railway history, together with the prospect of again being able to travel through magnificent scenery on a railway linking some of Derbyshire’s principal tourist centres, ensures that the desire to fully re-open the railway will never diminish. Pics in the gallery The B-24 Liberator on Kinder Scout Our next stop is a layby on the highest point of the A57 between Sheffield and Glossop. The Pennine Way crosses here and we are going to get the walking boots on and head south along the flagstones that have been laid across this wild moorland. The flagstone’s earlier lives were spent on the floor of the West Pennine mills of the Industrial Revolution. They were destined to be broken up as waste but instead were lifted, packed in crates and flown by helicopter to the Pennine Way. The large rectangular slabs of Bacup sandstone were placed rough side (underside) upwards in order to give maximum grip to walkers’ boots. Laid directly onto the ground, in effect they float on the soft peat as their size spreads the surface area loading. As far as possible they were laid in gentle curves, following natural undulations and contours, and so avoided artificially straight lines. Since the stones were recycled, they already had 150 years of weathering and didn’t have the look of newly quarried material. Some still had drilled holes that were once used as the footings of looms. The stone was originally cut from the Pennine hills and was now laid to rest in those very same hills. It has gone full circle. The mill workers looked to escape the weekday drudgery by walking in the same hills; when they finally achieved decent access people were able to walk for leisure, and some of the moorland paths became eroded. Repairs were needed. When the mills closed down the redundant stone was returned to the hills to form durable and lasting pathways. How neat is that? We are on the lookout for the remains of a B-24 Liberator that came down here nearly eighty years ago. First though we’ll have a look at the marque’s story: The Consolidated B-24 Liberator was an American heavy bomber that entered service in 1941. A highly modern aircraft for its day, it first saw combat operations with the Royal Air Force. With the American entry into World War II, production of the B-24 increased. By the end of the conflict, over 18,500 B-24s had been constructed making it the most-produced heavy bomber in history. Employed in all theatres by the US Army Air Forces and US Navy, the Liberator routinely served alongside the more rugged Boeing B-17 Flying Fortress. In addition to service as a heavy bomber, the B-24 played a critical role as a maritime patrol aircraft and aided in closing the "air gap" during the Battle of the Atlantic. The type was later evolved into the PB4Y Privateer maritime patrol aircraft. Liberators also served as long-range transports under the designation C-87 Liberator Express. Origins In 1938, the United States Army Air Corps approached Consolidated Aircraft about producing the new Boeing B-17 bomber under license as part of the "Project A" program to expand American industrial capacity. Visiting the Boeing plant in Seattle, Consolidated president Reuben Fleet assessed the B-17 and decided that a more modern aircraft could be designed using existing technology. Subsequent discussions led to the issuing of USAAC Specification C-212. Intended from the outset to be fulfilled by Consolidated's new effort, the specification called for a bomber with a higher speed and ceiling, as well as a greater range than the B-17. Responding in January 1939, the company incorporated several innovations from other projects into the final design which it designated the Model 32. Design & Development Assigning the project to chief designer Isaac M. Laddon, Consolidated created a high-wing monoplane that featured a deep fuselage with large bomb-bays and retracting bomb-bay doors. Powered by four Pratt & Whitney R1830 twin Wasp engines turning three-bladed variable-pitch propellers, the new aircraft featured long wings to improve performance at high altitude and increase payload. The high aspect ratio Davis wing employed in the design also allowed it to have a relatively high speed and extended range. This latter trait was gained due to the wings thickness which provided additional space for fuel tanks. In addition, the wings possessed other technological improvements such as laminated leading edges. Impressed with the design, the USAAC awarded Consolidated a contract to build a prototype on March 30, 1939. Dubbed the XB-24, the prototype first flew on December 29, 1939. Pleased with the prototype's performance, the USAAC moved the B-24 into production the following year. A distinctive aircraft, the B-24 featured a twin tail and rudder assembly as well as flat, slab-sided fuselage. This latter characteristic earned it the name "Flying Boxcar" with many of its crews. The B-24 was also the first American heavy bomber to utilize tricycle landing gear. Like the B-17, the B-24 possessed a wide array of defensive guns mounted in top, nose, tail, and belly turrets. Capable of carrying 8,000 lbs. of bombs, the bomb-bay was divided in two by a narrow catwalk that was universally disliked by air crews but served as the fuselage's structural keel beam. B-24 Liberator - Specifications (B-24J): General Length: 67 ft. 8 in. Wingspan: 110 ft. Height: 18 ft. Wing Area: 1,048 sq. ft. Empty Weight: 36,500 lbs. Loaded Weight: 55,000 lbs. Crew: 7-10 Performance Power Plant: 4 × Pratt & Whitney R-1830 turbo-supercharged radial engines, 1,200 hp each Combat Radius: 2,100 miles Max Speed: 290 mph Ceiling: 28,000 ft. Armament Guns: 10 × .50 in. M2 Browning machine guns Bombs: 2,700-8,000 lbs. depending on range An Evolving Airframe An anticipated aircraft, both the Royal and French Air Forces placed orders through the Anglo-French Purchasing Board before the prototype had even flown. The initial production batch of B-24As was completed in 1941, with many being sold directly to the Royal Air Force including those originally meant for France. Sent to Britain, where the bomber was dubbed "Liberator," the RAF soon found that they were unsuitable for combat over Europe as they had insufficient defensive armament and lacked self-sealing fuel tanks. Due to the aircraft's heavy payload and long range, the British converted these aircraft for use in maritime patrols and as long range transports. Learning from these issues, Consolidated improved the design and the first major American production model was the B-24C which also included improved Pratt & Whitney engines. In 1940, Consolidated again revised the aircraft and produced the B-24D. The first major variant of the Liberator, the B-24D quickly amassed orders for 2,738 aircraft. Overwhelming Consolidated's production capabilities, the company vastly expanded its San Diego, CA factory and built a new facility outside of Fort Worth, TX. At maximum production, the aircraft was built at five different plants across the United States and under license by North American (Grand Prairie, TX), Douglas (Tulsa, OK), and Ford (Willow Run, MI). The latter built a massive plant at Willow Run, MI that, at its peak (August 1944), was producing one aircraft per hour and ultimately built around half of all Liberators. Revised and improved several times throughout World War II, the final variant, the B-24M, ended production on May 31, 1945. Other Uses In addition to its use as a bomber, the B-24 airframe was also the basis for the C-87 Liberator Express cargo plane and the PB4Y Privateer maritime patrol aircraft. Though based on the B-24, the PBY4 featured a single tail fin as opposed to the distinctive twin tail arrangement. This design was later tested on the B-24N variant and engineers found that it improved handling. Though an order for 5,000 B-24Ns was placed in 1945, it was cancelled a short time later when the war ended. Due to the B-24's range and payload capabilities, it was able to perform well in the maritime role, however the C-87 proved less successful as the aircraft had difficulty landing with heavy loads. As a result, it was phased out as the C-54 Skymaster became available. Though less effective in this role, the C-87 fulfilled a vital need early in the war for transports capable of flying long distances at high altitude and saw service in many theatres including flying the Hump from India to China. All told, 18,188 B-24s of all types were built making it the most produced bomber of World War II. Operational History The Liberator first saw combat action with the RAF in 1941, however due to their unsuitability they were reassigned to RAF Coastal Command and transport duty. Improved RAF Liberator IIs, featuring self-sealing fuel tanks and powered turrets, flew the type's first bombing missions in early 1942, launching from bases in the Middle East. Though Liberators continued to fly for the RAF throughout the war, they were not employed for strategic bombing over Europe. With the US entry into World War II, the B-24 began to see extensive combat service. The first US bombing mission was a failed attack on Wake Island on June 6, 1942. Six days later, a small raid from Egypt was launched against the Ploesti oil fields in Romania. As US bomber squadrons deployed, the B-24 became the standard American heavy bomber in the Pacific Theatre due to its longer range, while a mix of B-17 and B-24 units were sent to Europe. Operating over Europe, the B-24 became one of the principal aircraft employed in the Allies' Combined Bomber Offensive against Germany. Flying as part of the Eighth Air Force in England and the Ninth and Fifteenth Air Forces in the Mediterranean, B-24’s repeatedly pounded targets across Axis-controlled Europe. On August 1, 1943, 177 B-24’s launched a famous raid against Ploesti as part of Operation Tidal Wave. Departing from bases in Africa, the B-24’s struck the oil fields from low altitude but lost 53 aircraft in the process. Battle of the Atlantic While many B-24’s were hitting targets in Europe, others were playing a key role in winning the Battle of the Atlantic. Flying initially from bases in Britain and Iceland, and later the Azores and the Caribbean, VLR (Very Long Range) Liberators played a decisive role in closing the "air gap" in the middle of the Atlantic and defeating the German U-boat threat. Utilizing radar and Leigh lights to locate the enemy, B-24’s were credited in the sinking of 93 U-boats. The aircraft also saw extensive maritime service in the Pacific where B-24’s and its derivative, the PB4Y-1, wreaked havoc on Japanese shipping. During the course of the conflict, modified B-24’s also service as electronic warfare platforms as well as flew clandestine missions for the Office of Strategic Services. Crew Issues While a workhorse of the Allied bombing effort, the B-24 was not hugely popular with American air crews who preferred the more rugged B-17. Among the issues with the B-24 was its inability to sustain heavy damage and remain aloft. The wings in particular proved vulnerable to enemy fire and if hit in critical areas could give way completely. It was not uncommon to see a B-24 falling from the sky with its wings folded upwards like a butterfly. Also, the aircraft proved highly susceptible to fires as many of the fuel tanks were mounted in the upper parts of the fuselage. In addition, crews nicknamed the B-24 the "Flying Coffin" as it possessed only one exit which was located near the tail of the aircraft. This made it difficult to impossible for the flight crew to escape a crippled B-24. It was due to these issues and the emergence of the Boeing B-29 Superfortress in 1944, that the B-24 Liberator was retired as a bomber at the end of hostilities. The PB4Y-2 Privateer, a fully navalized derivative of the B-24, remained in service with the US Navy until 1952, and with the US Coast Guard until 1958. The aircraft was also used in aerial firefighting through 2002 when a crash led to all remaining Privateers being grounded. Our particular aircraft was B-24J Liberator 42-52003 of the 310th Ferry Squadron, 27th Air Transport Group which crashed on Mill Hill after a shaky take off. We need to search this area! The aircraft was being ferried from Burtonwood to Hardwick by a two man ferry crew on the 11th October 1944. This was a brand new B24 on its delivery flight. It took three attempts to get off the ground and was damaged in the process. The two men took off from Burtonwood, near Warrington at 10:32. They set a course of 135 degrees and climbed to an indicated altitude of 2800 feet. At approximately 10:45 while in cloud and moderate to severe turbulence the pilot Lt Houpt spotted a small gap in the cloud and saw the ground was only about 150 feet below him. He then applied full power and began to climb, but before they could gain any meaningful height the aircraft struck the ground on Mill Hill some 1.5 miles from the Grouse Inn between Hayfield and Glossop. The crash site located Continues below:
-
Continued from above: Defending title holder was Steven Gilbert (542) who took his first ever Final win at Mendips with the last running of the Pink Ribbon. However, the Cornishman was not going to be taking part as he was serving a ban for misdemeanours at Taunton earlier in the month. After a busy period of race action, with the July Speedweekend’s, and championships getting redistributed it was an opportunity to ‘come home’ for the West Country superstars. Jon Palmer (24) would be looking to follow up his Heat and Final double last time out here, whilst a couple of the super quick lower graders from the previous meeting like Luke Johnson (194) and Ian England (398) would be in the dizzy heights of the star grade. As it turned out yellow was the primary colour, as each of the five races were won by drivers from the yellow grade. 24 cars competed in a two thirds format. Paul Moss (979) won Heat and Final. Luke Beeson (287) scored a brace of victories in his Heat and the GN, with Josh Weare (736), in his first appearance in the ex-Luke Wrench (560) car winning the remaining Heat. Results: Heat 1: 979, 24, 976, 667, 27, 315, 581, 935, 895 and 438. Heat 2: 736, 992, 287, 581, 979, 184, 828, 27 and 325. Heat 3: 287, 992, 315, 115, 667, 184, 935, 976, 460 and 438. Final: 979, 287, 581, 115, 315, 24, 184, 667, 935 and 460. GN: 287, 24, 935, 581, 184, 27, 762 and 194. Taunton – Monday 26th July 2021 After a stand-alone Monday night fixture at the start of the month this meeting marked a run of five consecutive Monday evening events. Whilst some of the West Country drivers found it challenging to attend a Monday evening session a decent amount of long distance travellers boosted the numbers. Jamie Jones (915) from the Potteries, and the north-west pair of Phil Mann (53) and Aaron Vaight (184) would all be clocking up the motorway miles. Jones had been a regular visitor since making his debut in 2020, whilst Mann has regularly headed to the south-west throughout his career. As for Vaight his attendance record with Autospeed has been phenomenal. However, the furthest travelled for this meeting was Ulverston’s Josh Vickers (446). In addition to the rise of Ian England (398), and Luke Johnson (194) to the star grade there were three new 2021 Superstars in attendance. Kieren Bradford (27), Jamie Avery (126) and Tommy Farrell (667). Luke Trewin (529) debuted a brand new WRC Unfortunately it was christened after just a few laps in practice with a hard hit to the fence Pre-meeting proceedings commenced with appreciation and applause for two recently departed stars of years past, 1985 British Champion Nick Lawrence (ex-561) and George Beckham (ex-621), who finished third in the 1986 World Final. The 30 car entry raced to a full format with 8 through to the Final. Heat 1: Led by Lauren Stack (928) until five to go when the speedy duo of Steven Gilbert (542) and Ben Borthwick (418) moved to the head of the field. Borthwick kept close to Gilbert through the race but not close enough for a last-bender. Result: 542, 418, 127, 828, 895, 53, 988 and 232. Heat 2: The early leader was Richard Andrews (605) who was chased down by Ryan Sheahan (325) and Justin Fisher (315). These two in turn were hunted down by Paul Rice (850) who passed both for the victory with deft use of the front bumper. Result: 850, 315, 325, 315, 184, 605, 903 and 194. Consolation: All three superstars were present in this one after suffering DNQ’s in their respective Heats. Farrell had received a black cross for starting out of position, Bradford had crashed out with Mike Rice (438), and Jon Palmer (24) had retired with mechanical trouble. Stack built up a big lead which came to nothing when caution flags flew for Luke Trewin (529) who had crashed heavily in the pit bend. Luke was not having much luck in his new WRC. Lauren fell towards the back when the green came out but still qualified for her first Final. Palmer and Bradford had an easy run into the top two places. Result: 24, 27, 398, 438, 667, 928, 320, 446, 948 and 207. Final: The 26 car race saw a race stoppage almost immediately. Mike Rice (438) crashed hard into the turn four wall practically roof first after riding over the Matt Hatch (320) car. Stack led the restart away as five cars piled up into turn three resulting in Fisher (315) and Gilbert’s race being brought to a premature end. Charlie Lobb (988) then took over the lead spot until seven to go when Palmer shifted him wide entering the pit bend and setting sail for the win. Lobb suffered diff problems and he and third placed Charlie Fisher (35) ended up being shuffled back in the closing stages as the other stars - headed by Borthwick and Matt Stoneman (127) put the pressure on. With Stoneman secure in second, Borthwick shoved third-placed Sheahan wide on the last bend, which let Bradford come through both for third. Speaking to commentator Alan McLachlan (the Cowdie man on the mic, who travels down from Scotland for the Autospeed meetings) after the race Palmer said that passing all the red tops in one move early on was key to the win, adding: “Trying to catch little Charlie Lobb, that was the hard work!” Result: 24, 127, 27, 418, 35, 828, 325, 667, 184 and 605. GN: Andrews led until past halfway before Stoneman came through for the victory. Palmer showed plenty of speed on his way to sixth from the lap handicap without the help of a stoppage. Result: 127, 35, 903, 890, 605, 24, 315, 27, 184 and 667. A few pics in the gallery for the above three meetings Let’s now head back to last week’s abandoned site near to Matlock where we’ll leave the factory site and take on the undergrowth to get to Matlock Riverside station via the overgrown works branch. Through the undergrowth to the station. This is the point where the line branched off to the works. An original British Rail cabin, formerly located at Luffenham junction. The restored cabin is mounted on a non-typical stone-block base with an internal staircase to protect the box from vandalism, required due to its isolated location. The 19-lever frame was recovered from Glendon North Junction near Kettering. Mechanical interlocking allows the signals exiting and entering the loop via the Darley Dale end to be cleared in opposing directions when the cabin is switched out via the King locking lever. Continues below:
-
Hi there folks, We start this week with a summary of three July F2 meetings, we then return to the Permanite site near Matlock to find ourselves on the ‘rails’, before finishing up at the highest point on the A57 Snake Pass road to go and find the site of a 1944 air crash. Skegness – Thurs 8th July 2021 After a year lost to Covid the UK Speedweekend got underway with the traditional Thursday night warm up event. 65 F2’s were in the pits to race before a huge crowd. Ted Holland, the 2019 Irish Champ Bumped into Les Mitchell (ex-238), the man who won three consecutive Finals at Brafield in 1971. Heat 1: Long distance traveller Mike Philip (195), from Forres on the Moray coast, made the 8hrs 30 mins journey worthwhile with a fine second place finish. He had led the way for the majority of the race until being overhauled by Jordon Thackra (324) at the end. Result: 324, 195, 419, 226, NI998, 915, 127, 359, 629, 581, 844, 5, 674 and 854. Top 14 to the Final. Heat 2: 31 cars on track for this one. Brad McKinstry (NI747) powered to a convincing win with a classic last bend hit on Dave Polley (38). Result: NI747, 38, 78, 560, 184, 606, 315, 190, 482, 210, 512, 780, 236 and 564. Consolation: Only the top 8 finishers from this one to qualify for the Final. It was a tall order in a field of 34 cars including 12 Star and Superstar drivers. Jessica Smith (390) led until 2 to go when a race stoppage allowed the pack to close up. Jonathan Hadfield (142) went on to take another win in his new car. Result: 142, 968, 647, 667, 24, 584, 595, 890, 27 and 16. Final: This was another action-packed race which saw Micky Brennan (968) with a dominant win. His form since returning has been outstanding. He led Graham Fegan (NI998) and Luke Wrench (560) over the line. Result: 968, N1998, 560, 647, 127, 24, 210, 226, 629 and 38. GN: The last race of the night went to the 560 car as he headed a WRC 1-2 with Tristan Claydon (210) following him home. Result: 560, 210, 226, 629, 780, 78, 854, 419, 184 and 976. The Saloons were a big part of the UK Championship weekend, with 62 cars present for this Thurs night meeting. Heat 1: The opener began with a rollover for Rowan Venni (370) who was racing his brother’s car for the weekend. Sam Parrin (250), Dom Davies (261) and Bradley Fox (162) were up front early on. West Country duo Ian Govier (28) and Warren Darby (677) challenged for the lead with the 677 car taking the win. Top 3 result: 677, 618 and 525. Heat 2: Jordan Cassie (697) running from the front had a good battle with Michael Allard (349). Allard’s cause was helped by a caution flag for Steve Honeyman (607) after a massive hit from Graeme Shevill (661). Allard soon took the lead on the restart with a tussle for 3rd between multiple drivers with Irishman Kieran McIvor (811) surviving a ride around the fence for the place. Result: 349, 697 and 711. The 607 car after a huge hit from 661 Steve on with the repair Consolation: An air filter fire in the Venni car brings out an early caution. Fox leads from Colin Savage (14) and Tommy Parrin (350) in his new car. The end of the race saw the sparks fly when Shevill went in with a last bend attack on Andrew Mathieson (124) for the win. Result: 661, 124 and 350. Final: The Final was run in tribute to former Skegness marshal/starter Dave Garner. It was obvious from the start that Rob Speak (318) was determined to get the trophy. Austen Freestone (341) was soon in front with Darby the first blue, along with Speak the first red to make their moves. Freestone got a lucky break through the backmarkers with Darby going through as well. A caution closed the field up though which saw Speaky make his move into the lead. However, Freestone remained close in behind and attempted a last bend hit just missing the 318 back end. Darby nipped through for second. A great race with a fine drive by the promoter. Dave’s son, Jason the Skegness starter presented Rob with the trophy. Result: 318, 677 and 341. GN: Davies led this one but couldn’t hold back Allard who was on a mission winning the race from Barry Russell (600). Result: 349, 600 and 261. Bristol - Sunday 18th July 2021: An aerial view of the quarry close to the track This little acre of the Mendips was turned a shade of pink as the meeting was raising funds for Cancer Research. It was also a day to remember one time Mendip official Lesley Maidment as the F2’s were racing in the 10th running of the Pink Ribbon Trophy. Nathan Maidment (935) borrowed the John Brereton (948) car for the meeting Continues below:
-
Continued from above: The latest pic in Trams in Trouble: A derailment for Brush Railcoach 637 at Central Pier on Sunday 21st October 1984. Sand on the line was the culprit. and in Miscellaneous: Hebble Motor Services, Halifax specified Bellhouse Hartwell ‘Landmaster’ bodies for four of their Royal Tiger PSU1/16 coaches in 1954. Their imaginative design was not unattractive but their 'Bug Eyed' nickname was predictable. One of several Hippo 20.H heavy recovery units commissioned by Leyland in the mid-1950’s for Service Depots, this one having a Lancashire trade plate from Chorley. The tanker on tow appears to have been on fire. Is this a Beaver or a different make altogether? The headboard has the name Meirion. Next time: F2 action from Skegness, Bristol (The Pink Ribbon Trophy) and Taunton. As mentioned above, the closed railway. We'll have a look at the remains of a ‘Flying Coffin’ on a wild and largely inhospitable gritstone moor.
-
Continued from above: A lot of the rail equipment was supplied by Robert Hudson’s Gildersome Foundry at Leeds. (It was spelt without the 'E' on the end in their first advertisements for some reason. The company was established in 1865, with their works, the ‘Gildersome Foundry’ situated at Gildersome, nr Morley, Leeds. Their head offices were close to the Hunslet and Holbeck area where many of the engineering firms supplying factory machinery and railway equipment were situated. The Hudson's were a wealthy family with interests in the mining industry, and supplying this industry would provide much of the work for Robert Hudson. They specialised in providing light railway equipment such as prefabricated narrow track sections and various designs of wagon. The company would also supply locomotives but these were entirely sub-contracted to other companies that specialised in locomotive production. As well as supplying complete railway systems they supplied rope haulage systems. At its peak the Gildersome Works occupied a 38 acre site with pattern making shops, a foundry with two Bessemer furnaces, machine shops, erecting shops and a drawing office. The sort of narrow gauge system they could supply was well employed in their own works. An extensive 2ft gauge system was used for moving materials around the site, the wagons being pushed along by the workers, or a road tractor for heavier loads. The works were situated alongside the Great Northern railway line, where sidings were provided for receiving raw materials and dispatching completed products. One of the most successful Hudson Products was the small tipper skip wagons made from their early days. In 1875 Hudson patented the ‘rolling triple centre pivot’ this provided three points at which the skip wagon could sit securely, in the centre for movement, and tipped over 90 degrees to either side for unloading. Many of these were made and can still be found all over the world. A key to the success of Hudson’s wagons were their roller bearings which meant they required minimal force to move them. Wagons could be pushed around by hand, or very long trains could be pulled by a small locomotive or animal. Sadly, the company ceased trading in 1984 owing to cheaper, and therefore inferior products from abroad. Back at Permanite the wagons could be moved from upper to lower levels in a lift complete with rail lines. Looking down the track to the lift The lifts were manufactured by Pickerings of Stockton-on-Tees who are still in business today. A company that has weathered the storm which has decimated British industry over the years. Pickerings Lifts is one of the oldest engineering firms in the United Kingdom, with an unbroken history of family ownership and management, now in its fifth generation. They are the UK’s leading lift specialist company, starting from humble beginnings over 160 years ago… Jonathan Pickerings first set up as a maker of pulleys, blocks and chains during the Crimean War. Keen to expand, Jonathan soon turned his hand to developing self-sustaining hoisting equipment. He showcased his revolutionary pulley-block and hoisting equipment at the Centennial International Exhibition, the first official World's Fair, in Philadelphia, USA, in 1876 (also on show were Alexander Graham Bell's telephone, and the Remington typewriter). Success led to exhibitions in Germany and Holland, achieving medals for excellence and design quality. In 1888 the first commercial electric lift was designed, manufactured and installed by Pickerings Lifts for the Middlesbrough Co-Operative Society. Pickerings Lifts also invented the self-sustaining hand lift and service lift, developing belt-power, and hydraulic lifts. In 1896, they reached another industry milestone with the invention of the first fully automatic push-button lift, a considerable feat of engineering and innovation for the time. The company carried out work of national importance during both World Wars, including the manufacture of balloon winches and field power/traction units. Later came the trench mortars and components for Bailey Bridges and floating pontoon bridges during WWII. They also installed the ammunition lifts for the long-range cross-channel guns near Dover. The Gildersome Works In 1932, Pickerings Lifts was a Founding Member of the Lift & Escalator Industry Association (LEIA), which is still going strong today. In 2008, they incorporated escalators into their portfolio becoming a comprehensive service provider for their customer’s requirements. In 2010 they were selected by US Based 4Front Engineered Solutions to be the UK’s sole distributor, bringing a wider range of products such as sectional doors, loading platforms, dock levellers, and vehicle restraints to their portfolio. Today, Pickerings Lifts is the UK’s Leading Lift Specialist, offering customers their expertise and experience to maintain, repair and modernise any lift, escalator, mobility and loading bay equipment. Moving on we come to the blender tanks. They still have a very sticky residue leaking from the discharge points. The smell of tar lingers on. These tanks were manufactured by another surviving success story – Phoenix Engineering of Chard, Somerset. The First Phoenix: The story of The Phoenix Engineering Co. Ltd. starts back in 1839, when the Smith Brothers’ Phoenix Iron Foundry started trading. 45 years later Edward Rusk, a London financier, acquired the freehold to the foundry and in November 1891 he set up the Phoenix Engineering Company Limited in order to buy the Phoenix Iron Foundry. Rusk was the majority shareholder and the rest of the capital was owned by some London-based engineers, Roger Bolger Pownall, Charles Harris, and Thomas John Jennings, who was the company secretary. Phoenix Engineering Company Limited continued to manufacture the same product lines as the Smith Brothers had, as well as pumps for the Pulsometer Engineering Company. Thomas Jennings had worked for Pulsometer and the pumps he now produced were to be sold under the Pulsometer brand name. A New Phoenix Rises: Between 1891 and 1904 Phoenix made an annual profit only twice so in 1905 it was decided that a radical re-organisation was necessary. Thus a new company was incorporated by the directors to buy the Phoenix Engineering Company Limited, and to acquire the freehold of the Phoenix Iron Foundry from the estate of Edward Rusk, who had died in the February of that year. The shareholders in the old company were issued shares in new company, The Phoenix Engineering Co. Ltd., on a one-to-one basis, thus giving Edward Rusk’s executors control. In 1906 the new Phoenix made an annual profit of £269/8/8 on a turnover of £4538/16/8 and product lines were expanded to include bitumen heaters and sprayers sold under the Rapid trade mark. Then, in 1909, Phoenix signed an agreement with Llewellin and James of Bristol, one of their biggest competitors at the time, to become the sole supplier of all their tar boilers and the two companies agreed to sell their boilers at the same price. Early road builders Expansion and Exports: During WWI Phoenix increased their manufacturing operations to include agricultural machinery and after the war found a good market for bitumen equipment and pumps in the British Empire. This was the beginning of their strong export figures. Along with countless other companies, Phoenix was badly hit during the recession, as public spending on roads was drastically cut, but with the advent of WWII there was an increased demand for their products. In fact, demand was so great that the War Department ‘gave’ them a subcontractor in Glasgow for the production of bitumen boilers. Phoenix then streamlined their product lines, mainly producing bitumen equipment, pumps, and temporarily, field kitchens. Ground Breaking Design: In the early 60’s the original foundry was closed and the manufacture of pumps ceased. John Pownall developed the self-propelled chipping spreader, and spreaders based on his design, plus bitumen heaters and sprayers which now accounted for the vast majority of the company’s sales. During the 70’s Phoenix concentrating on increasing their sales overseas and in 1977, at the height of the oil boom in the Middle East and Africa, won the Queen’s Award to Industry in recognition of their achievements in the export markets. Phoenix Continues to Flourish: In 1997 they again won the Queen’s Award to Industry for Export Achievements, and exports over recent years averaged at 65% of total sales. They have exported Chard-built equipment to many countries, including Vietnam, Laos, the West Indies, Nepal, Mongolia, Japan, as well as Western Europe, Africa, the Middle East and the Far East. Phoenix continues to go from strength to strength as it nears its 122nd birthday and is still run by descendants of the original founding families. The bitumen mix is heated up using Clarmac Heaters Back in 2002 this article appeared in the Scottish newspaper, the Herald: Hard work and perseverance pull Clarmac back from brink. Engineering firm saved from receivers by buy-out: In a sprawling industrial yard in the east end of Glasgow, an unusually loyal band of engineers laboured through the winter without pay, giving up their own time in an act of faith that a new owner could rescue their old firm from the clutches of the receiver. The team, who had all been made redundant from Clarmac Engineering when the parent firm called in the receivers, pinned their hopes on three men with a vision of buying back the business and relaunching it as an independent company. Allan Kincaid led the trio of directors, which also included Malcolm Stewart and Eric Welsh, in a bid to buy the 74-year-old business from the receiver, which was called in last November. Last weekend the Clarmac team lifted three massive bitumen storage tanks onto lorries for delivery to clients in the quarrying industry, marking the first big order for the reborn business. The journey from receivership to start-up was fraught with difficulties, says Kincaid. He attributed the successful start-up to perseverance, the loyal support of the old workforce, financial backing from the Royal Bank, and sound advice from Business Ventures (a group within Scottish Enterprise Glasgow dedicated to helping start-ups). Back in November, Kincaid and his fellow directors were so convinced the business had a future they pledged their redundancy money to back a management buy-out, but that would only provide a percentage of the required capital and a bank loan was vital. Kincaid was negotiating to move the business from Dennistoun to 16,000 sq ft premises in Carntyne before the receivers moved in, and he decided to continue with the plan. He had enlisted the help of Scottish Enterprise Glasgow to find the new site and was encouraged by them to formulate a buy-out plan. ''Once we'd decided to buy the business we were introduced to Andrew Brocklehurst from Business Ventures and he was a tremendous help in steering us through the preparation of the business plan, and over the financial and legal hurdles. I think it's fair to say that without the assistance we got from Andrew we would not have a business today,'' Kincaid said. The Royal Bank liked the buy-out idea but issued an ultimatum to Kincaid: deliver proof of orders within 48 hours or the funding deal was off. Kincaid and his team called customers all over the UK, from quarries to oil companies, who are the main customers for the thermally-insulated steel tanks used to store and transport bitumen at 200 degrees Celsius. ''We got 30 or 40 positive responses and submitted the first 20 to Paul McGuinness at the Royal Bank and the underwriters decided to back the project'', Kincaid said. He also obtained letters from suppliers, pledging their willingness to deal with Clarmac under new ownership, and in early January Kincaid's team paid for the assets of the company. No-one was more relieved than the seven redundant engineers, and a PA whose hopes of future employment were riding on Kincaid's plan. ''There were times when we could have walked away because there were just so many obstacles, but Andrew Brocklehurst used to tell us we had to jump a different fence each day,'' he said. Kincaid expects turnover to reach £1.2m in the first year and he hopes in future to invest in new machinery to allow Clarmac to diversify into other markets which require bulk storage, such as the food industry. He has already begun collaborating with Paisley University on new product development. However,i can't find much info on the company today so can only assume it has ceased trading. The tank heating controls are supplied by Sunvic: Sunvic is proud of its British heritage. For over 70 years they have manufactured central heating products from their UK base in Lanarkshire, Scotland. Sunvic Controls Limited have continued to expand its range of products. Their location and structure allows them to service clients across the UK and the rest of the world. Sunvic's market leading products are developed by a team of highly qualified engineers experienced in mechanical, electrical and electronic design and use leading edge technology to meet progressive new product requirements. That's some pedigree. Coming to the far side of the site we find a loading bay. In the roof is a halogen heater which unbelievably still works! Close to here is a gas oil tank with another two Coloquix works applied to the sides. This area was used to store the finished product before dispatch The same scene in its heyday. Note the Foden tanker. That is about it for the main parts of interest here. There are other buildings and store rooms on the site but most are now empty. If you do plan a look around be aware there are some big holes and tanks to fall into. The tall building has plenty of opportunities to lose your footing and plummet to ground level. Plenty of pics in the gallery. As a bonus it’s possible to bushwhack through the undergrowth and get onto a closed railway line. We’ll have a look at that next time. Continues below:
-
Continued from above: On the very upper floor the hoppers are open-topped. If you slipped into one of these there’s no getting out! They go a long way down. A screw conveyor left behind There are also some big open drops down the stairwell which would be a game over moment. There is a walkway outside to some big external hoppers which is also unfenced. There is a lot of graffiti throughout the site, including some fine works of art by Coloquix A number of abandoned places in Derbyshire feature paintings by the Sheffield based artist. Back at ground level a passage connects to the building containing the unprocessed bitumen vats. It was here that I heard the sound of an approaching gang. It crossed my mind that this is where the camera gets nicked. Sure enough they soon spotted me and strolled over. “Who are you, where are you from, and what are you doing?” the designated head of the group asked. I said,” Taking pictures of the graffiti” It was a lucky answer as from that moment their hostility evaporated. One of the lads was a graffiti artist and had a holdall with him which contained spray paint and charcoal pencils for creating fresh art work. They regularly added to the stuff already there so were very eager to explain the meaning of most of it. They turned out to be a great bunch of lads, and to top it off did a personalised one for me. It just goes to show you can’t judge people on first impressions. No doubt if i’d told them to do one i’d have probably been chucked in the lime hopper though. Throughout the buildings there are rails remaining from the narrow gauge internal network used to move the wagon loads of limestone powder, silica and sand around. There are even points and small turntables. Continues below:
-
Continued from above: The aerial view below shows the location of the works arrowed at top left, with the quarry bottom right. The railway network connected with the two sites is shown in yellow. A spur was taken from the Millers Dale to Ambergate line which runs parallel to the A6. Only a tantalising glimpse of sleepers amongst the undergrowth is all that remains of the railway. Getting into the site was easy, no high fences to climb or security providing you don’t try it from the Sainsbury’s side of the site as there are operational cameras. It’s a great place to spend a few hours with loads to see. However, being close to Matlock it does attract its share of youths, and characters under the influence of various substances. We’ll meet some later! Let’s get inside and see what we can find. Pics in the gallery follow this walk through in order. The first building we come across is between the old quarry and the main site and was used as a mixing shed. Looking like it should be in the 'Texas Chainsaw Massacre' The inside view As we pass through the entrance gates an old weigh bridge is still in situ. A number of high floodlights are still standing here. Moving further in to the site the main buildings come into view. As it is now and from an earlier time Passing these first two buildings we come to the ‘big shed’ where the moulds were allowed to cool. The roof fans were eerily still circulating. Next to this is a multi-storey red brick building which contains the hoppers for the limestone. There’s lots of powdered limestone still about in here. The Middle Peak Quarry was the main supplier of this. Looking up to the mechanism for the tall hoppers Continues below:
-
Continued from above: Cowdenbeath - Sunday 27th June 2021: Just before the railway bridge in Cowdenbeath town centre a local artist has painted her latest fantastic mural on a gable end. I stopped for a chat and she told me that the best thing about it is the fact that nobody has added graffiti to them as they are respected symbols of the town. This was the third mural she had done following on from ‘Miner Boy’ and ‘Shopkeeper’s Daughter’ Miner Boy Shopkeeper's Daughter Detail h/with from the local paper: The finishing touches have been made and the paint is dry on the latest giant public artwork to be unveiled in Cowdenbeath. Respected Fife artist, Kerry Wilson, has completed her third mural in the town, which now takes up the entire gable end of a building in High Street. Shoppers have stopped to stare while traffic has been brought to a standstill as people admire the 30-foot image, commissioned by Cowdenbeath Community Council. Details of what the picture would be was a closely guarded secret as Kerry set about creating her latest masterpiece. And with the scaffolding finally down, locals have been stopping to wonder at the latest addition to the burgeoning public art collection Cowdenbeath is now being recognised for. This time, Kerry has created stunning image of a young boy laying down playing with a ministox car and breakdown vehicle of the type seen at the Racewall in the town. She admitted it has been her most challenging work to date. "By deciding to have the image fading out of focus the further back it goes I’ve certainly not made it easy for myself,” Kerry said. “But i push myself and never shy away from a challenge.” Despite her talent, it was far from easy for the Kirkcaldy-based artist, who has faced a number of delays. As well as having to dodge heavy rainstorms, work was also halted after the discovery of a bee hive within the chimney stack. “The rain meant I had to chalk out the design on the side of the building after it was washed off,” Kerry said. “And the bees couldn’t be moved as they were protected as they had been there for many years.” The council had been trying hard for five years to attract more people into the town centre and increase footfall and the artwork was a focal point of that. “And it’s just great to know that people in the town are as pleased and proud of the art as we are.” a spokesperson said. Local councillor Darren Watt said he was “amazed” by the result after watching as the artwork come to life over the weeks. He added: “Like other local residents, I am delighted to see the latest mural unveiled in the town centre. This is an exceptional addition and praise must once again go to the artist, Kerry Wilson. It’s a real asset to have incredible artwork throughout our town and High Street." “Hopefully this helps give visitors another reason to stop by and experience what Cowdenbeath has to offer.” A unique occasion awaited at the Racewall where both the F2, and Saloon Scottish Championships were being held on the same day. It was the 40th running of the Championship for the F2’s, and very much part of the history of GMP Scotland since that very first season back in 1981. Over the years the race had been won by many of the greats in the sport including Bill Batten, George MacMillan, Garry Hooper, Ali King and Rob Speak. It was a sunny and warm afternoon and the fans had flocked to this meeting. There were lots of cars in the pits with the majority of long-distance travellers stopping off on their way back home from Crimond. Martin Ford (4) the previous evening’s winner was absent as were a few of the Crimond drivers although Ryan Farquhar (419), Colin Stewart (191) and Jason McDonald (387) had made their way down. A full format for the F2’s once again. Heat 1: An exciting finish to this race. Gordon Moodie (7) had got ahead of Paul Reid (17) entering the pit bend on the last lap but Reid got the better drive out and went through to win. Result: 17, 7, 647, 674, 78, 86, 280, 387, 915 and 182. Heat 2: Craig Wallace (16) claimed the victory, and as in the previous race it was on the last lap that he got the lead. Result: 16, 652, 629, 144, 618, 236, 512, 402, 419 and 391. Consolation: After an early race stoppage Dean McGill (263) led until three to go when Liam Rennie (3) swept past for the win. Result: 3, 263, 419, 391, 251, 182, 237, 881 and 444. Final: The cars lined up for the Scottish in a drawn within grades grid. Jack White (182) led the field away but shortly after the start Jess Ward (86) was cannoned around the top bend. On the pit bend Peter Watt (280) and McGill tangled with the 263 pinned against the wall. The yellows flags flew. McGill’s bumper needed removing before they could disentangle the cars. At the restart Ward was hit entering the pit bend and ended up losing a wheel against the fence. Caution period number two. White led the single file train away as Moodie pulled off with a flat. Within a few laps Stephen Forster (652) took the lead. At halfway Rennie was slowly closing in second, with Chris Burgoyne (647) a couple of car lengths further back. With six laps to go 647 moved into second and began making rapid inroads to the leader passing him for the lead and the win with two left to run. Rennie pipped Forster over the line for second. Result: 647, 3, 652, 674, 16, 387, 78, 618, 236 and 144. GN: Paul Reid took the win from Moodie and Rennie. Result: 17, 7, 3, 674, 647, 629, 402, 144, 16 and 618. Saloons: The 25 cars were reduced by one after practice with the 640 car blowing an engine. An all-in format was employed with each driver racing twice. Heat 1: Logan Bruce (601) made a good start but within two laps the flags flew for a rolled Willie Mitchell (96) after he caught a marker tyre. Both Graeme Shevill (661) and Steve Honeyman (607) came to grief in a back straight jostling match. Just after half-distance Stuart Shevill Jnr (618) was leading when Eck Cunningham (45) was stopped on the entry to the home straight being collected by Cameron Milne (60). Within a couple of laps of the restart Kyle Irvine (85) sent 618 wide and swept past for the win. Shevill slowed and stopped. Top 3: 85, 73 and 684. Heat 2: An easier race for 618 this time as he took the win from James Letford (73) with a forceful move with three to go. Result: 618, 73 and 85. Final: Irvine and Letford occupied the front row, while behind were Ian McLaughlin (684) and Shevill Jnr. Irvine took the lead at the drop of the green as a considerable amount of bumper-work saw Holly Glen (8) left on the football pitch within a lap of the start. The race was halted to help Holly out of her car. Irvine made a good restart but had Barry Russell (600) making a robust bid to either take him out, or take the lead. As he did so it delayed defending double champion McLaughlin and Shevill moved in to second. Russell clipped the wall and retired. The front two cars extended their gap as the rest were exchanging positions. Just after halfway Honeyman switched to all-out attack mode on Graeme Shevill entering the turnstile bend which ended up with both parked up nose to nose on the pit bend run off. Shevill and Honeyman nose to nose With the laps winding down Irvine pulled away from 618 to take the victory. Result: 85, 618, 5, 684, 661, 670, 122, 229, 73 and 96. Pics in the gallery Okay folks, we head for Derbyshire now to have a look around the abandoned Permanite works. Opening in the 1960’s Permanite Asphalt, located just outside Matlock, was originally part of the larger Cawdor Quarry complex. It was incorporated in 1989 and manufactured various asphalt products, mainly flooring blocks used to waterproof floors, as well as roofing sheets. The process involved the mixing of aggregate, bitumen, sand and limestone. The plant took powdered limestone from several of the local quarries and mixed it with hot bitumen emulsion that was brought down from the refineries of Ellesmere port, this being a bi-product of the fuel oil-refining process. It would all be mixed at 200 C for about 5 hours. The mixed tar and limestone solution was poured into metal moulds on the floor of the big shed and allowed to solidify. It was done by hand and was heavy and gruelling work at 25 kilos per full bucket. The work paid well, around three times more than the average wage at the time. The back-breaking process of manually separating and stacking the cooled blocks followed. During the late 80's part of the process was mechanised when Permanite spent a lot of money on a shiny new plant but this kept breaking down. The site was regulated by the local Derbyshire Dales District Council on the condition that the heating of tar or bitumen was regulated under section 6.3 of the Environmental Permitting Regulations. In 2009, Permanite Asphalt relocated 7 miles away to Grangemill, becoming known as Ruberoid, which is part of the IKO Group. The company was dissolved in September 2016. It's likely this site is not going to last much longer, the locals have pretty much lost the war against housing developers and apart from a small victory over some adjacent fields it's all earmarked for houses. In 2018, developers Groveholt Ltd submitted plans for 586 houses in total for the ‘Matlock Spa’ development - with 468 of the homes to be built on the brownfield sites of Cawdor quarry, and the former Permanite works. As of 2021, these plans had yet to get off the ground, and the site remains derelict. Continues below:
-
Hi there folks, We start with a racing trip to Scotland, and then onto Derbyshire for some industrial abandonment. We finish off with the latest pics in the ‘Trams in Trouble’, and ‘Miscellaneous’ series. Lochgelly – Friday 25th June 2021: Considerable investment has been made to the facilities The Superstox were in action, and a welcome visiting driver was Gary Chisholm in what was his first outing at the track. The Superstox had provided some competitive racing in 2021 already, with a number of lower graded drivers stepping up and stealing the plaudits from those further back. Bryan Forrest had been in super form though, and scooped a hat-trick of race wins at the last outing just a couple of weeks previously. Dean Johnston seemed to be getting his new car up to pace, and put in his best performance of the season last time out - could he get more out of it on Friday night? The answer was a resounding ‘yes’. The Johnston (446) transporter Top 3’s: Heat 1: Bryan Forrest (309), Mark Brady (171) and Dean Johnston (446). Chissy was a non-starter owing to engine trouble. Heat 2: 446, Jack Turbitt (217) and Kenny McKenzie (453). Chissy in 9th. Final: Lee Livingston (55), 446 and 453. Chissy in 8th. Crimond - Saturday 26th June 2021: For those that live close to the raceway it was a case of, “Fit like a foo are ye dein”, or, "Hello and welcome", for everyone else to the F2 Challenge Trophy, and WCQR meeting. This was only the second ever Championship event for the class to be held at Brisca’s most northerly outpost. With intervention by Autospeed’s Crispen Rosevear, and the assistance of fellow Scottish F2 promoters GMP the track was able to swap its traditional Sunday race day to Saturday evening. Any long-distance travellers would be able to travel home on Sunday after the F2 Scottish Championship, and WCQR at Cowdie. Long-time retired racer Graham Kelly (721) had wished to return to racing in 2020 to celebrate Crimond’s 50th year but their season was postponed completely. He had been waiting patiently to make his official return and was ready to go. This was going to be the biggest ever field of F2’s to attend Crimond Raceway with 35 cars booked in. There were quite a few visitors, the furthest being Jamie Spence (903) who had travelled 600 miles from Basingstoke, followed by a trio of East Anglians - Henry King (78), Jess Ward (86) and Craig Driscoll (251). From the north of England came Martin Ford (4), Andy Ford (13), Jack White (182), Mark Taylor (444), Ben Lockwood (618) and Jamie Jones (915). Furthest-travelled Scot was Euan Millar (629) from Lockerbie. He still had a 4 hr run. There were a few last minute cancellations but a good turnout of 31 cars raced in a full format meeting. Practice saw Paul Reid (17) almost roll it after hitting a marker tyre, and Mike Philip’s (195) engine let go. Heat 1: Mark Taylor (444) made an early break but swiftly lost out to Scott Paterson (779) who held the lead for a number of laps before he was passed by Stevie Forster (652). The 652 car claimed the victory from Liam Rennie (3), and Gordon Moodie (7). Result: 652, 3, 7, 78, 854, 419, 915, 674, 86 and 444. Heat 2: Graham Kelly and Andy Ford both spun at the start and lost time. Colin Stewart (191) took the lead at the halfway point to win from Jack White (182), and a fast closing Craig Wallace (16). Result: 191, 182, 16, 387, 4, 629, 618, 251, 647 and 480. Consolation: Jamie Spence’s long journey north was rewarded by a fine first ever F2 victory in this one by a big gap back to Philip and Kelly. Result: 903, 195, 721, 236, 512, 17, 779, 13, 343 and 922. Final: The grid was drawn in grade order and saw White take an early lead. At the rear of the field Moodie and Robbie Dawson (854) started the latest instalment of their long-running feud. Jason Blacklock (512) was stuck at the pit bend bringing out the yellows. Dawson managed to disentangle his car from the tyre wall and lined up for the restart. Robbie attempts to break free as his sister Laura (F2 - 54) in the grey bobble hat to the right of his wing looks on As soon as the green flag dropped he clashed again with 7 who retired from the race. White was still leading ahead of Martin Ford with Jason McDonald (387) heading the red top chase. Ryan Farquhar (419) spun but carried on, then a four car pile-up in the town bend brought out the caution. Ford was the new leader at the restart and eased away from the field to a jubilant victory. Action followed behind with Chris Burgoyne (647) and Kelly losing ground with the 721 car sustaining rear end damage. Result: 4, 387, 16, 629, 3, 78, 480, 647, 619 and 419. GN: A dramatic collision between Philip and Garry Sime (480) ended up with the 195 going airborne over the 480 car whose wing got written off in the process. Wallace took the victory ahead of Stewart and Dawson. Result: 16, 191, 854, 629, 618, 419, 387, 236, 86 and 182. Pics in the gallery Continues below:
-
Continued from above: Finally, here’s the first in a series of Trams in Trouble pics: English Electric Series II Railcoach 612 at Alexander Road tram stop on Tuesday 20 June 1972. 612 was taken out of passenger service following the accident. In March 1973, the bodywork was scrapped down to the basic wooden frame. This was carried out either in Blundell Street tram depot or Rigby Road tram depot. The tram later became OMO car 8. (Pic credit to the Evening Gazette) Also the first pics in a new Miscellaneous series: What would normally be called a ‘tilt test’, Leyland Motors always used to describe as the ‘gravity test’. The piece of equipment used was frequently moved around the factory, but here we see it in the Body Shop of South Works, near to the Paint Shop. The method of carrying out the test looks quite simple and presumably the frame was safely anchored to the floor along the ‘hinge’. One wonders if they ever had any mishaps, potentially very expensive mistakes! At least, this body had a metal framework. It is one of the later ‘Vee-front’ all-metal Leyland Highbridge bodies. The bus was destined for Kippax & District Motor Co, Garforth, West Yorkshire. It was a Titan TD4 and was photographed on 3rd September 1935. The oval enamelled plate on the back is numbered 5230B, being the PSV licence number, the ‘B’ denoting the Yorkshire traffic area. A Leyland TB10 demonstrator trolley bus covered some 1,300 miles on test around Chesterfield. It was a three-axle double deck vehicle, with front and rear entrances, with a seating capacity of 63. Back next week with the Scottish reports, and industrial dereliction.
-
Continued from above: AEC Routemaster – CUV 213C (RM2213). New in May 1965 and remained in active service until 1994 when it was transferred to the reserve fleet at Hatfield. Left here in 1998 and was sold to KD Coach Hire of Dyserth, North Wales. Bought by her current owner in 2019 after being owned by preservationists in Scotland, Southampton and Peterborough. Alongside is Leyland National – JTU 588T (SNG588). New to Crosville in May 1979 and operated as part of the Wales & South Cambrian fleet. Sold to Glasgow Airport and converted to double door. Later, it was sold again as a training bus and then finally a café before rescue by a preservationist in Scotland. The Gardner sounded superb reverberating off the walls in Chester Former Alder Valley Leyland National – KPA 369P. Alder Valley was formed on 1st January 1972 when the National Bus Company (NBC) merged two subsidiaries, Aldershot and District (A&D,) and Thames Valley Traction (TVT) RFM 641 - 1953 Guy Arab IV, Massey 56-seat double deck originally Chester City Transport No 1. The RE looking magnificent at dusk A rear view of RM765 and BL88 and from the front. The soft glow of the Routemaster’s interior lights add to the atmosphere. Continues below:
-
Continued from above: The third leg was a tour through the Illuminations, followed by a recreation of the final passenger journey of the traditional tramway on 6th November 2011, using modified Balloon 707 (which operated that final journey). The modified 707 707 pre-modification Technical Information: Built: 1933 - 35 as Balloon originally (rebuilt as millennium car 1998 - 2004) Builder: English Electric, Preston Capacity: 84 - 94 seated (varies per fleet member) Numbered: 707, 709, 718, 724 Trucks: EE equal wheel bogies, 4ft 9 inch wheelbase Motors: EE 305 HP 57 x 2 Controllers: EE Z6 Top Speed: approx 35 mph Braking: Westinghouse air wheel, rheostatic 8 notches, hand- wheel Current Collector: Pantograph Current Operation: part of B fleet, can be used on normal service if needed In 1993 Balloon 707 was withdrawn in need of a major overhaul. At first it was assumed that 707 would receive a similar style of overhaul to the other Balloons being overhauled around that time. After a couple of years in store awaiting its turn in the queue, work commenced on 707 and the tram returned to service in 1998. The refurbishment featured enlarged drivers cabs with flat fronted ends with rounded edges giving the tram the appearance of a double decked railcoach/twin-car, and high visibility headlights. The addition of the high visibility headlights allow clear visibility in the poorly lit northern section of the tramway at night, allowing the tram to be allocated to the evening Fleetwood services. Internally, the tram car has central heating and bus style seats featuring the traditional moquette. The car re-emerged repainted with the Millennium style green, cream and black livery. Initially the upper end corner windows were omitted, however these were retrofitted at a later date, giving improved all round view for the passengers. Opinions of the rebuilding of 707 were mixed at the time that the tram re-entered service. Some enthusiasts saw the refurbishment as vandalism of a popular class of tram. However, over the course of time, the Millennium trams settled down and provided reliable service following a few initial teething troubles (which was to be expected really). 707 did not have opening cab windows originally and had air conditioning units in the driver's cab. For a few months after entering service, a fitter could be seen at Manchester Square with a watering can to top up the water in the air conditioning unit!!!!, needless to say, an opening cab window was installed soon after. During 2010 and 2011, the tram received modifications with the fitting of pods and power operated sliding doors. The promenade was very busy with standing traffic on both sides of the road. It was like the middle of the summer season. The council’s decision to keep the Illuminations on until Jan has certainly paid off and is to be repeated in 2022. It was quite surreal to see the amount of people around at this usually deserted time of year. We managed to get through the Starr Gate depot on the access loop this time which was a bonus for folks who had missed the earlier leg. Back to Rigby Road depot at the end of the day shows a varied line up HMS Blackpool F736 required a depot shunting manoeuvre before heading out for an Illuminations tour. The pantograph lights up the area with a flash from the overhead. Some pics now from the New Year’s Day Chester and Wrexham Running Day: It was a chance to go back in time to the glory days of bus travel whether on a Crosville bus remembering the good old days of the area, or on a London bus imagining you’re travelling down Regent Street. Two routes were on offer both starting from the Wrexham Road Park & Ride. One went into Chester and the other to Wrexham. Bristol LH – OJD 93R (BL88). New to London Transport in April 1977. Allocated to various garages including Hounslow, Kingston and Croydon. Passed to OK Motor Services in 1981 where it remained until 1997. Rescued from North East Bus Breakers for preservation. Goes like a rocket too!! Bristol RE – UFM 52F (ERG52). New to Crosville’s Liverpool Edge Lane depot in 1968, later passing to Rock Ferry depot. Spent most of its time on various excursions into North Wales. Moved to Caernarfon depot in 1972 for use on the famous ‘Cymru Coastliner’ service linking Caernarfon and Chester along the North Wales coast. Bristol Lodekka – 4227FM (DFG157). New to Crosville in 1964, and based at Wrexham depot. Operated service D1 between Llangollen, Wrexham and Chester. This bus worked the very route back in the day that it was on at this event! Withdrawn in 1981. AEC Routemaster – WLT 765 (RM765). New to London Transport in April 1961 to their Edmonton garage. Like all RM’s, during its working life it paid regular visits to the LT Overhaul Works at Aldenham. Its first overhaul was in 1965, followed by others in 1968, 1972, 1975, 1977 and 1980. It saw service at Stamford Hill, Catford, Holloway and South Croydon garages before withdrawal in 1998. Continues below:
-
Continued from above: I’m a member of the Fylde Tramway Society and earlier this week we arranged a tour consisting of three legs. A few pics of the day follow: The first leg was in recognition of the 60th anniversary of the closure of the former tram routes on Lytham Road and Station Road. A former Blackpool Corporation Transport vehicle (334) was used for this. No. 334 is a typical example of Blackpool’s 64 strong fleet of East Lancashire bodied Leyland Atlanteans acquired between 1977 and 1984. No. 334 itself arrived in June 1980, replacing 12 year old PD3’s such as 529. It entered service the following month in an attractive livery of off-white with green roof, upper deck window surrounds, narrow band above lower deck windows and broad band on lower deck panels. It retained this style until June 1988 when it was painted into the post-deregulation scheme of cream with green roof, window surrounds and skirt. Another repaint followed in January 1991, and a further in June 1994 by which time the style had been revised to feature matt black window surrounds. Atlantean withdrawals began in 1989 and by 1994, Nos. 301-321 had been sold, although three (Nos. 310/335/342 were sold for scrap after fire damage). Blackpool then purchased neighbouring Fylde Transport and the new subsidiary included many vehicles much older than the Blackpool Atlanteans. Replacement of these took priority and it was to be 2002 before any more of the East Lancs Atlanteans were sold. Several were used by Fylde before it was subsumed into the Blackpool operation in June 1996. No. 334 had a brief period of storage during May and June 1995 but was repainted in the revised livery (cream, green skirt and roof level stripe, black window surrounds). It was transferred to Fylde in April 1996 but did not receive the blue livery as this was shortly to be abandoned. It continued to run from Squires Gate depot in the main until it closed in April 1999. Whilst at both Rigby Road and Squires Gate it saw a mixture of all day services and school contracts. No. 334 was one of five Atlanteans stored in November 2002, but brought back into use in January 2003 as more buses were needed for a tramway replacement service. The delivery of nine Dennis Tridents in May 2003 brought 334’s career to an end. Its last day was 29 May 2003 when it ran on service 20 (Town Centre to Marton Mere Leisure Park). In June 2003 it was acquired by member Graham Oliver for preservation as part of the LTT collection and passed into Trust ownership in 2005. Extensive restoration work started in May 2006 involving a complete repanelling and a full repaint was completed in August 2007. The bus had recently had the radiator replaced, the brakes fully overhauled and other work undertaken prior to being submitted for a Class VI MOT at Preston. The route taken followed the tram routes from 1961, and made photo stops at strategic places along the way. On Lytham Road with service 12 relevant to the original bus route along here The same location in the opposite direction in the early days Now displaying route 26 parked in Station Road with South Pier in the background The same location pre 1961 The second leg was a 2 ½ trip on Balloon tram 700 traversing some unusual crossover moves throughout the promenade system. It may seem geeksvillle to non-transport folks but these were some seriously one off moves. There was some concern that a few of the track points would be difficult to operate owing to their limited use, and the amount of sand and sea water that had covered the prom during the last two storms. In the end all was well though such was the robustness of their original construction. Highlights were a reverse crossover at the Tower, a north end reverse crossover at Bispham centre track, a Thornton Gate centre track reverse, a Cleveleys reverse crossover, and turn rounds on the loops at Little Bispham and the Pleasure Beach. A run through the access loop at Starr Gate Depot Compound was foiled by a light rail Flexity parked on the loop. The tram now identified as 700 started off life as 226 when it was the prototype open top Luxury Dreadnought entering service in February 1934. It was soon renumbered 237 when its original number was taken by the production series Open Boat cars and continued to operate in its open top condition until it became the last of the trams to be enclosed in June 1942. Remaining as part of the operational fleet practically ever since 700 – as it was renumbered in 1968 – was chosen for an overhaul in the 1990’s which although using some modern features such as halogen headlights saw the tram receive double indicator blinds again along with original style interior. It was finished in the popular Wartime Green and Cream livery and also received original numbers over the centre entrances. It also initially ran with a trolley once again but this was fairly shortlived with a pantograph returned for operational reasons. Despite its overhaul to this standard 700 was one of the Balloons Cars selected for modernisation to be used on the upgraded tramway and today carries the widened centre entrances. 700 looking resplendent outside Rigby Road depot Now outside Starr Gate depot and finally at Fleetwood alongside the old lighthouse A 1970’s shot of 700 in North Albert Street, Fleetwood Continues below:
-
Hi there folks, Before we head up to Scotland in next week’s post there was an F2 Qualifier at Taunton on the Monday (21st June) prior to have a look at. A terrific turnout of 55 cars on a week night contested this QR. The F2’s lived up to their reputation of providing top-drawer entertainment at this track. It was quite simply brilliant, and the meeting of the year for me. The majority of drivers who raced at St. Day the previous afternoon were in attendance along with a batch of extra additions. That impressive batch included some of the biggest names in Brisca F2, such as multi champion Dave Polley (38), who was making his first appearance since July 2020, former double World Champion Micky Brennan (968), whose last visit was in September 2019, and the most successful driver in the history of the F2 World Championship Rob Speak (218) – eight times a winner of the gold roof, and actually a winner of this event, the Smeatharpe World QR, ten years ago. Lady racers Jess Ward (86), Courtney Witts (780) and Lauren Stack (928) joined the field. Whilst Jess had been a regular during 2020, this was the first racing visit for Courtney, who enthusiastically praised the St.Day track from the day before. She declared it her favourite F2 track. Owing to the large number of cars three heats were required, with eight qualifying for the Final from each. Heat 1: A frantic start to the opener saw Jess Ward inadvertently put Speak into the wall, and he then collected the hobbled Will Adams (544), who had incurred damage in a back-straight collision with leader Charlie Fisher (35). A caution was required, with Adams and Fisher among those already out. Blue top Joe Marquand (689) had avoided the chaos to hit the front from star men James Riggall (527) and Luke Wrench (560) despite barely a lap having been run. From there it was easy pickings for Wrench who nudged Marquand wide at half-distance to take a decisive lead. Jon Palmer (24) came through to second ahead of Brennan and Marquand as a smoky Riggall slipped backwards before pulling off. Result: 560, 24, 968, 689, 606, 218, 488 and 124. Heat 2: The stars in Heat 2 delayed each other as they battled hard, and that allowed Ian England (398) to take a comfortable win from fellow yellow top Jamie Jones (915), and Matt Linfield (464). Benevolent Fund Trophy winner Jamie Avery (126) was the best of the reds in fourth, while Steven Gilbert (542) shoved Dave Polley wide on the final bend as the pair scraped through in seventh and eighth. Result: 398, 915, 464, 126, 783, 667, 542 and 38. Heat 3: The cavalry charge in this race had Dave Sansom (352) in the thick of it. It put previous Smeatharpe Final winner Kieren Bradford (27) in the wall and forced out Sunday’s St. Day dominator Justin Fisher (315) with a puncture. Out front, Luke Johnson (194) led until relieved by Mike Rice (438), who was closed down by Jack Prosser (844) with five laps to go. On his first appearance of the season Neil Hooper (676) was in typically hard hitting form and took advantage of his blue grade to push the leaders but, having made it to second, could not get close enough for a last-bend lunge on Prosser who duly took the win. Matt Stoneman (127) was third ahead of Rice, while a late charge from Ben Borthwick (418) edged him into the qualifying places. Result: 844, 676, 127, 438, 184, 194, 183 and 418. Consolation: Frantic, hard racing was the order of the day in this 28 car race. Track debutant Courtney Witts worked her way into the lead under pressure from Adams, who briefly hit the front, only to immediately expire. That allowed Witts back ahead for a matter of seconds before Charlie Fisher came past to take his second race win in two days. Gary Wrench (359) was second ahead of Tristan Claydon (210) who just pipped Witts for third. While one Fisher was continuing to ride the crest of a wave, the other had come crashing back to earth, Justin failing to qualify after collecting and getting hooked up with the spun Lauren Stack (928). Result: 35, 359, 210, 780, 988, 232, 890 and 605. Final: All thirty-two qualifiers except Liam Bentham (488) took their place in the race, led early on by Johnson and Richard Andrews (605). Among the action-packed early laps, Speak spun, while Polley and Claydon charged into the wall, and Charlie Guinchard’s (183) battle with Gilbert and Borthwick ended with a spin which delayed the latter pair. These two then continued to trade blows, ending up in a heap on the back straight where they were collected by several cars, leading to yellow flags. It would continue between this pair in the GN. England led from Mike Rice, Charlie Lobb (988) and Witts but Wrench was lurking ominously in fifth ahead of Brennan, Stoneman and Jon Palmer. While Brennan was slow away and slipped backwards, Wrench shot straight into third before picking off Rice and England and building up a lead. The action continued behind him as Stoneman was shoved wide by Guinchard then spun along with Speak, the pair collected by Johnson. Into the final quarter of the race, Wrench’s right-rear wheel began to smoke, and the oil he was putting down made for tricky track conditions. However, although that was hindering Wrench, it also plagued those in pursuit. Managing his advantage, Wrench was able to nurse the car home for his third win in five Finals at the track this season, with England second and Palmer third. “I think it’s done the half shaft seal or the bearing,”reported Wrench. “I thought, “Who’s putting the oil down?” Then I looked in the mirror…” Luke then said this was his last race in the car, and its new owner (Josh Weare 736) was taking it away after the meeting Result: 560, 398, 24, 438, 968, 988, 676, 780, 667 and 606. A 1-2-3 for WRC chassis. An altercation with 542 resulted in race ending damage for 418 R/h side wiped out on the 844 car GN: The 26 car race began with Gilbert blasting Borthwick into the pit bend fence with a huge hit which led to a complete re-run. While the red tops continued to pile each other into the pit bend in take two, Sansom was also in the thick of the action again, getting turned across the front of Witt’s car into the home straight wall, and then being annihilated by Guinchard who launched him hard into the pit bend fence leading to a caution period to get Dave out of his car. Mike Rice headed the restart from Riggall, who had been unable to change the engine in time for the Consolation, but was now flying. He moved in front within a lap and motored to victory from Rice, who pulled clear of the hard-fought battle for third topped by Dale Moon (302) from Tommy Farrell (667), James Rygor (783) and Jon Palmer. Result: 527, 438, 302, 667, 783, 24, 126, 27, 35 and 979. A Gilbert fencing for 418 Main rails bent on 352 after a huge hit into the plating from 183 The seat shifted in the impact Following the race both 542 and 183 were called up to the box where they found themselves in disciplinary hot water for their actions against 418 and 352 respectively. More pics in the gallery Continues below:
-
Continued from above: A lock was located about 220 yards from Clifton Aqueduct alongside Pilkington's Tile Works. An aerial view of theThirteen Arches, the railway viaduct over the Irwell, and the Manchester, Bolton and Bury Canal. Constructed in 1846 for the East Lancashire Railway it was built in a gentle curve. The Canal comes under the second arch from the right and then crosses the Irwell via Clifton Aqueduct . The canal and aqueduct were there before the Thirteen Arches. They date from the 1790’s. The buildings on the Clifton/Swinton side of the Irwell are Pilkington's Tile and Pottery works. You can see the ‘bottle’ pottery kilns in the bottom left corner. The small building and chimney near the aqueduct on the opposite side of the river were a pumping station that pumped water out of the Irwell and across the aqueduct to Pilkington's works. After crossing the aqueduct on the Whitefield side the canal clearly broadens out into a basin. This was for barges to wait their turn to cross the aqueduct. Also night soil from Salford was unloaded there in vast quantities for the local farmers. Frederick Road Bridge in Salford still has the slots in it where wagons unloaded their night soil straight into the waiting barges below. This canal had a revolutionary innovation - its barges were "containerised" with metal containers which could be hoisted out and in quite easily. The amount of industry shown on the map is staggering compared to what is left today In the manner of lock construction, there was a weir at the head of the lock and a by-wash. This ensured that the MB&BC was always gaining water from Fletcher's Canal. The entrance of the canal arm to Botany Bay Colliery was on the north-west corner of the works. This arm was approximately 380 yards long. Just beyond the entrance to the arm, a footbridge crossed Fletcher's Canal. At about 1,147 yards from Clifton Aqueduct a change bridge was built and the towpath changed from the north side to the south side of the canal. At the point where Fletcher's Canal made a head-on junction with James Brindley's original leat, it turned westwards for about 190 yards to its terminus at Wet Earth Colliery. In this section a skew railway bridge and a travelling crane crossed the canal. Underground canals were driven from Fletcher's Canal into Wet Earth, Botany Bay and Spindle Point Collieries Estate. At Botany Bay the level seems to have run for about two miles to Spindle Point Colliery. However, the entrance to this was destroyed when the Lancashire and Yorkshire Railway Company built their line. Similarly, there is archaeological evidence that an underground boat level extended from the downcast shaft at Wet Earth to other nearby collieries. In 1805 a new shaft was sunk at Wet Earth and this one had a steam-winding engine. Ultimately the waterwheel at Botany Bay ceased winding coal but Fletcher's Canal continued to be used for drainage purposes. In 1831 an Act empowered the MB&BC Company to convert their canal into a railway with a rail branch to the collieries. This Act prohibited Fletcher's Canal from being used as a railway line but it did give mine owners free carriage on the proposed railway branch. Nevertheless, all this came to nothing when this Act was repealed in 1832 but the second Act did remove the prohibition on Fletcher's canal being converted into a railway line in order to return to the status quo. Following the death of Jacob Fletcher in 1857, trustees managed the collieries (his daughter was only 12-years old). In 1864/5, the various collieries and Fletcher's Canal were leased to Joseph & Josiah Evans. They brought in their nephews, Charles and Edward Pilkington, sons of glassmaker Richard Pilkington, as managers and so the Clifton & Kearsley Coal Company was formed. The Pilkington family owned the Pilkington Tile and Pottery Company at Clifton, and Pilkington Brothers Ltd at St Helens, Lancashire. Eventually, a railway branch was built from Clifton Junction that ran, first to Botany Bay and then on to Wet Earth, which was known as the Wet Earth Railway. In 1880 serious mining subsidence occurred on Fletcher's Canal that caused it to be closed for about nine months while repairs were affected and in 1892 Botany Bay Colliery closed. In 1896 Wet Earth Colliery had a workforce of 304 underground, and 104 surface workers. Records show that in 1905 Fletcher's Canal carried 142,905 tons of coal. Of this total, 32,369 tons were carried down the MB&BC to Salford and Manchester, while 110,536 tons were both loaded and discharged on Fletcher's Canal, that is carried from mine to railway. The revenue from tolls was given as £1,551. Wet Earth Colliery remained open until 1928, but it was then no longer economic, following which Fletcher's Canal ceased to be used to carry coal. The only traffic on Fletcher's Canal was then clay and feldspar carried the short distance to the works of the Pilkington Tile and Pottery Company. Fletcher's Canal closed in 1935 when it ceased to be used to carry materials to Pilkington's works. The working conditions in the mines were very harsh. Seams were narrow and miners worked in cramped dark conditions. Women and children were employed bringing coal to the surface on wooden sledges. The worst mining disaster in the area was the Unity Brook Disaster on March 12th 1878 where 43 men and boys died in an explosion. Among those named are Thomas Lever, 18, Samuel Wolstenholme, 50, William Wolstenholme, 23, John Tickle Lomax, 31, James Beattie, 19, Robert, 40, David, 13 and Jonathan 12 Enions, Andrew Walker, 22. All are buried at St. Stephens. In 1885 176 were killed in the Clifton Hall Colliery Explosion. Outwood Colliery in common with most of the ‘modern’ collieries was sunk in an already well worked area. Sinking appears to have commenced in the 1830’s and at this time the colliery was known as Clough Fold. There were eventually five shafts, but only three were being worked by the end of the 19th century. Thomas Fletcher & Sons purchased the colliery around 1858. They continued to develop the colliery and operated it successfully for over 40 years. By 1908, however, the firm was insolvent and went into liquidation. The appointed liquidator put the colliery up for auction in 1909 as a going concern but the reserve price was not met. Within a very short time the colliery was sold privately to the Clifton & Kersley Coal Co. Ltd, who immediately set up a subsidiary company, Outwood Collieries Ltd, to take over and operate the colliery. Following the acquisition of the colliery by Outwood Collieries Limited, a series of improvements was carried out. The coal screening plant was renewed and a coal washer erected. Landsale facilities were also improved and the tub track to the James Street sales yard was replaced by a standard gauge branch line. Direct sales from the colliery accounted for a considerable portion of production. A completely new brickworks was also built, being brought into production in 1927. The colliery became part of Manchester Collieries Ltd in 1929 and it was about this time that production ceased and the colliery was put on a care and maintenance basis. However, an underground fire developed which ate its way into the shaft pillar and in 1930 one of the shafts collapsed. The headgear fell into the shaft, the winding rope slicing through the engine house wall like a cheese cutter. This event put an end to any hopes of bringing the colliery back into production and it was formally abandoned in 1931. The coal washing plant was retained as it dealt with coal from other collieries. A new storage bunker for the washer was provided in 1932. Operations at Outwood finally ceased in 1956 when the coal washing functions were taken over by the plant at Mosley Common Colliery. We come to the magnificent Clifton Viaduct next. It is known locally as the ’13 Arches’ It has a slight curve built into it as it heads north In September 1843, a group of businessmen met to discuss the building of a railway to serve districts of north-east Lancashire. This resulted in the creation of the Manchester Bury & Rossendale Railway Company, with the intention of constructing a line from Bury to Clifton, where it would connect to the Manchester & Bolton Railway, as well as a northerly extension to Rawtenstall. Their bill received Royal Assent in July 1844, authorising the company to raise £300,000 and borrow a further £100,000. Strong financial support was forthcoming from local businesses. May 1844 saw the awarding of two contracts to Manchester firm Pauling & Henfry who tendered £167,529 for the construction of both sections, however they were subsequently dismissed and John Waring appointed in their place. Much of the work was outsourced to subcontractors. Extending for over 300 yards, Clifton Viaduct escorted the line over both the River Irwell and Manchester Bolton & Bury Canal. Built from rock-faced stone but with brick soffits, it comprises 13 segmental arches springing from impost bands. The river span is longer than the others - measuring 96 feet - and is flanked by king piers that rise to the coped parapet. The deck is 80 feet above water level. At its northern end, the structure curves to the west on a radius of around 45 chains. It would appear that the piers originally incorporated arches to reduce their weight and focus the forces, but these have subsequently been infilled with brick. In 1845, the MB&BR joined forces with the Blackburn & Preston Railway to become the East Lancashire Railway. The line was opened on 28th September 1846, having been inspected five days earlier by Sir Charles Pasley, Inspector-General of Railways. The original East Lancashire Railway lasted until 1859 when it was subsumed into the much larger Lancashire and Yorkshire Railway. The 13 arches of the Clifton Viaduct became defunct along with the rest of the line from Clifton Junction to Bury in 1966. Unlike the aqueduct which remains a well-used walking route, the viaduct is fenced off and out-of-bounds. It now acts as a landmark for drivers on the M60. After managing to get access onto the viaduct and taking in the view from the mid-point high above the Irwell we make our way back to Ringley along the track-bed of the disused line. At the point where we cross over the M60 is the former site of Molyneux Brow station. The M60 cuts right through the station site. The footbridge is on the course of the track-bed. Molyneux Brow station first appeared in the public timetable in June 1853. It apparently took its name from some isolated cottages about 100 yards to the north. The route here was double-track so the station was provided with two low platforms which started in a cutting at the north-western end, but owing to the steepness of the land, they ended on an embankment. The main station building was east of the line on the southbound platform, and there was a small goods yard with two sidings, a signal box and a 5-ton crane immediately south-east of this platform. The goods yard didn't handle livestock. An access road, Philips Park Road was built at the request of the Philips family (of Philips Park Hall, Whitefield), to give them access to Molyneux Brow station. At the time of opening the station was served by trains going northwards to Colne, or Bacup, and southbound to Manchester Victoria. On 13th May 1859 the Lancashire & Yorkshire Railway (LYR) absorbed the ELR. The LYR started to use the route through Molyneux Brow as an alternative to its congested main line between Manchester and Leeds which brought much extra traffic. The LYR also routed much of its holiday traffic through the station. On 1st January 1922 Molyneux Brow became part of the London & North Western Railway (LNWR). One year later, on 1st January 1923, the LNWR became a constituent of the London Midland & Scottish Railway (LMS) by which time, of the twenty-five trains in each direction using the line, fewer than eight called at Molyneux Brow. The station in LMS days The LMS considered the station uneconomic: the One-inch Ordnance Survey map of 1928 showed that there was practically no population within a mile of the station. The lack of a road crossing of the River Irwell and the Manchester, Bolton & Bury Canal south-west of the station, and the use of the intervening valley floor as Bolton Corporation sewage farm, severely limited its hinterland in that direction. The station was an early closure, all services ceasing on 29th June 1931. Passenger and goods trains continued to pass through the site of the station until 3rd December 1966. The line closed on 5th December 1966, and within a couple of years the site of Molyneux Brow station was obliterated by what became the M60 Motorway. As you head west just before J16 (A666 junction), take a look across to the left. The removal of the embankment at its north end to make way for the M60, and at the southern end for industrial buildings, has left the viaduct stranded and forlorn. We eventually leave the track-bed and turning left walk through Ringley Wood. This sits above the abandoned Ringley Colliery. A tramway from Outwood Colliery further to the east was linked directly to here. A short tram road was built from Ringley Colliery and this extension took it to the canal where there was an overhead loading gantry so that the coal could be put directly from the wagons into boats. The Ringley Incline The colliery closed in 1893 with the tram road becoming abandoned in 1910. The remains of the incline, embankment, cutting and capped off ventilation shafts can still be seen. As we exit the woods it’s a short walk back into the village. During the present century suburban development has encroached upon the setting of the village and it is hard to believe the scale and size of the industry that existed here. It is now nothing more than a fading memory, and a whisper on the breeze. Credit and thanks for parts of this write up to the following: Paul Hindle, Alan Young, Paul Wright, Cliff Pelham and P.Whitehead. Pics in the gallery. Next time: We’ve travelled to the furthest Brisca track south this week so let’s head to the furthest one north. A Scottish triple as we take in the Crimond F2 Qualifier book-ended via Lochgelly on the way (where a surprise and most welcome visitor takes to the track in the Superstox class), and Cowdie on the return for their Qualifier. We then head ‘Off The Beaten Track’ in Derbyshire to take a look around a derelict industrial site. However, this particular place amongst the decay and desolation is the haunt of a gang of local youths who turn up.
-
Continued from above: The canal was connected to the MB&BC in c.1801. Its course was parallel to the MB&BC but on the opposite bank of the River Irwell. When completed, it was 1½-miles long and it joined the MB&BC at Clifton Aqueduct. A busy Clifton Aqueduct in days gone by Overgrown and out of use today This map shows the aqueduct and Pack Saddle Bridge There was a towpath throughout the length of Fletcher's Canal and to connect this to the towpath of the MB&BC, a junction side bridge was built at the southern end of Clifton Aqueduct, this being known as Pack Saddle Bridge. An archive photograph showing Clifton Aqueduct (left of centre) from Fletcher's Canal. The stone towpath bridge which crossed the canal at its junction with the Fletcher's Canal is now gone. The railway viaduct dominates the background. Another archive photograph, this time showing the towpath bridge close up with a person crossing over it. The canal goes below the bridge to cross the aqueduct. The area around the overgrown Clifton Aqueduct is hardly recognisable today with only a very small part of the Pack Saddle Bridge left. This small fragment is all that remains of the Pack Saddle Bridge Continues below:
-
Continued from above: The Manchester, Bolton and Bury Canal opened in 1795, serving coal mines from the Clifton, Agecroft, Kearsley and Pendleton mines. One of the principal arms ran southwards from Bolton along the Irwell valley, and through the village. The Horseshoe Inn by the church gate was a scheduled stopping place for the packet boats running from Bolton to Manchester. The Horseshoe Inn as it was in the early days As it is today with substantial alterations Later industry included a coal fired power station. Kearsley Power station was built in the late 1920's, water for cooling taken from the Irwell. It had a dramatic impact on the landscape of the Irwell Valley and although its massive cooling towers were demolished in 1985, the pylons dominate many views. During the present century suburban development has encroached upon the setting of the village. Moving south from the village we come to the main mining area. The above-mentioned canal was extended with a cut called Fletcher's Canal to carry coal from the pits. Other pits in the area were the Ringley Colliery, and the Outwood Colliery. In the 18th century the two foremost impediments to making coal mines profitable were flooding and transport. At this time, the accepted way of draining shallow mines was to use men or horses to draw up buckets of water. A somewhat more advanced method was to use a horse gin. An alternative method, if the coal seam was at a higher level than the surrounding ground, was to drive a sough (tunnel) from the mine to the lower ground. Additionally, the road system in the country was also inadequate and poorly maintained. Transport was by horse and cart, or even by packhorse and it was expensive. If the coal seams happened to be in an area where there was a navigable river then this could be used for transport. Often this was not the case but when one was available then it was subject to the vagaries of weather, floods, water shortage and silting up of the channel. Close to Ringley was the Wet Earth Colliery. Here Ringley witnessed a remarkable feat of engineering by James Brindley in the early part of the Industrial Revolution. At this location the solution to the mine flooding was: James Brindley's Hydraulic Pumping System In c.1740 John Heathcote, a landowner in the Irwell Valley, endeavoured to sink the first deep coal mine in the area at Clifton but it persistently flooded and Matthew Fletcher (c.1733-24 August 1808), a member of an influential local mining family, was brought in to advise on how to solve the flooding problem. It seems that he had little success and in due course the mine closed. In 1750, Heathcote called in the renowned engineer and millwright, James Brindley (1716-1772), to advise on how best to prevent flooding. Heathcote was impressed with Brindley's abilities and he thereupon appointed him to put into practice a solution to the flooding problem at Wet Earth. It took Brindley two years to survey the land and design an appropriate pumping system. Heathcote accepted Brindley's proposals in 1752 and the go-ahead was granted for work to commence. It took Brindley another four years, until 1756, to complete the work. Brindley's solution was to use the River Irwell to provide power to pump water from the bottom of the shaft. Wet Earth Colliery was located close to the south bank of the river and upstream, by the hamlet of Ringley Fold, the river begins a loop nearly half-a-mile wide. He resolved to build a weir across the river near Ringley Fold, the purpose of which was to impound water and increase the head of water available to power a waterwheel. Above the weir, on the north bank of the river, he drove a tunnel some 800-yards long across the loop. To begin with, it was driven through shale, which required it to be brick lined. The works then struck the Pendleton Fault where it entered sandstone and from thereon it was unlined. Just below the weir a short side tunnel was driven to the river bank for flush-out purposes. The tunnel arrived at the river by a place known as Giant's Seat where a vertical shaft was sunk to a depth below that of the bed of the River Irwell, as well as one more flush-out tunnel to the river bank. Opposite this shaft, on the south bank of the river, a second vertical shaft was sunk to the same level as the first tunnel. The two vertical shafts were then connected together by driving a 220-foot long horizontal tunnel below the bed of the river. In this way, the two vertical shafts and the horizontal tunnel formed an inverted siphon. From the top of the southern shaft an open leat (head race) was cut to a point close to Wet Earth Colliery where it turned sharply westwards. It then entered the hillside by a short tunnel that accessed the pumping chamber where the pit shaft was located. In this chamber, Brindley installed an overshot waterwheel to drive a pumpjack (or nodding donkey). Water pumped from the mine shaft and spent water from the waterwheel then discharged down a tail-race tunnel into the river Irwell. Brindley's ingenious system was successful and Matthew Fletcher became the owner of Wet Earth Colliery. Afterwards, he sank a new shaft at Wet Earth, known as Gal Pit, which was some 159-foot deep and 13 feet in diameter. This shaft reached down as far as the Doe seam of coal. The name of the pit comes from the Galloway pony, the traditional name for pit ponies or Galloways. To summarise; water from above Ringley Fold Weir flowed along a tunnel for some 800 yards, passed below the river by way of the inverted siphon and rose to the open leat on the south side of the river. The leat then conveyed the water to the pumping chamber where it powered the waterwheel that, in turn, drove the pumpjack that lifted water out of the mine. Drain water and spent water from the waterwheel then discharged into the River Irwell via the tail-race tunnel. The head of water from the top of Ringley Fold Weir to the pumping chamber was 35 feet. Following the positive result of this project, James Brindley became known as the 'man who made water run uphill' because of the inverted siphon below the River Irwell. It was this project that confirmed him as the leading engineer of the day and in retrospect he was arguably the first civil engineer of the Industrial Revolution. The Wet Earth project showed that he had the ability to conceive, plan and bring to a successful conclusion a major undertaking, while at the same time training others to carry on with the work while he attended to other tasks. By 1760, Fletcher had sunk another shaft one mile east of Wet Earth Colliery, known as Botany Bay Colliery. Simultaneously, he extended Brindley's leat for this distance where he installed a second waterwheel but this one was used to wind coal up the shaft. Brindley's waterwheel worked continuously until 1867 when it was replaced by a water turbine. This worked until 1924 when a steam-driven pump replaced it and this worked until 1928 when the colliery closed. Wet Earth pit closed in 1928 after 180 years of working. Even L.S. Lowry painted a picture entitled ‘Pit Head Scene at Wet Earth’ in 1925. The Wet Earth Colliery site. The dock shown on the old map above is heavily overgrown now Also on the map you can see a travelling crane to the right. This is one of the remaining brick supports. Thus Brindley's waterwheel worked for 111 years; the water turbine for 57 years and the steam-driven pump for four years. Closure of the colliery did not spell the end for Brindley's tunnel, siphon and leat. These continued to supply water for industrial purposes until 1960 when the site of the tunnel was used for Ringley Fold Sewage Treatment Works. After that, Ringley Fold Weir was used to supply cooling water to Kearsley Power Station. Fletcher's Canal: By the 1790’s, Matthew Fletcher was the Chairman of the Mersey and Irwell Navigation and a Committeeman of the Manchester, Bolton and Bury Canal Company. He was also the Principal Engineer of the latter company. In 1790-91 he widened and deepened the leat between Wet Earth and Botany Bay Collieries and extended it eastwards, in preparation for making a head-on junction with the proposed Manchester, Bolton and Bury Canal (MB&BC). The purpose of this was to enable him to convey coal from his mines, while still retaining the original function of Brindley's leat. This isolated canal became known as Fletcher's Canal and on the hypothesis that it was provided with a number of coal boats then initially it could only have been used to carry coal to a wharf by a suitable road and/or tramway. Although the MB&BC was opened between Rhodes Lock and Salford in 1796, there was still no connection between Fletcher's Canal and the MB&BC in 1799. The delay in making the connection was brought about by two issues: 1. Mill owners by the River Irwell had only agreed to the construction of the MB&BC after strict conditions had been written into its Act to limit the amount of water that the canal could take from the river further upstream. This meant that it was essential that no water from the MB&BC should enter Fletcher's Canal. 2. It seems that in anticipation of making a connection, Matthew Fletcher had built a lock in his canal, which was located about 220 yards from the proposed head-on junction with the MB&BC but its fall was found to be too great for the water level in the MB&BC when it opened. The Derbyshire engineer, Benjamin Outram, who was advising the canal company at the time, recommended the construction of a second lock in Fletcher's Canal with a small rise. Apparently, his recommendation received the approval of both the canal committee and the mill owners but it was not acted upon. Instead, the original lock seems to have been enlarged to create a chamber 90-foot long by 21-foot wide, with a fall of 20 inches towards the MB&BC, which therefore always gained water. This lock could accommodate three narrow boats side-by-side. We continue alongside the abandoned Fletcher’s Canal and cross underneath the M60. The disused Fletchers Canal Continues below:
-
Hi there folks, Before we begin this week here’s a quick update on Midland Red. The last operational Midland Red garage in Leicestershire was finally closed on 31st October 2021 when Arriva shut its Wigston garage. It had been built in the favoured ‘Art-Deco’ style and first opened for bus operations on 5th October 1957 as a result of the two established BMMO garages in Leicester (Sandacre Street and Southgate Street) being full to overflowing. RHA 919G outside Wigston Garage. Built as B51F between 1968 and 1970 by Birmingham and Midland Motor Omnibus Company Limited (BMMO—Midland “Red” Motor Services) as type code S23, one-man operation single-decker service bus. Bodywork finished in-house by BMMO at Central Works. Wigston began with 20 buses from each of the Leicester garages, but went on to have an allocation of mainly BMMO built double-deckers with a few saloons required for country services. It also served as an area engineering centre looking after major servicing even attending to Nuneaton’s CM6 motorway coaches that worked the Coventry-London services. However, with the fabric of the building now showing its age and in need of a lot of repair Arriva felt it could manage its fleet by concentrating it at its main depot at Thurmaston. Following the closure only five former BMMO garages remain operational, these being Banbury, Nuneaton, Rugby, Tamworth and Worcester. Finally on the bus scene here’s a great look at a Leyland Super National featuring a classic smoky cold start, and an on-board drive over the River Trent via the King George V (Keadby) bridge which was built in 1916. The engine note sure brings back the memories. The Super-National at Marble Arch Onto this week. We start with a couple of F2 Qualifiers from the south-west, and then move up country to Greater Manchester. Bristol – Sunday 30th May 2021 In addition to the south-west drivers there was a good showing of English drivers from the east and the north-west, together with a quintet of Scots. Heat 1: A quiet race saw Jon Palmer take a routine win. Result: 24, 27, 184, 398, 542, 844, 195, 689 and 928. Heat 2: Luke Wrench had an easy victory in this one. Result: 560, 38, 126, 53, 16, 438, 890, 325, 194 and 736. Heat 3: Bizarre circumstances at the end of the race saw first over the line Matt Stoneman (127) docked, and the same fate befell Harley Burns (992). That saw James Rygor (783) inherit the win from his third spot finish. He then also failed post-race checks, and left a surprised Luke Beeson (287) as the official winner. Result: 287, 667, 127, 992, 606, 895, 979, 915, 419 and 787. Consolation: Jack Cave (801) took the win to continue his great start to the season. Result: 801, 183, 359, 736, 210, 419, 581, 629, 194 and 618. Final: Even though she didn’t finish in a qualifying place Lauren Stack (928) was allowed to race in the Final for some unknown reason. Some would say it doesn’t matter but as it goes it did. The race looked to be going to Jamie Avery (126). He was in control and clear at the front when the race went under caution with just three laps to go after the 928 car had spun in turn two. At the restart J.P in the 24 car pounced to grab the lead, and the win, which netted him the impressive Gerry Dommett Trophy. Jack Cave (801) finished second leaving Avery in third. A damaging last bend crash saw Steven Gilbert (542), Charlie Guinchard (183) and Stoneman crash out. Ryan Farquhar (419) went into the last lap fifteenth and came home eighth which was some reward for his long drive back to Aberlour in the north of Scotland. Jon Palmer (24) became the first driver at that point of the season to achieve a maximum score in a WCQ. The Heat and Final double victories gained him 30 points to add to 5 attendance points. Result: 24, 801, 126, 38, 890, 667, 184, 419, 581 and 915. Adrian Blackwell, the F2 tech officer checks the 24’s tyres JP on the victory lap GN: The GN fielded just 18 cars such was the damage in the Final. James Riggall took the win. Result: 527, 38, 560, 126, 194, 667, 24, 915, 890 and 184. St.Day – Sunday 20th June 2021: Would this be the last time? The last time for a Brisca F2 World Championship Qualifier at St. Day. The question remains unanswered for now. The annual qualifying round took place in warm sunny weather in front of a healthy sized crowd. A steady stream of bookings had been coming in to boost the entry list. Scottish pair Mike Philip (195) and Colin Stewart (191) clocked up some jaw-dropping miles to attend for their track debut. Lady racers Jess Ward (86) and Courtney Witts (780) were two more track debutants. Aaron Vaight (184) is seen so much in the south-west that it’s easy to overlook how far he travels from the north-west of England. The inclusion of Andy Ford (13) and Charlie Guinchard (183) added to the entertainment factor. With one third of the entry being from Plymouth, and further west into Cornwall there were still several south-west drivers clocking up 100 miles or more to be present. Of the local contingent (including 24, 27 and 126), gathering World points at the south-west rounds would be key to those aiming to advance to the Semi Finals. The strong 39 car entry was ideal for a full-format meeting. It would hardly be the St. Day World Qualifier without a very nice touch from perennial sponsors Neil Truran Motorsport, who handed out a ‘traffic light’ trio of red, amber and green bottles of Rattler cider to all drivers on the traditional Grand Parade. Heat 1: A dominant win for Justin Fisher (315) who tore through the field from his blue grade start to pass white top John Brereton (948) for the lead with six laps remaining. Brereton had some trouble dealing with backmarker traffic, including Stewart who had been delayed when Jack Bunter (128) spun early on, but held onto second from Joe Marquand (689) and Jon Palmer (24). Result: 315, 948, 689, 24, 542, 302, 438, 606, 35 and 86. Heat 2: There was an early caution when Ian England (398) took a heavy hit into the wall by the pit gate and lost the steering wheel in the process. This closed up the field and let the higher graded drivers make up track position. On form man Kieren Bradford (27) passed the early pacesetters in the shape of Dayne Pritlove (540) and Jack Prosser (844) to take the top spot before half-distance and looked like he was set for another race win. However, Paul Rice (890) and Ben Borthwick (418) were flying. Borthwick used the bumper to pass Rice and Bradford in one move, but Rice had other ideas and followed him through and then took the lead himself. Borthwick tracked Rice for the remainder of the race but could only make light contact with a last-bend hit which wasn’t enough to move the 890 car from the top spot. Result: 890, 418, 27, 126, 183, 783, 184, 844, 464 and 251. Consolation: The 15 car race proved easy for the blues and reds who had failed to qualify from their heats. Ben Goddard (895) overtook long-time leader Pritlove with three to go. Paul Moss (979), with a new bumper fitted after a big hit into the wall in his heat then spun Pritlove from second, but delayed himself in the process allowing Tommy Farrell (667), Ryan Sheahan (325) and Courtney Witts (780) to blast past. Result: 895, 667, 325, 780, 979, 195, 398, 578, 797 and 828. Final: A full 30 car grid assembled for the main race which was led off by the lone white top qualifier Brereton. Early problems for superstar James Rygor (783) dropped him off the lead lap but as he tried to re-pass Brereton it allowed Stewart to find a way into the lead. It wasn’t long before the flying Fisher hit the front though, as bumpers flew in all around the track. Goddard moved into second but was well behind, while maintaining a decent gap over third placed Bradford who had Palmer on his tail. Having been delayed early on Borthwick appeared to be riding shotgun for fellow Motorworld man Fisher, although the Devon veteran needed no help such was his dominant pace. The in-form driver eased to victory as he had been threatening to do since the season began. “I’ll take that,” was race winner Fisher’s understated reaction. “A good day - lots of cars, lots of people watching,” was his summary. Palmer admitted: “I wasn’t fast enough to catch the top two. I could have done with some caution flags really. Justin was gone – absolutely flying” Result: 315, 895, 24, 689, 27, 667, 542, 251, 183 and 184. The winning car GN: 26 on track for this one. Brereton was left well clear after a messy start by the rest of the field. England was one of a number of early retirements, with Bradford also forced out by a puncture. Into the second half of the race Brereton maintained a big gap over the chasing Charlie Fisher (35), with 689 third ahead of top stars Borthwick and Palmer who still had plenty of ground to make up. While Fisher was unable to catch the leader he nevertheless inherited the win, (his first in the formula), after Brereton was docked two places for jumping the start (along with Fisher Snr). It was a very happy Fisher family who went home with three wins split between father and son on Father’s Day. Result: 35, 689, 948, 418, 24, 251, 183, 780, 325 and 844. The Saloons had a disappointing turn-out of 15 cars. The afternoon was completely dominated by star novice Warren Darby (677) who secured a hat trick of victories. In each race the teenager opened out a big advantage from the off and never looked like being beaten. Top 3’s: Heat 1: 677, 84 and 902. Heat 2: 677, 902 and 447. Final: 677, 84 and 902. Pics in the gallery for both meetings. Okay, we’ll now make our way to the village of Ringley, near to Kearsley in Greater Manchester. It is situated alongside the River Irwell. The area close to the village has a fair amount of the industrial past now long overgrown and forgotten. It also played a major part in the career of ‘the man who made water run uphill’. Ringley is situated in the Irwell valley, about 6 miles north-west of Manchester. Before development the area was wooded and the name probably comes from the Old English meaning a clearing. Early settlement and industry grew up on the banks of the river. The river could be crossed at a ford a little further downstream. In Medieval times it was one of the few bridging points across the Irwell between Bolton and Manchester. A stone packhorse bridge constructed in 1677 remains at the heart of the village although it is now closed to vehicular traffic. The 400 year old former church tower with evidence of subsidence The old village stocks are located on the opposite side of the road from the Church tower. No record of their construction can be found but they probably date from the early 17th century. The stone posts have grooves on their inner faces, into which are slotted two tiers of foot holes, to secure the prisoner by his ankles. Now behind railings Stocks were in general use from Medieval times or before. They were set up in a public place, either at the entrance to a town or on a village green. No village was considered complete without its stocks as they were essential to law and order. According to the severity of the crime, the offender would be sentenced to spend a number of hours, or even days, clamped in the stocks.The stocks were used to punish minor offences such as petty stealing, drunkenness and vagrancy. For instance, in 1605 every person convicted of drunkenness was either fined five shillings or put in the stocks for six hours. Wood stealers might well have been punished by two days in the stocks. Often prisoners were taunted and laughed at by onlookers. Not only were stocks used as a mode of punishment and show of public disapproval, but also as a means of securing all offenders before they were dealt with officially. Early occupations here were farming and handloom weaving, before coal mining, paper making and cotton spinning took over. The first mill, built around 1780 was situated where the River Croal and River Irwell meet, and powered by a wheel from a weir on the Croal. Near this spinning mill was a chemical works owned by Benjamin Rawson producing acid for the bleach and paper industry. Thomas Bonsor Crompton built a steam and water powered mill c1833 adding to the 16 mills already in the Farnworth and Kearsley area. In 1826 Clammermouth Mill was built by Joseph and Robert Lord. A pottery at Clammermouth used clay from the bed of the Irwell. Kearsley Spinning Mill, owned by Edmund Turner, was destroyed by fire in 1832, probably caused by a candle (used for lighting). Rawson's chemical plant stopped producing vitriol in around 1834 and the plant was sold to a Mr Wilson but closed in 1875. John Livesey had a small paperwork’s at Dye House Mill, but five years after it closed, paper was being made at Crompton's Mill in Ringley, later to be called Robert Fletcher and Son. By 1897 the Bankerfield Mill and the New Prestolee Mill were among the largest spinning mills in the country. Of the paper industry, these are the recorded mills during the early 1800's. Creams Mill, Little Lever founded by James Crompton 1670. Farnworth Bridge Mill, founded 1680 by Robert Crompton. Lever Hall Mill, Great Lever founded 1718 by Ellis Crompton, Grundy's Mill, Little Lever founded by James Grundy in 1760, Livesey's Mill, Prestolee founded 1770 by John Livesey, Seddon's Mill, Prestolee founded by Thomas Seddon 1780, Springfield Mill, Bolton founded 1820 by James and John Livesey of Prestolee, Stoneclough Mill founded 1823 by Ralph Crompton, becoming Robert Fletcher and Son in 1859, Robert Fletcher himself living from 1804 - 1865. Fletchers Paper Mills acquired a reputation as one of the world’s leading manufacturers of fine paper. Ringley Wakes: A tradition in Lancashire, the Wakes holiday was a time that people could rest from work. It was a time to join in and enjoy the festivities. Ringley Village held its Wakes on the first Sunday in May. Activities included bull-baiting, quoiting, swarming the pole, and gurning through a horse collar. Many other games and activities formed part of the regular programme of merriment. Lord Mayor of Ringley: The highlight of the Wakes was the choosing of the Lord Mayor. This was not an official position and the powers of the office were minimal. The holder of the office was entitled to have, on each Sunday, a pint of beer, a clay pipe, a box of matches and an ounce of tobacco from each of the three public houses within the village, and a further four in Stoneclough and Prestolee. To claim his weekly allowance the Mayor had to dress in his best Sunday clothes, be clean shaven, and have clean clogs and a clean muffler. Unfortunately as part of the proceedings the new Mayor was carried through the village and thrown from the canal bridge into the canal below. Irwell eels were once renowned for their excellent taste which was reputed to result from their diet being supplemented by fat, oil and grease released into the river from the numerous fulling mills along its banks. Communications between Ringley and the neighbouring towns of Bolton and Manchester were very poor until the construction of the canal. Continues below:
-
Continued from above: The Leyland Titan PD2 recovery vehicle was brought into use on the running day It was sent out to rescue a BMMO S22 after it stopped on the road run with air in the fuel Finally, one of the shuttle buses used on the day was this Walsall Corporation Daimler CRC6 from 1968. It is fitted with a Cummins V6 rear engine and Northern Counties 85 seat bodywork. It has two staircases, and a front entrance and rear exit. It was the first bus to be fitted with CCTV. During the 50’s and 60’s Walsall was well known for its varied fleet, with many one-offs and experimental vehicles. This bus was the final one-off before the fleet was swallowed up in to the new West Midlands PTE in 1969. At 36ft long, it was for many years the longest double-decker in the country. It carried this unusual light blue and cream livery instead of the normal all over blue. Due to the length, it was usually kept away from the narrow roads around Walsall’s housing estates and was often to be seen on the long distance services to Birmingham. It was notoriously unreliable and had to be towed back to the depot at Birchills on many an occasion, once famously closing Birmingham’s busy Corporation Street for several hours. It’s well worth paying a visit to Wythall. There is a large collection of stored vehicles, and a museum housing all things transport related. Plenty of pics in the gallery. Next time: It’s 2021 F2 WCQ time. We’ll have a look at the Bristol and St. Day rounds, and then we’ll go off on a snowy visit to an area in northern Greater Manchester to see what remains of the past.

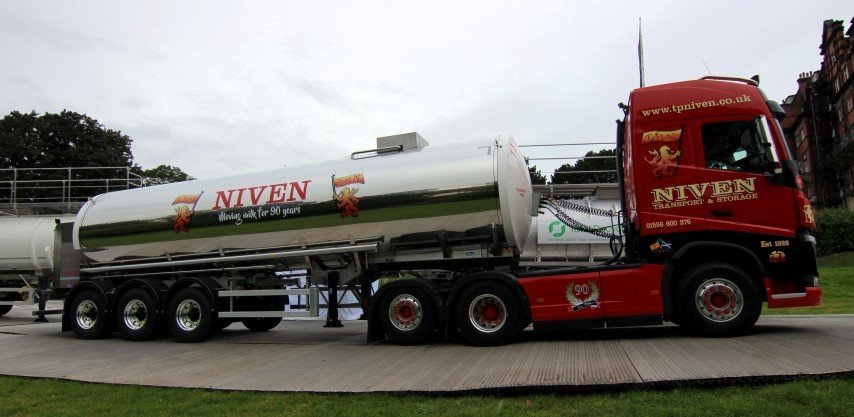
m.JPG.dc795c336b6186118e58b3bb7da714a4.JPG)
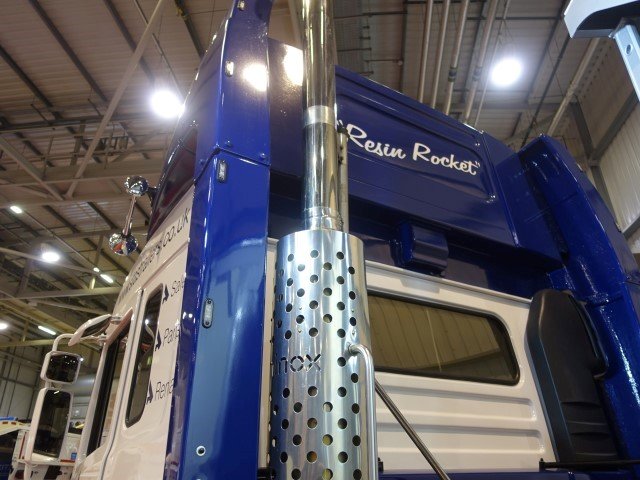
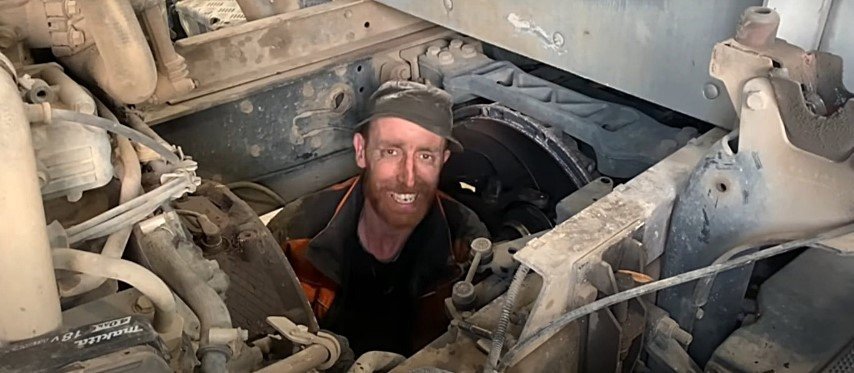
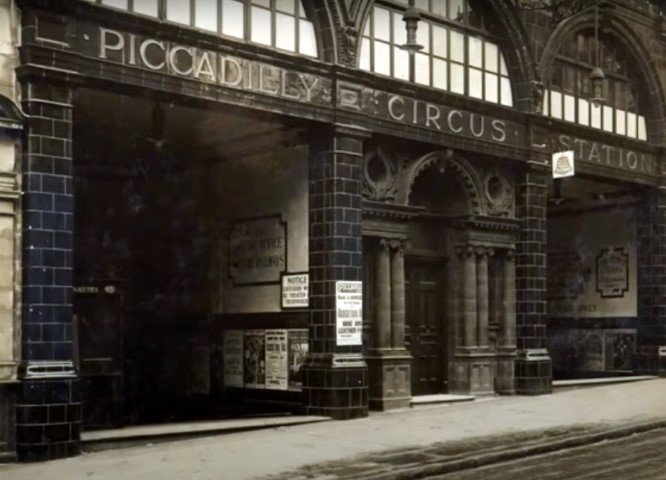

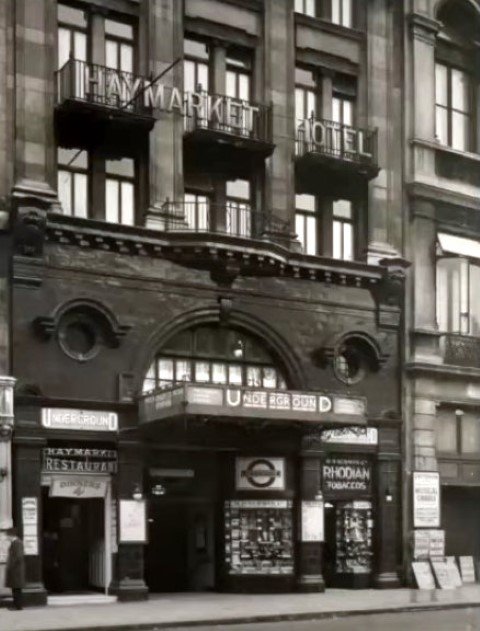
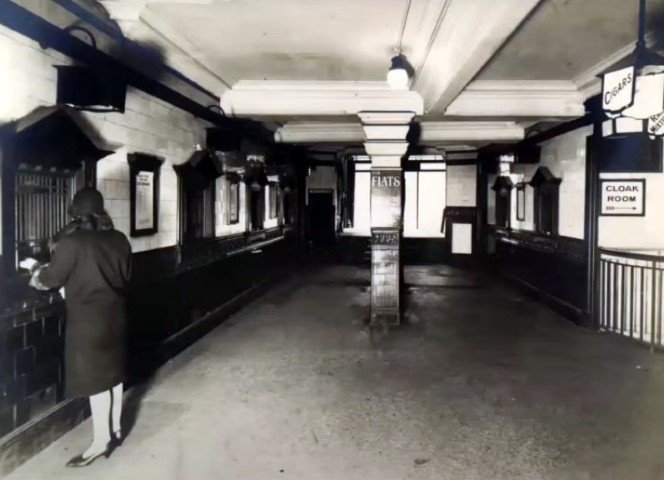
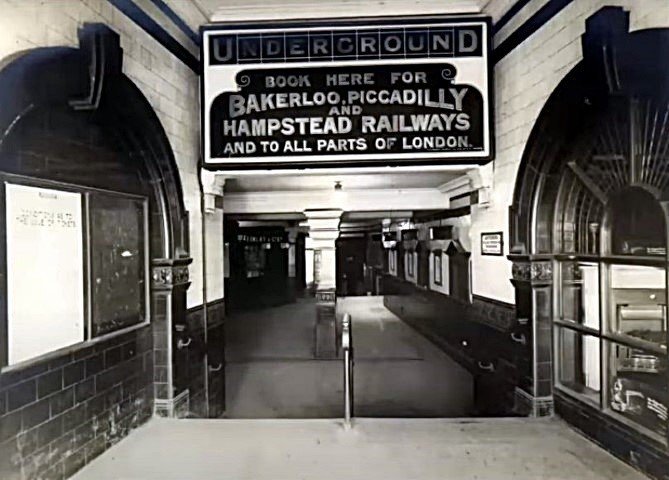
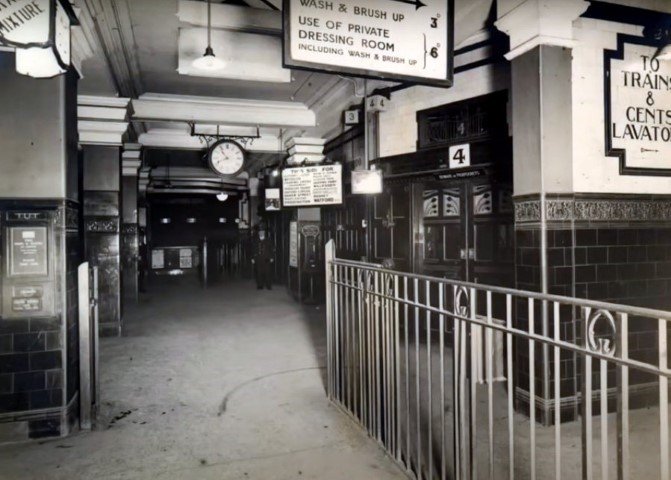
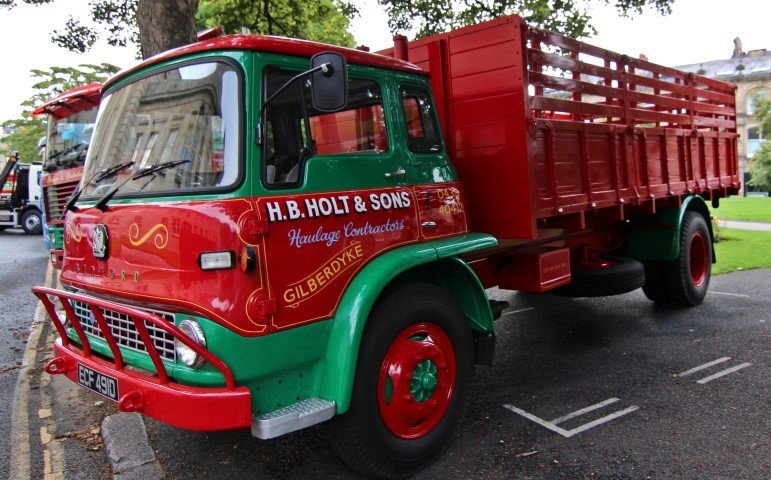

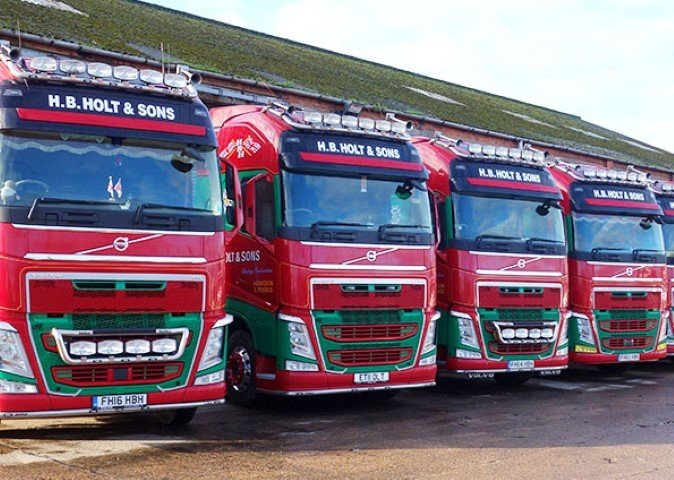
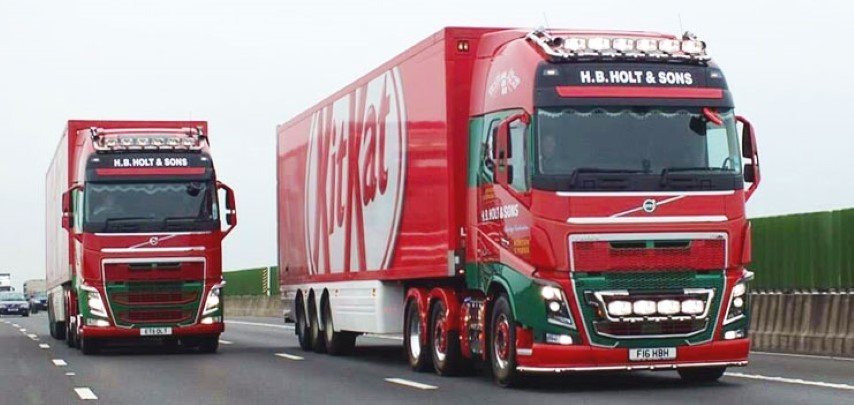


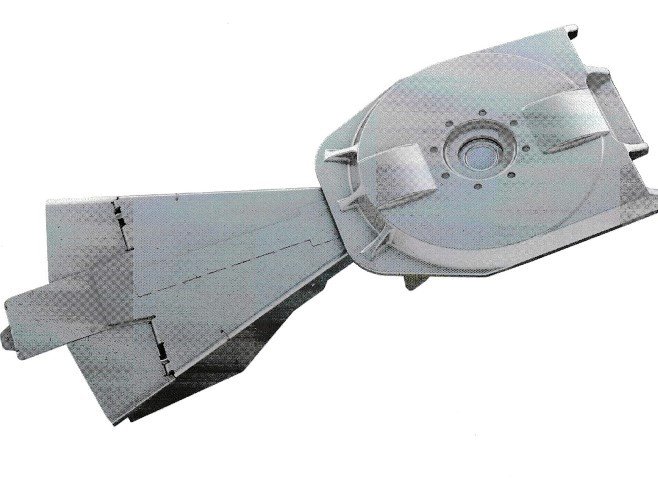
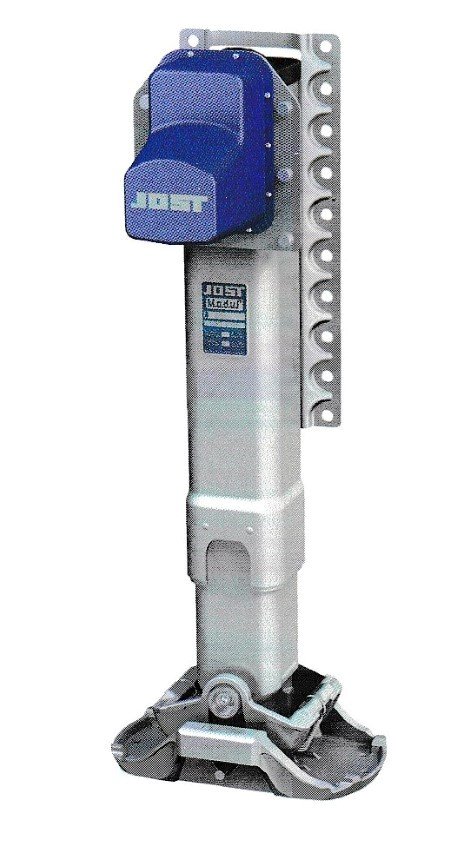

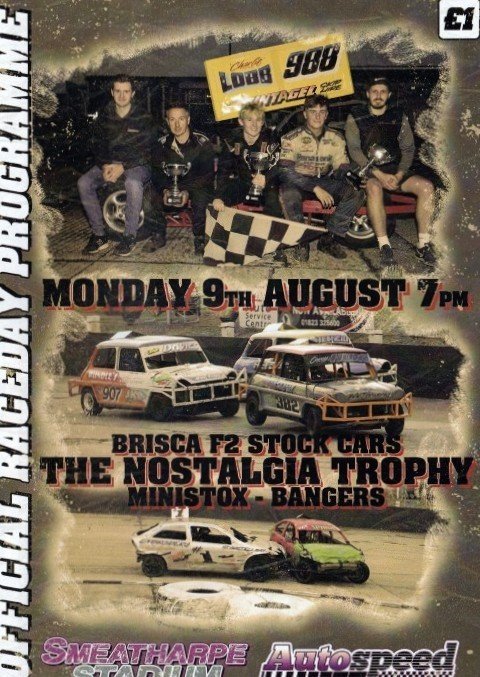
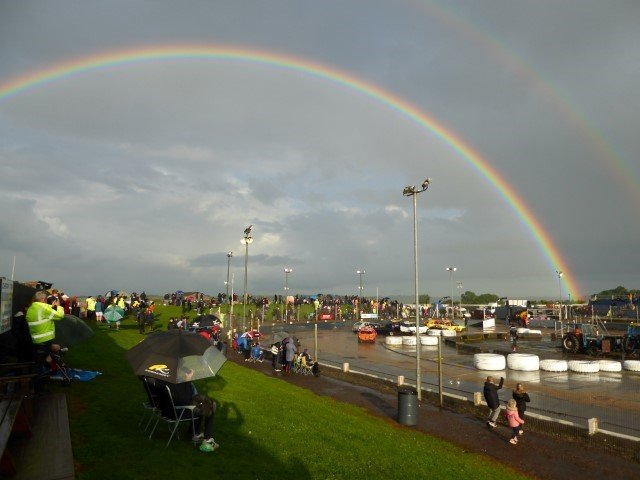
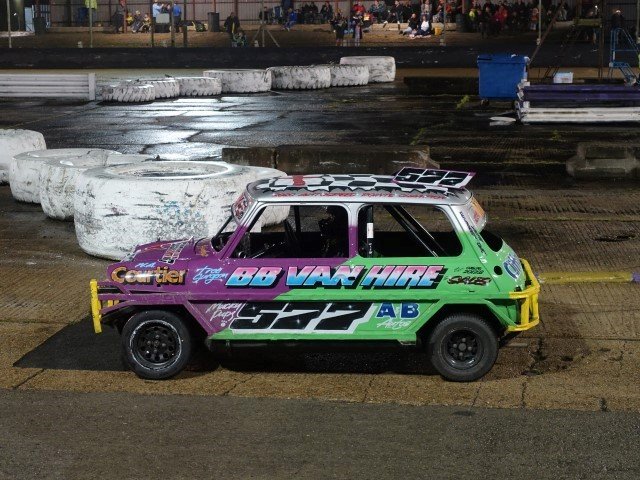

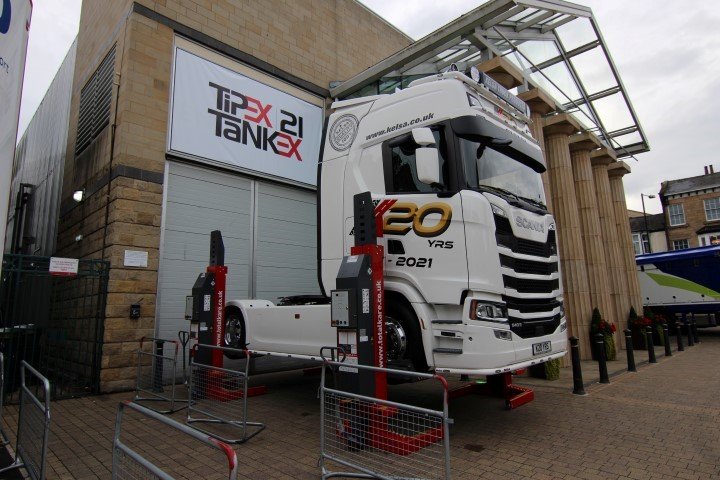
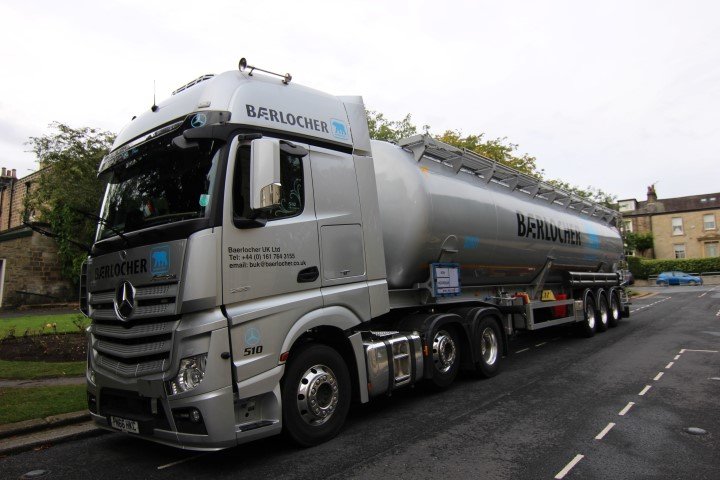

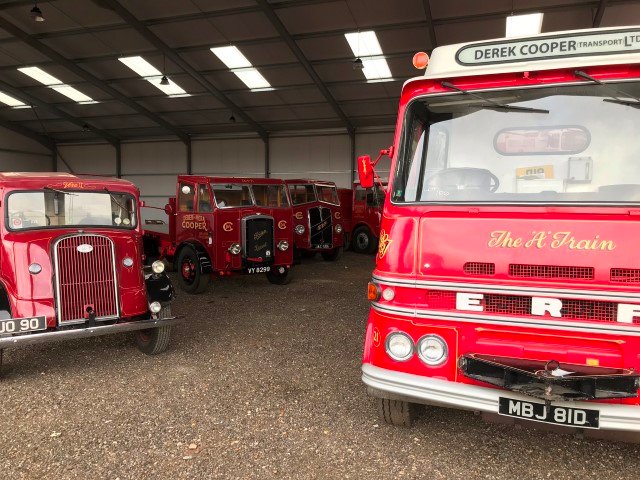

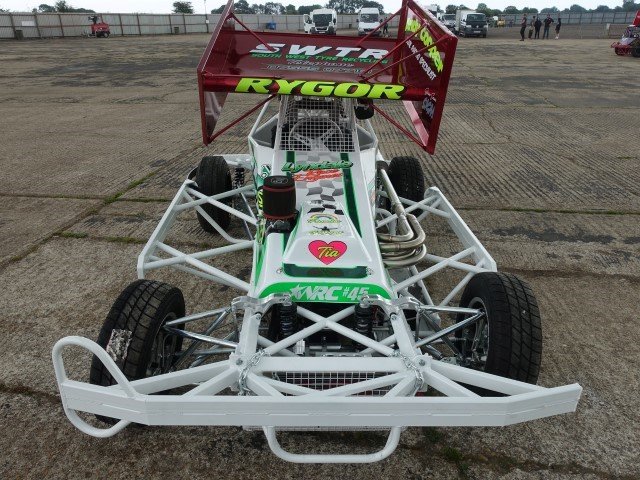
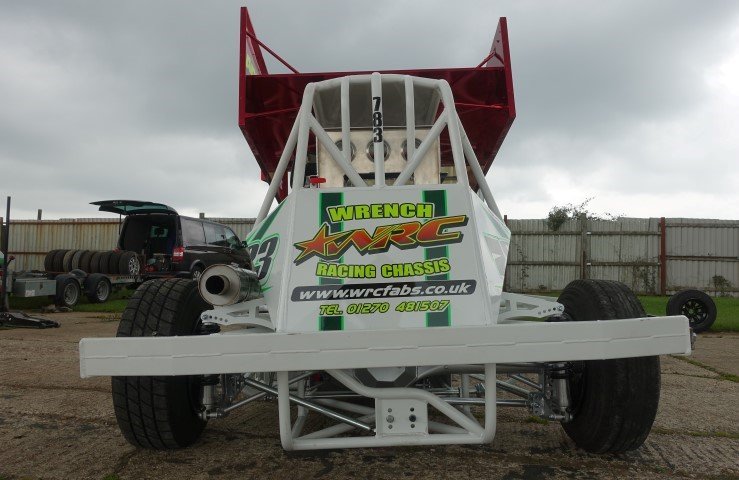
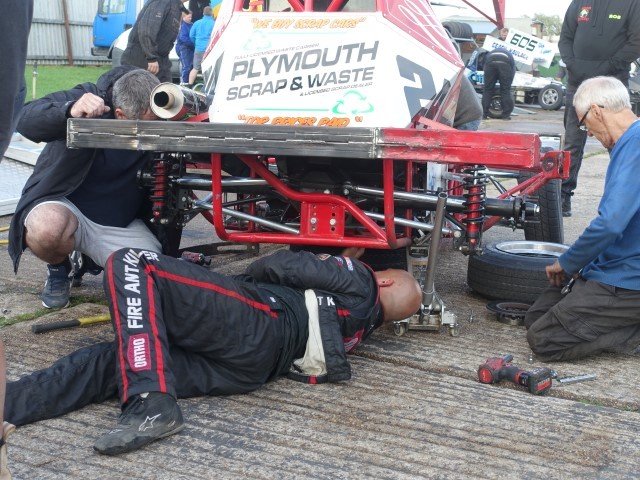
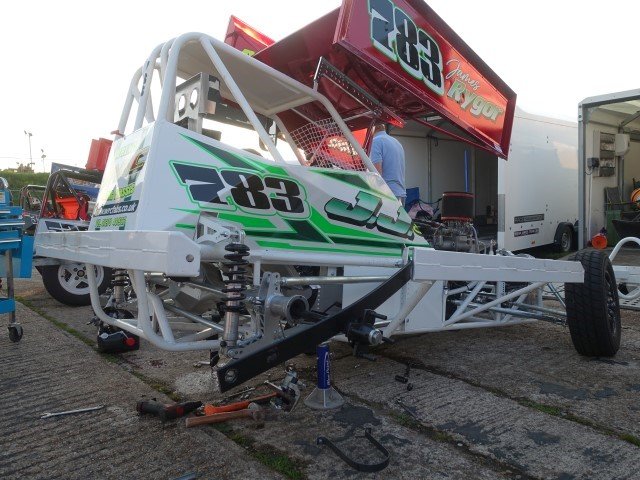
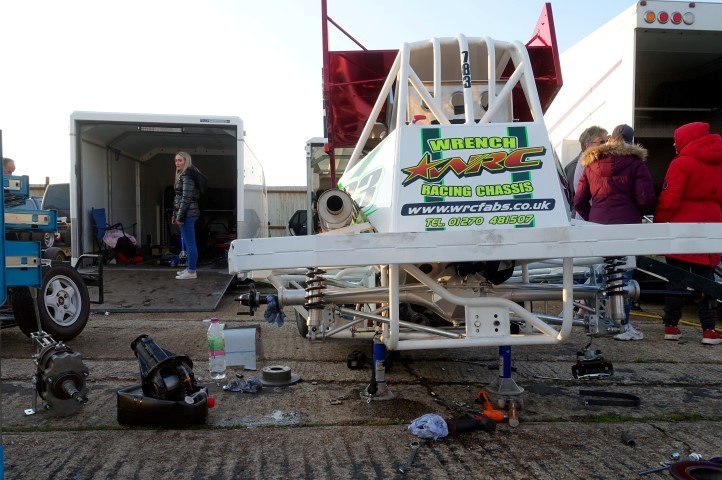
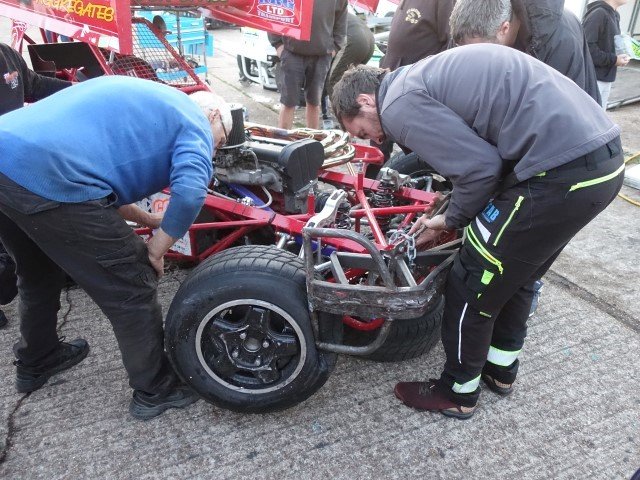
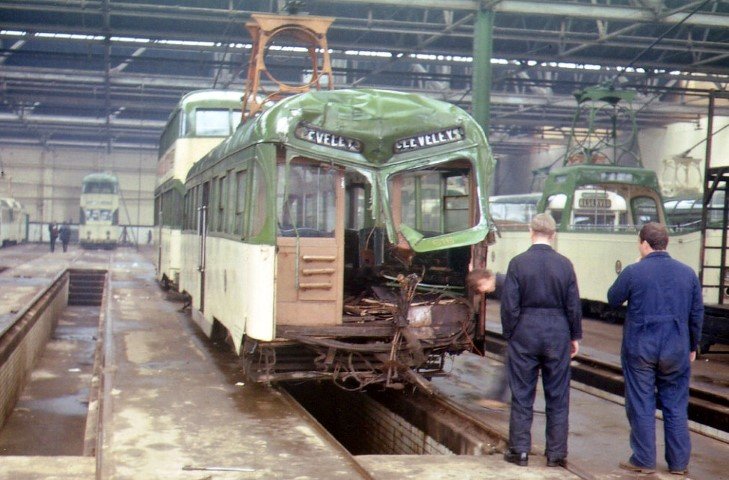
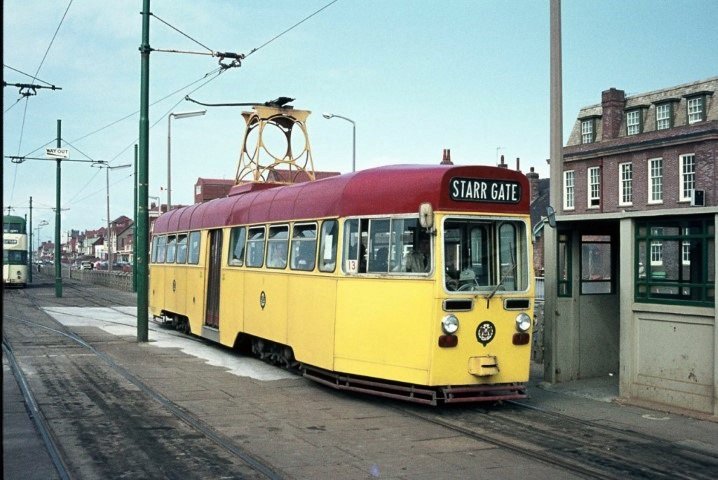
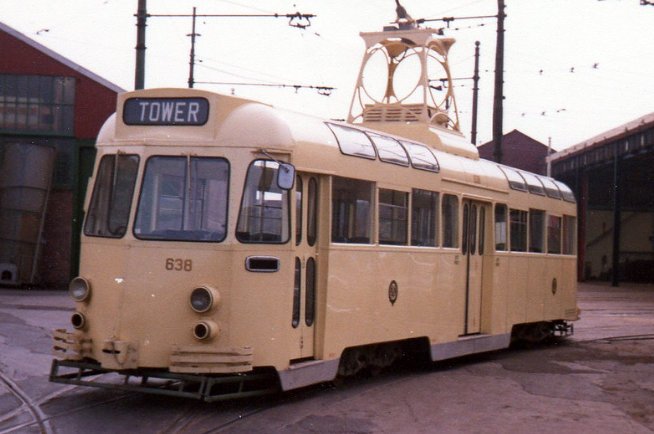

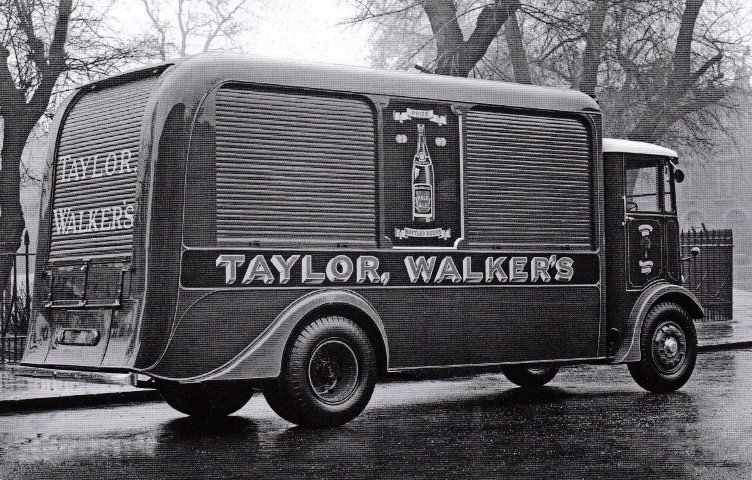
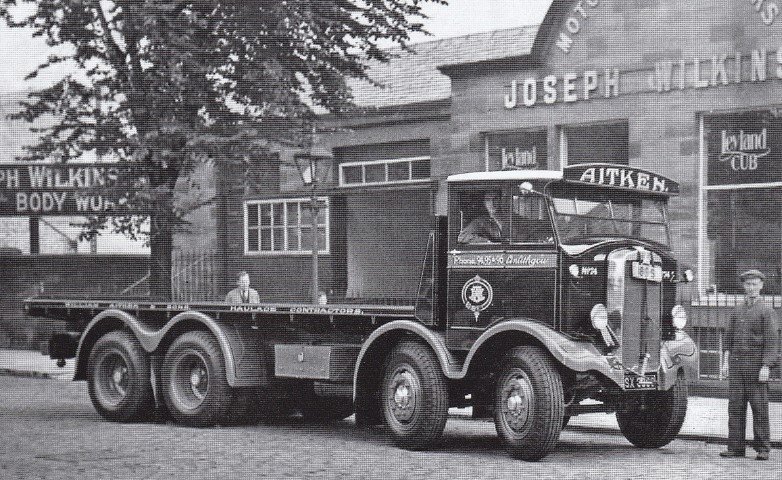
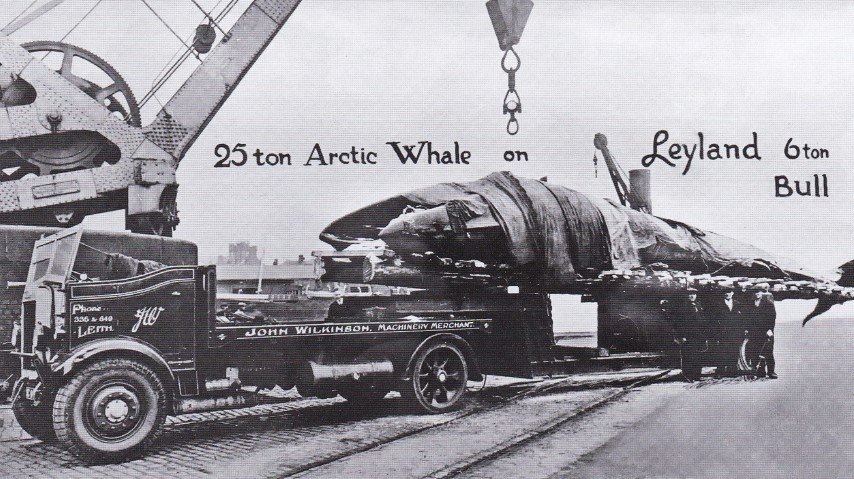
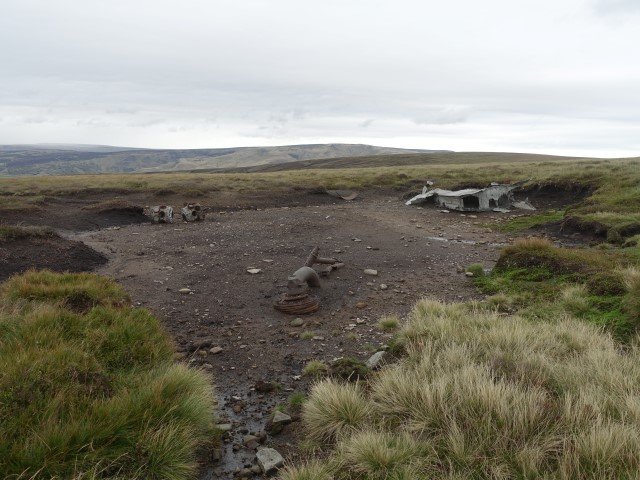

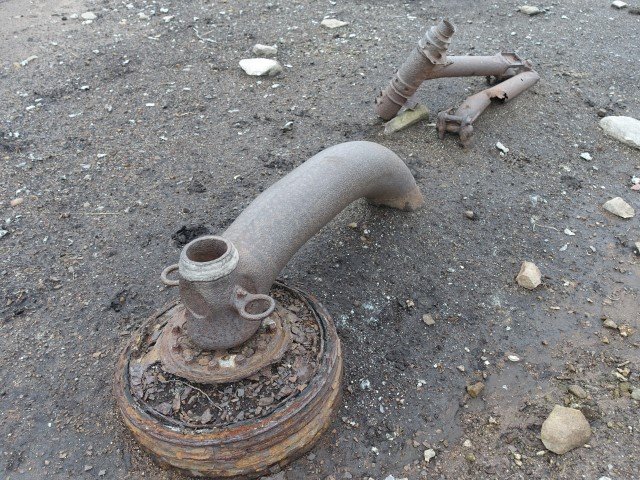
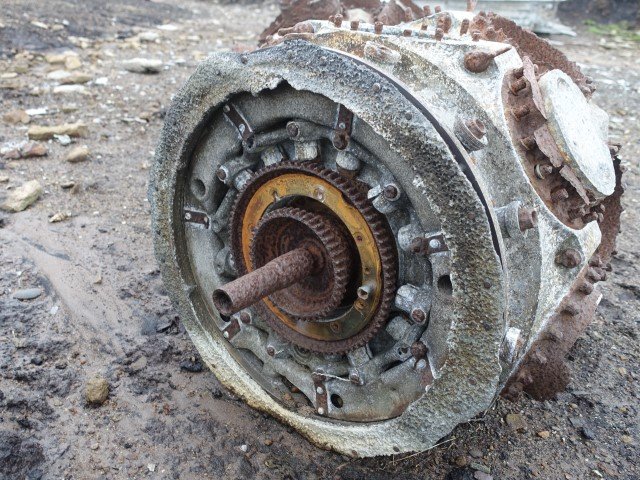
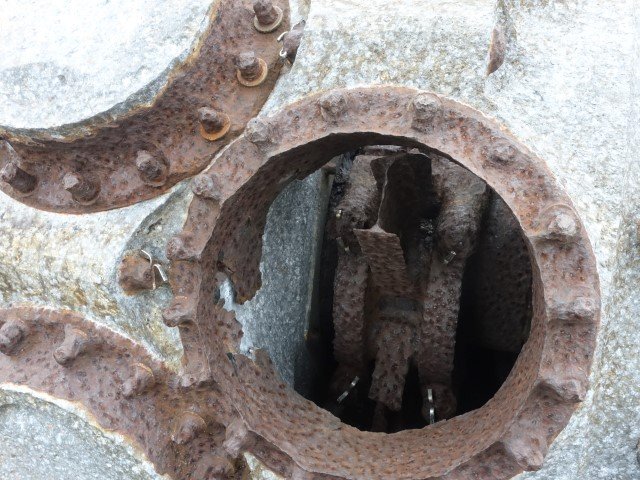
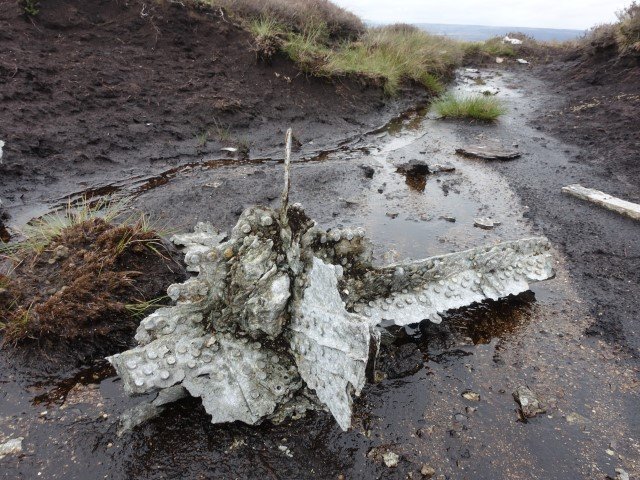
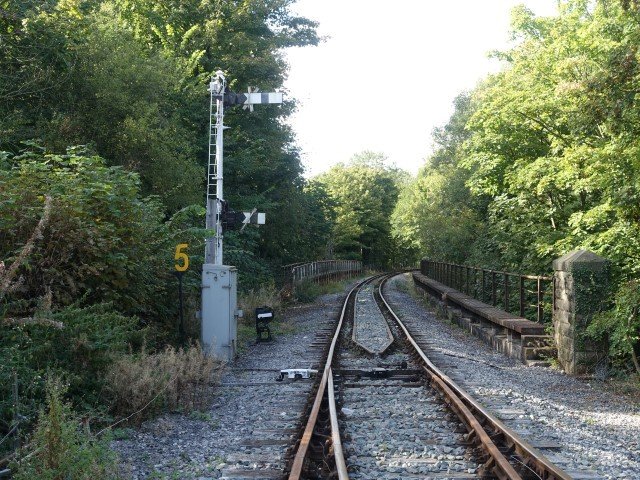
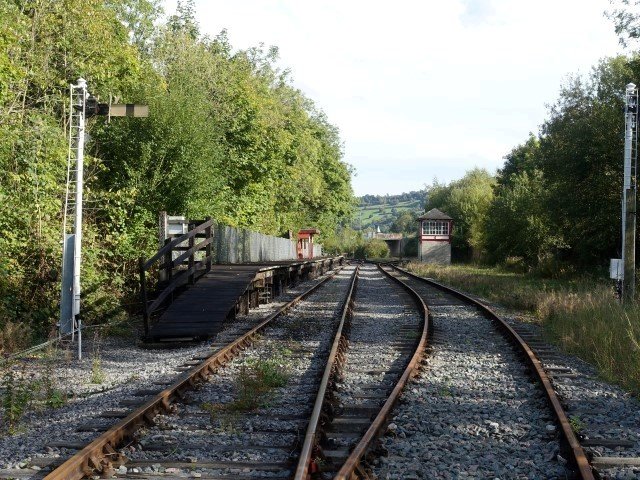
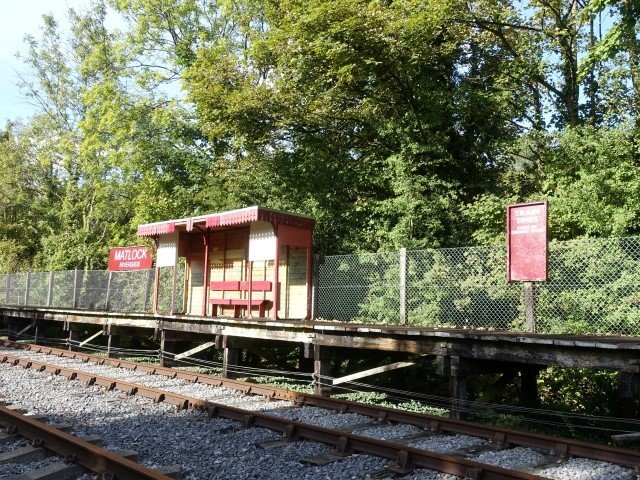
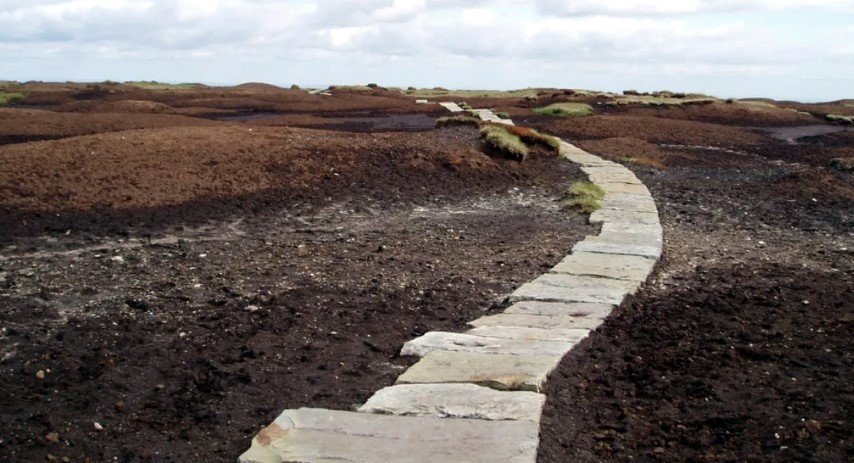
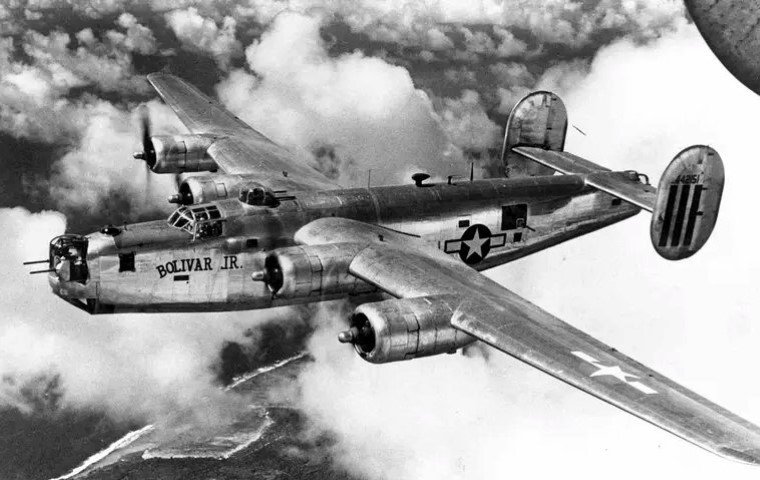
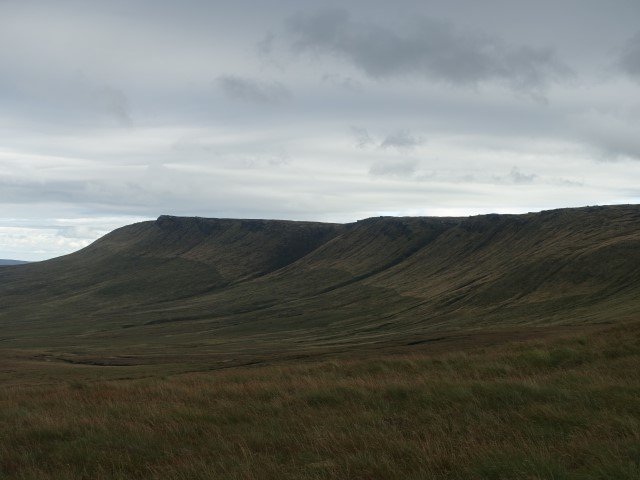
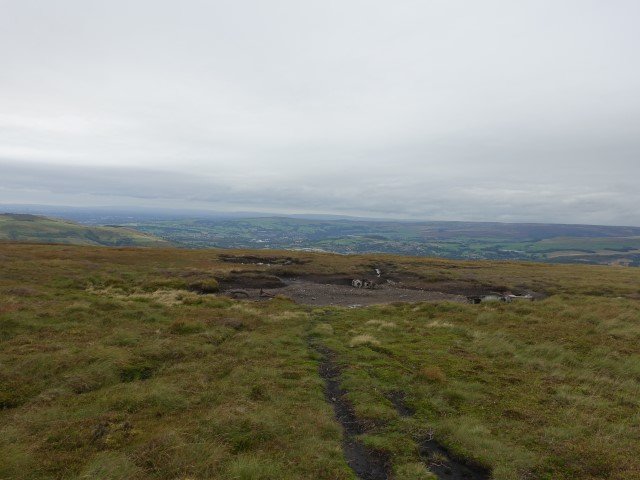
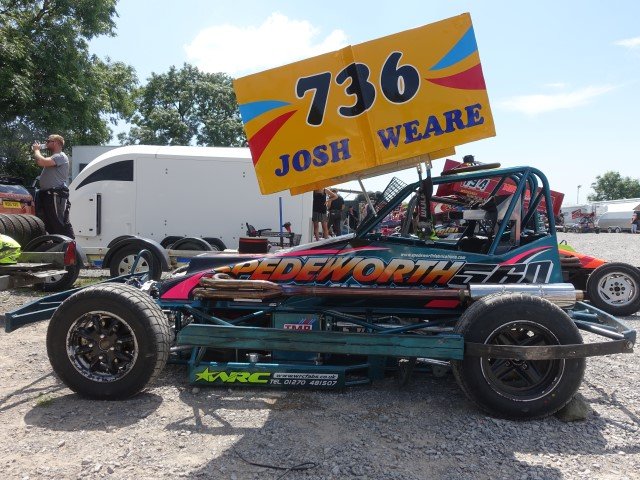
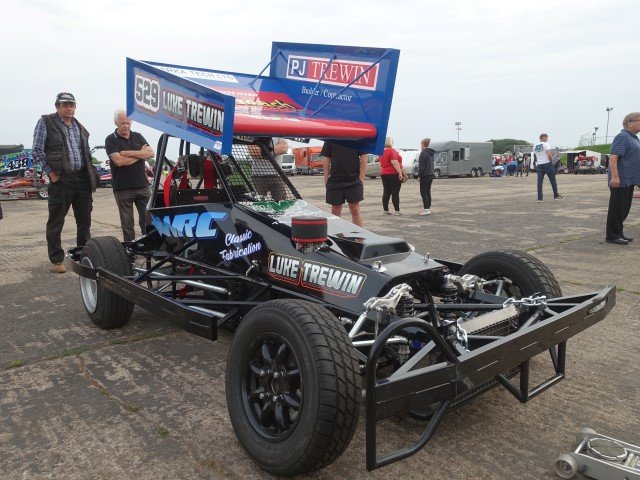
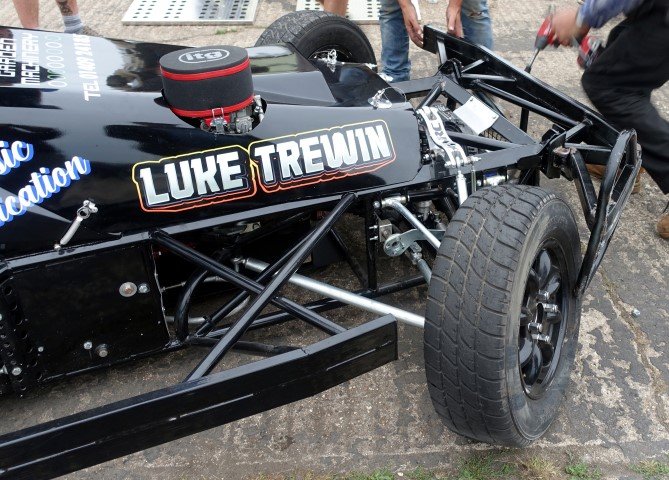

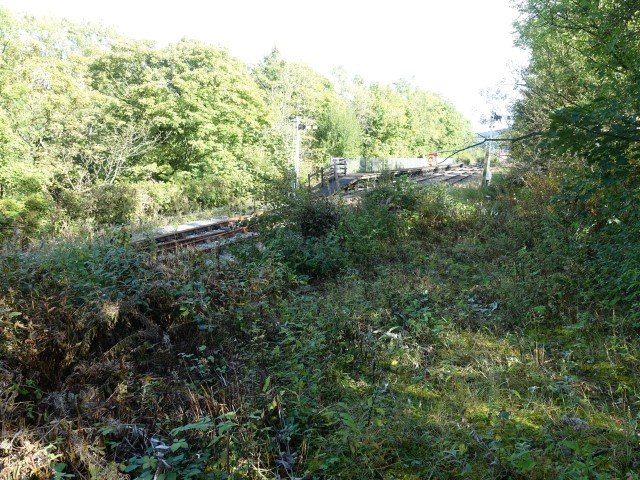

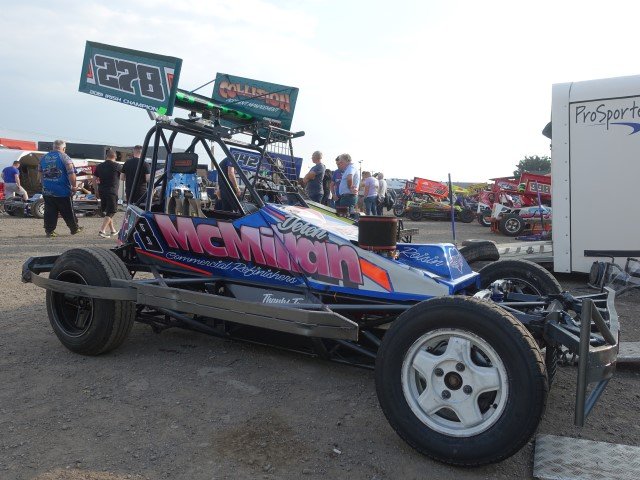
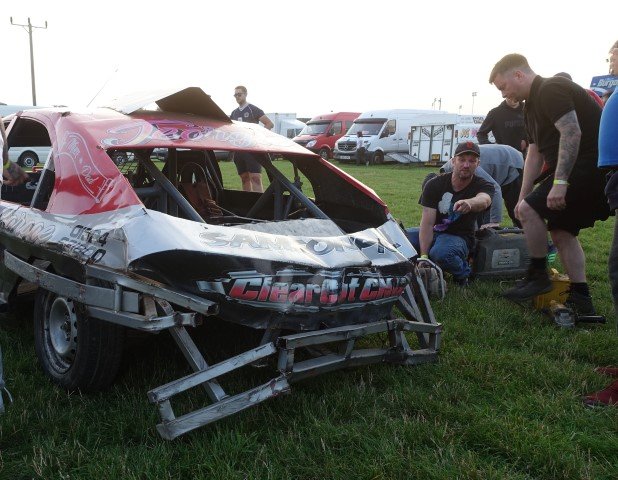
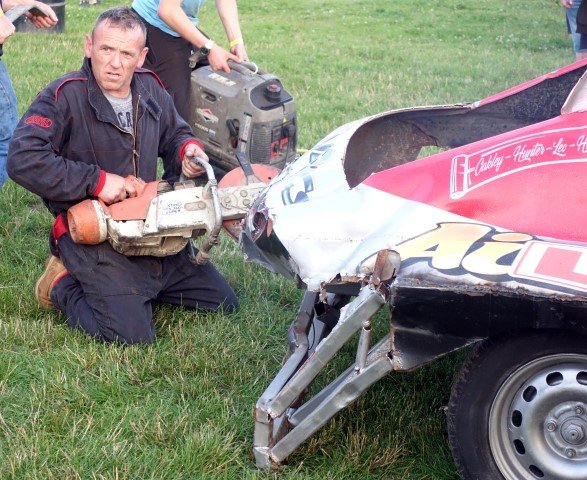
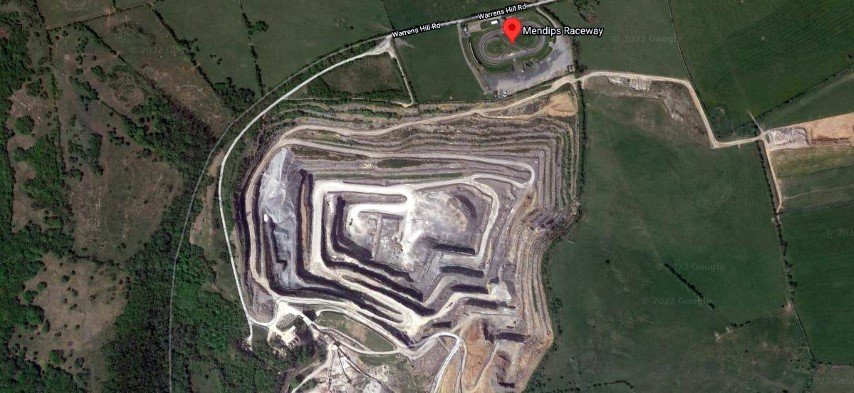

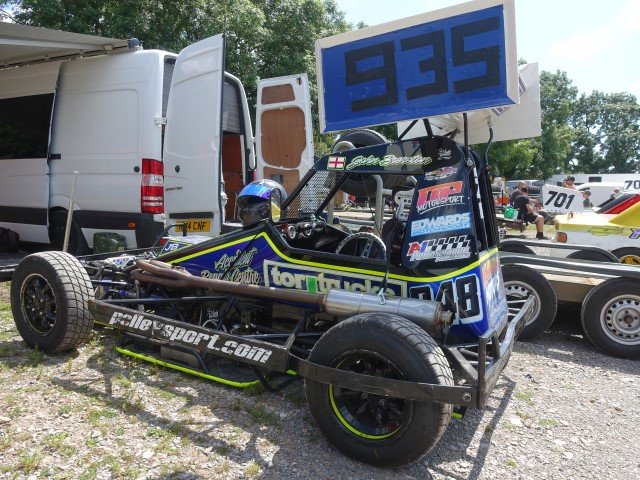
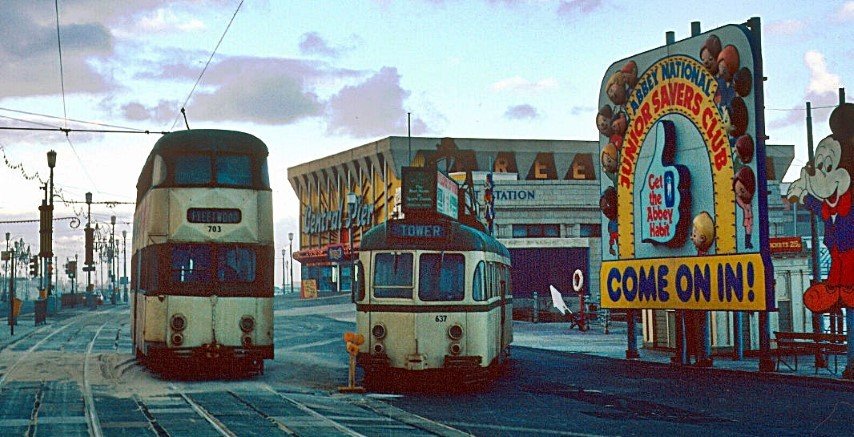
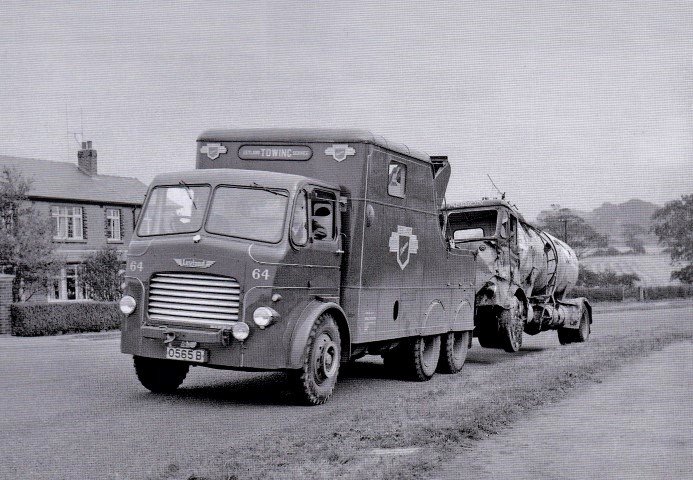
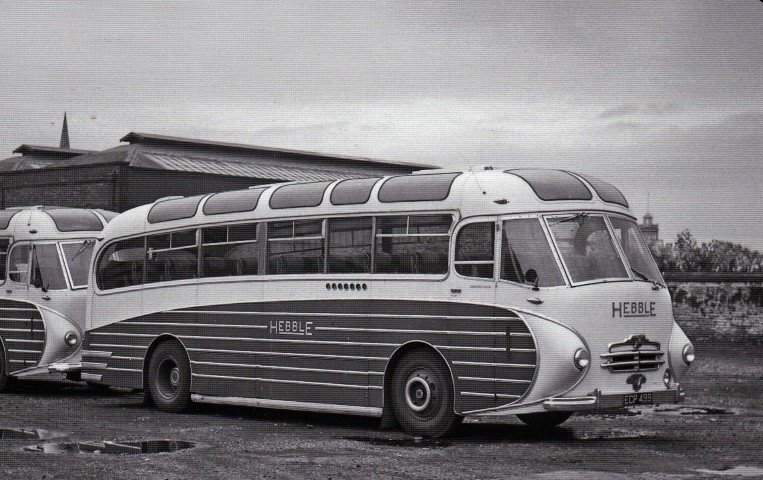
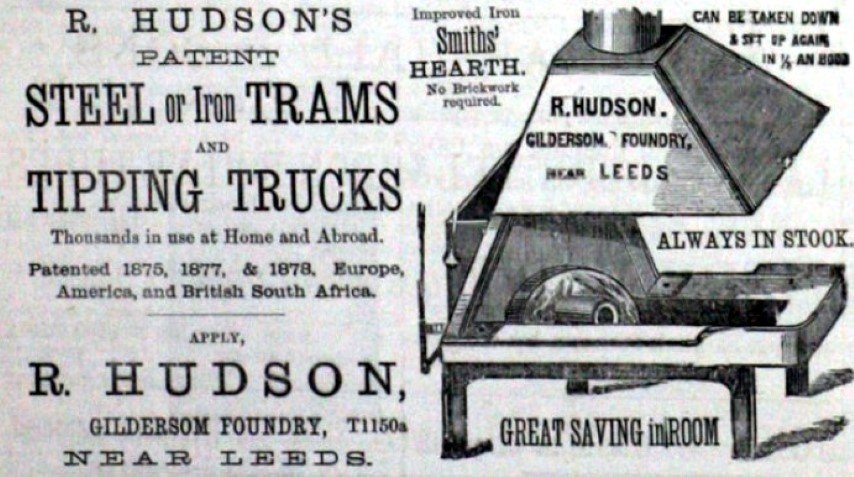
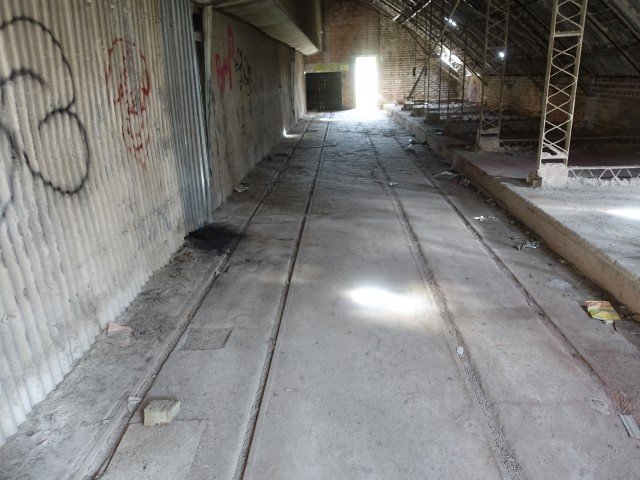
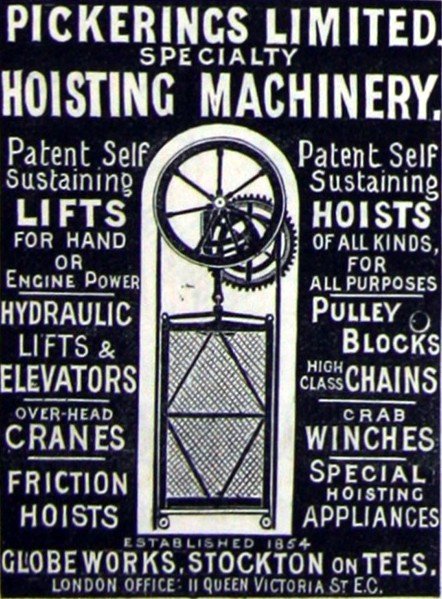
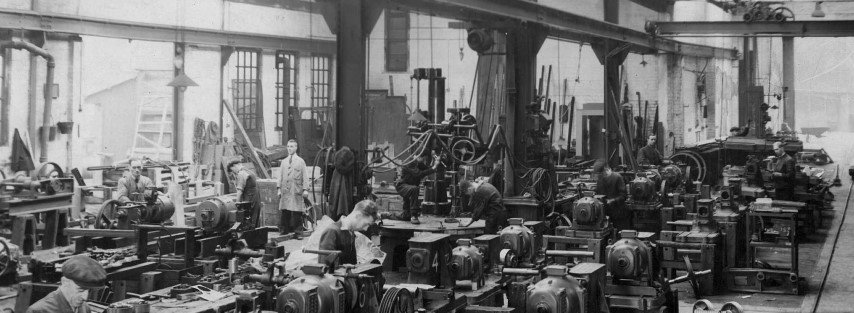
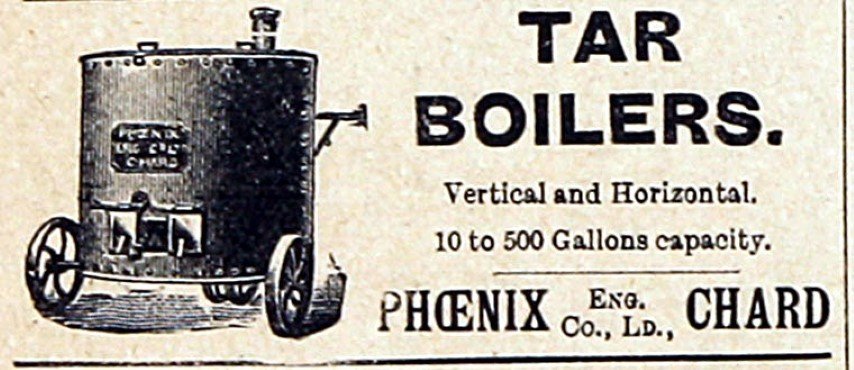
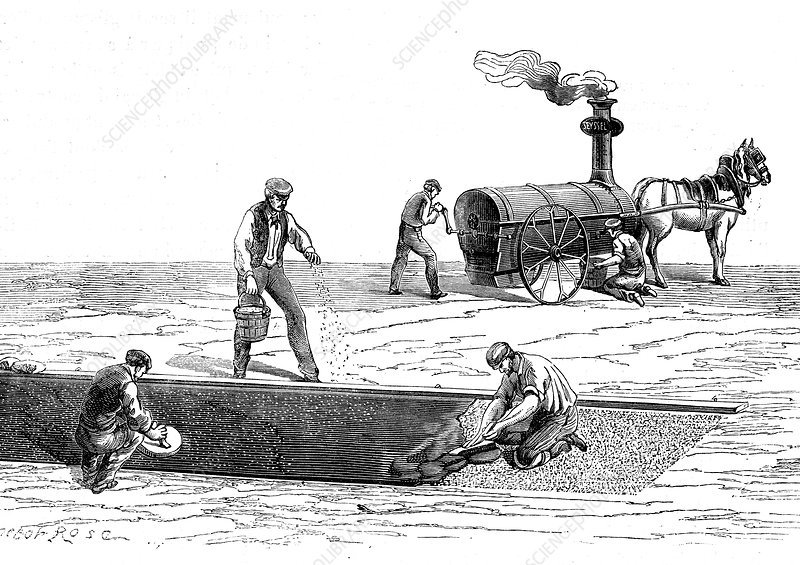
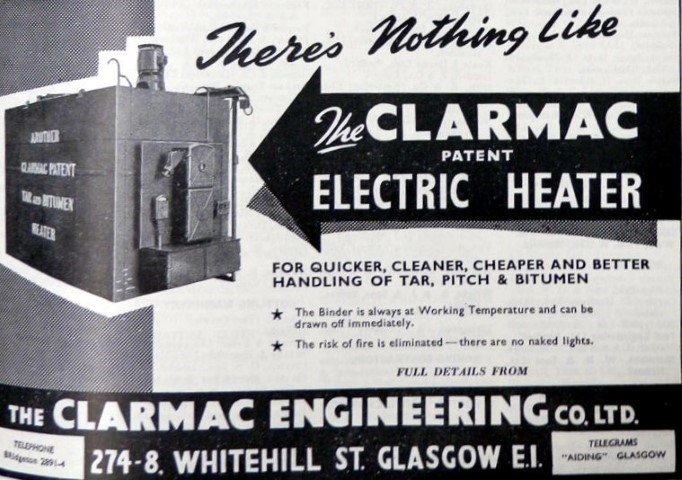

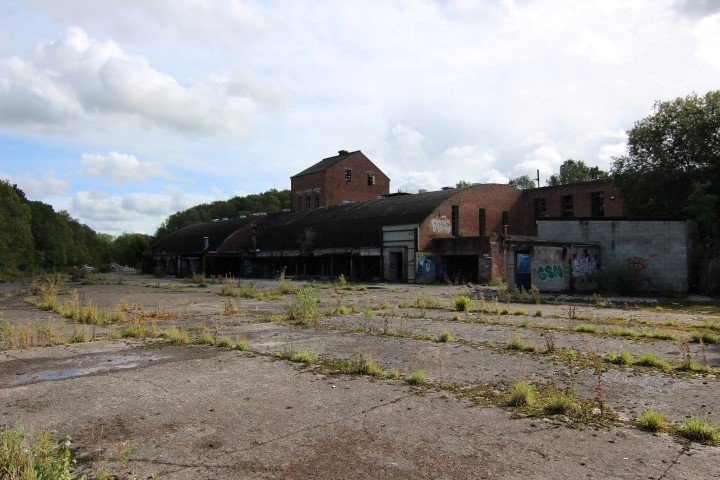
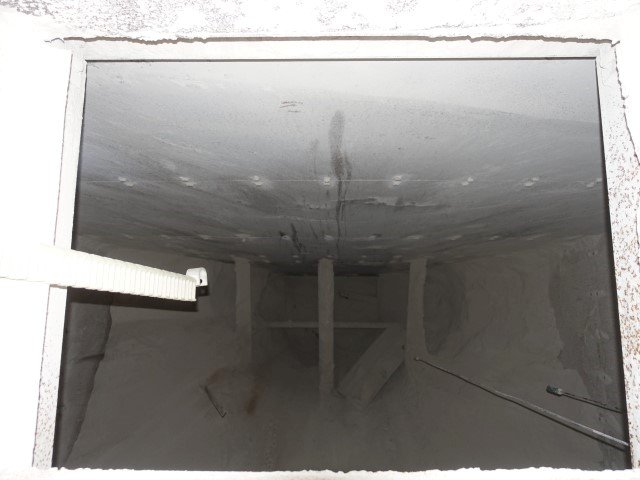
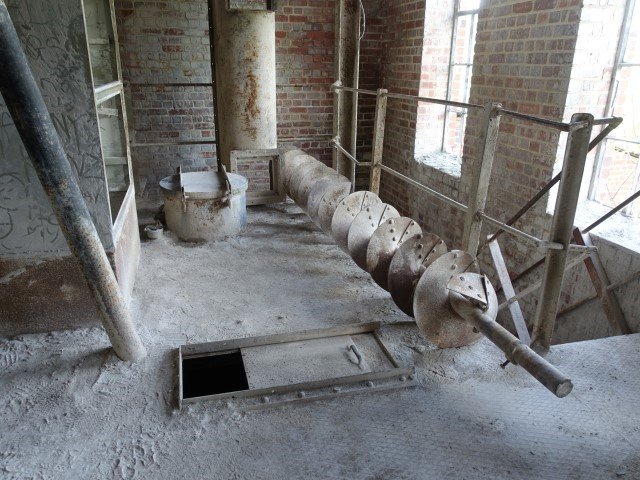
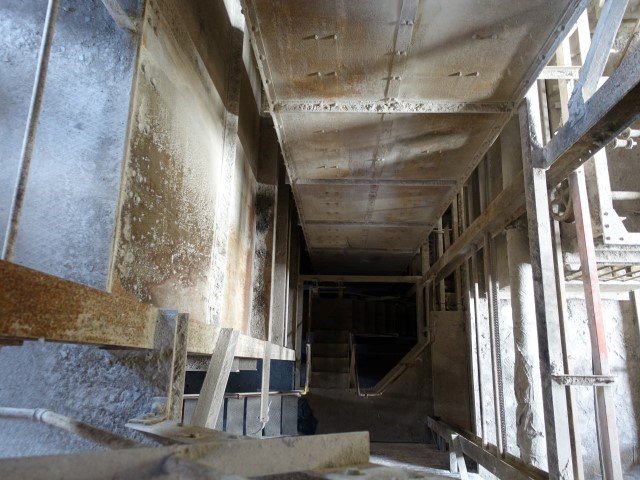
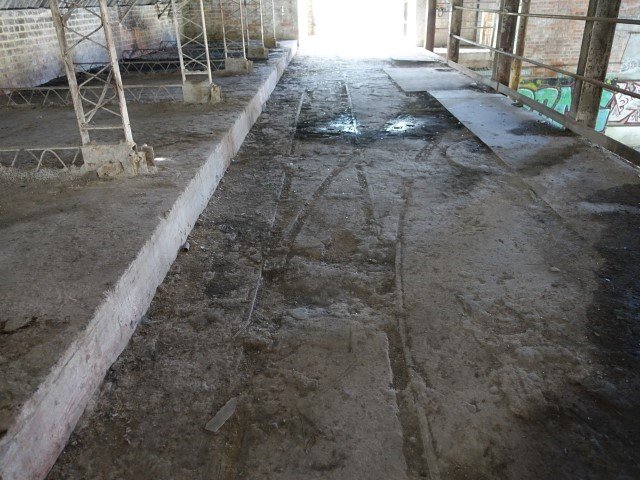
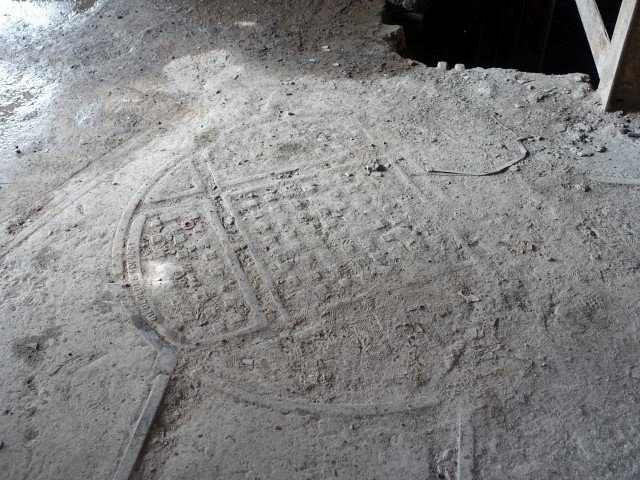

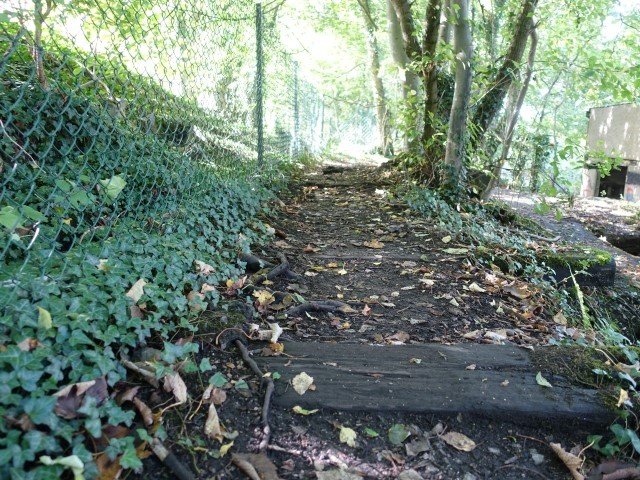
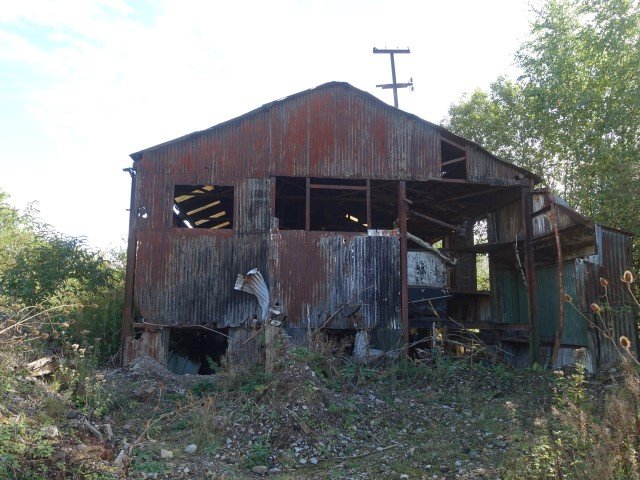
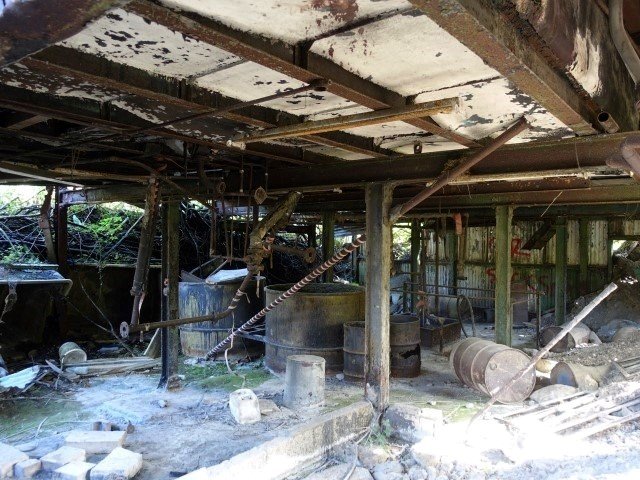
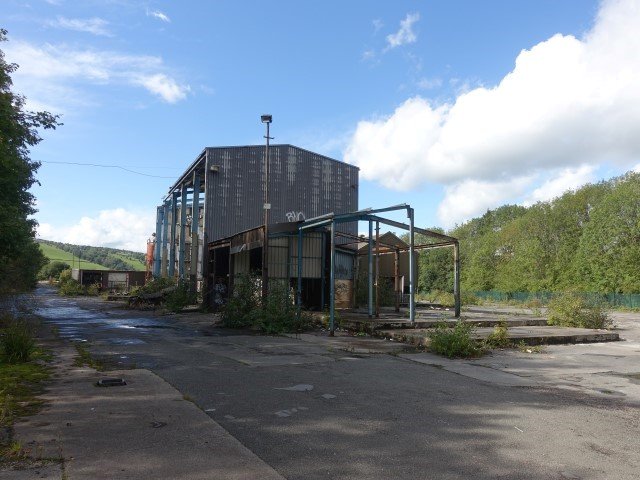
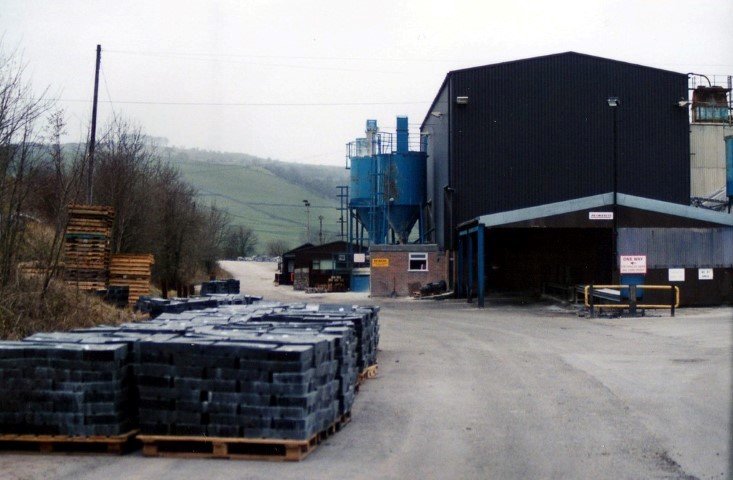
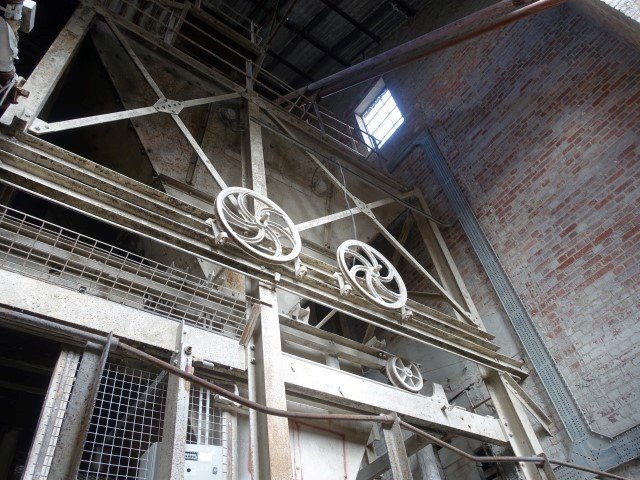
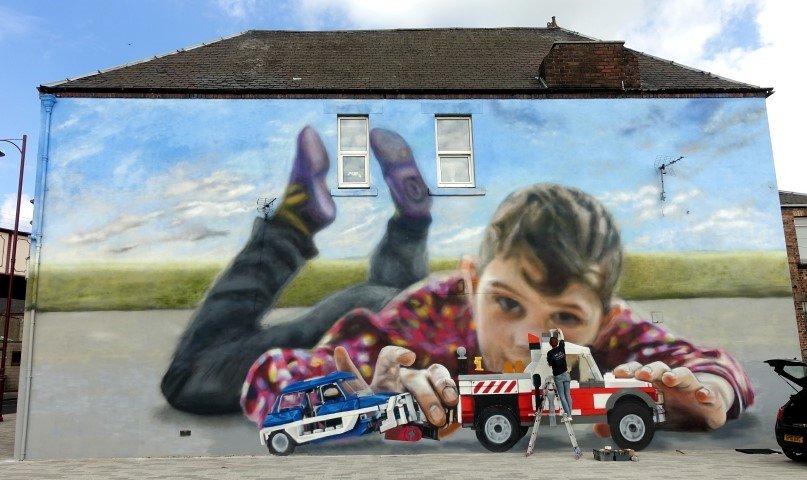
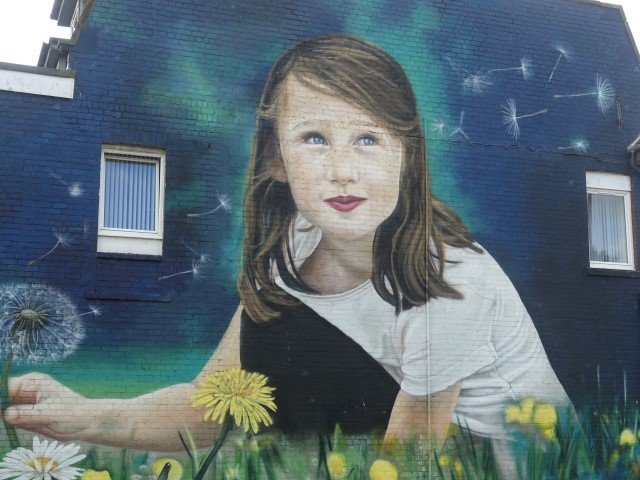

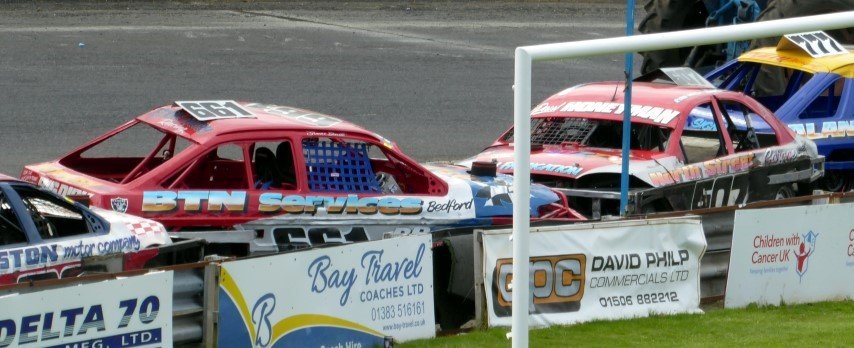

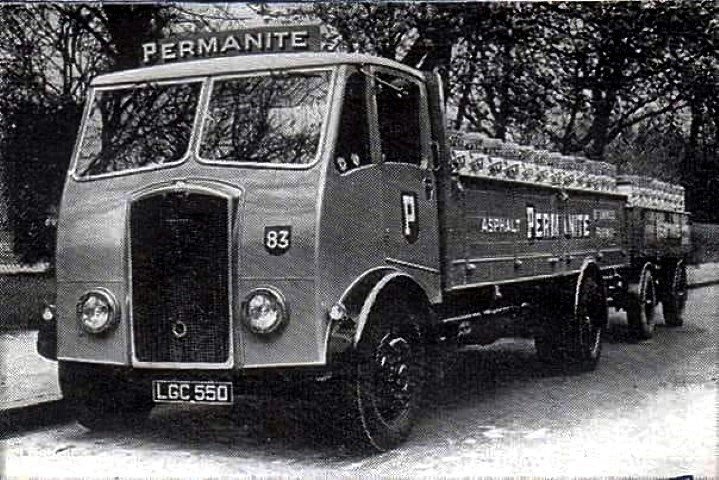
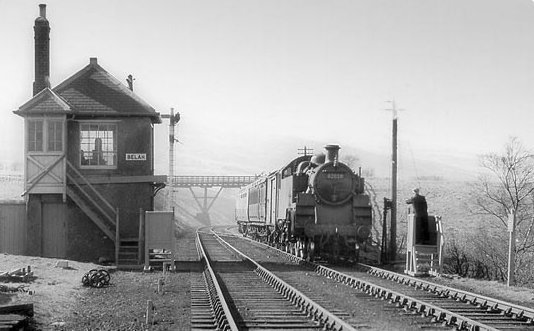

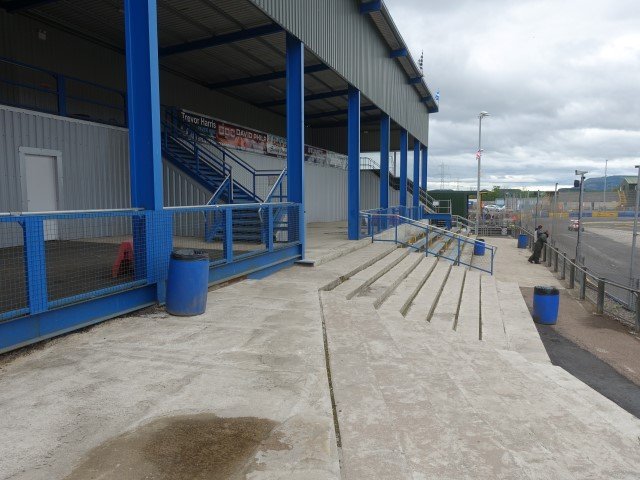
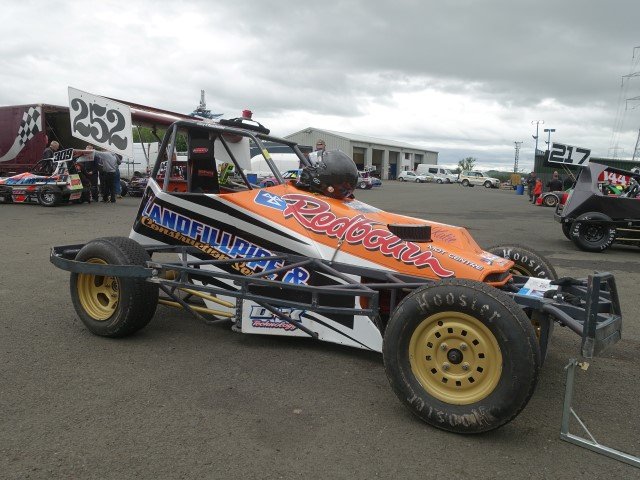
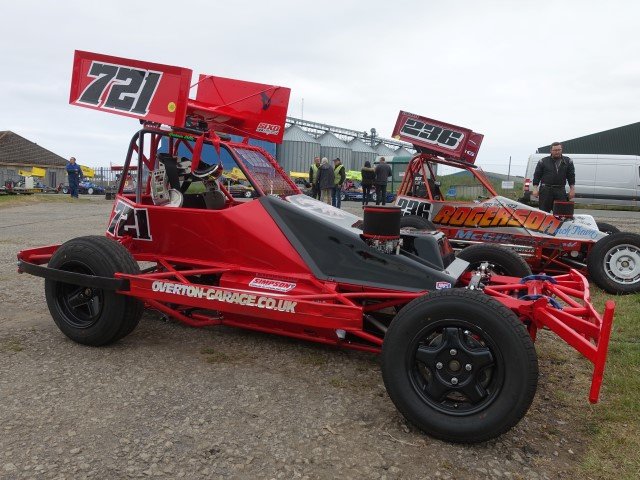
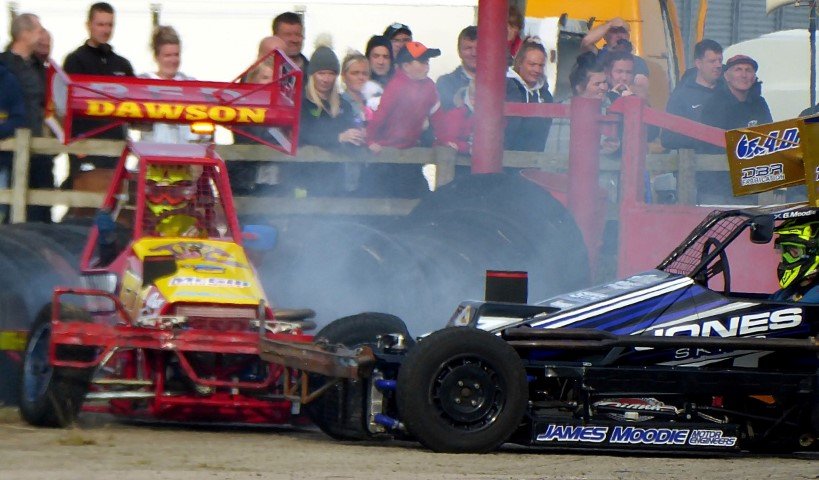
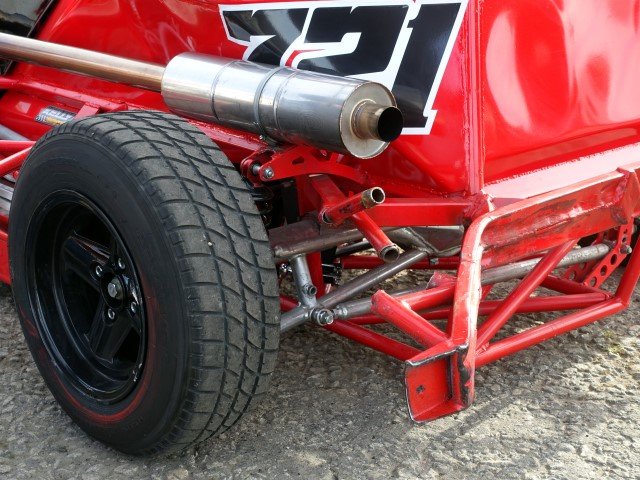
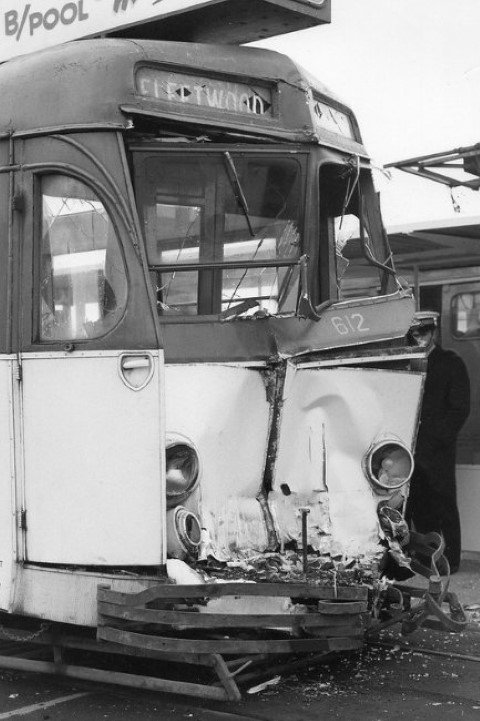
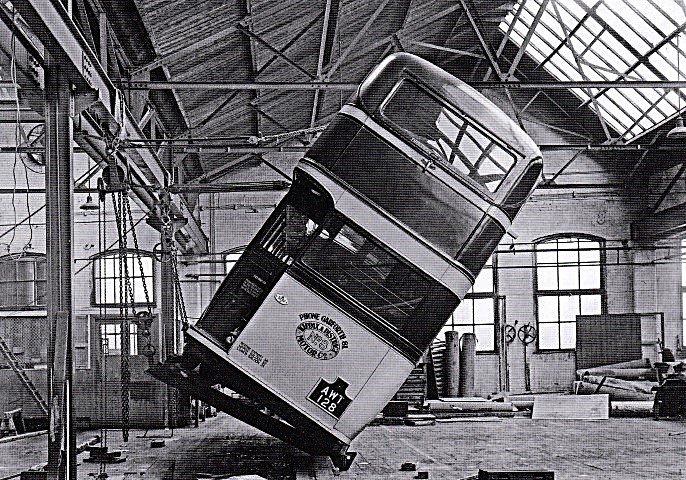


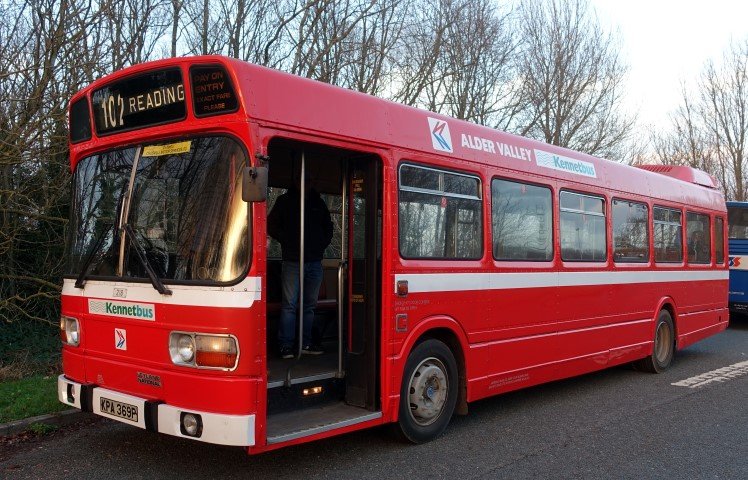
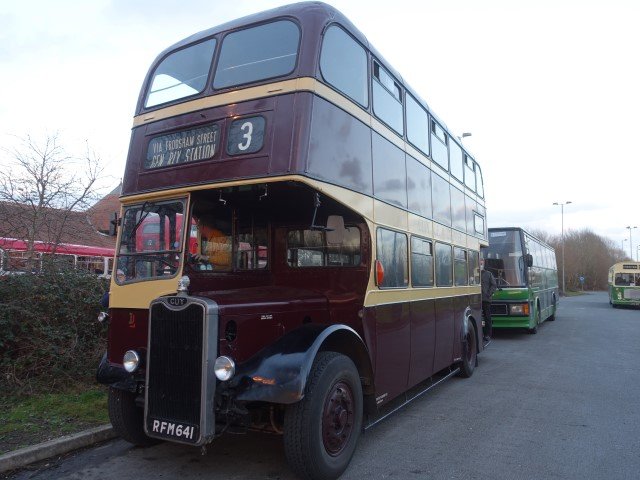
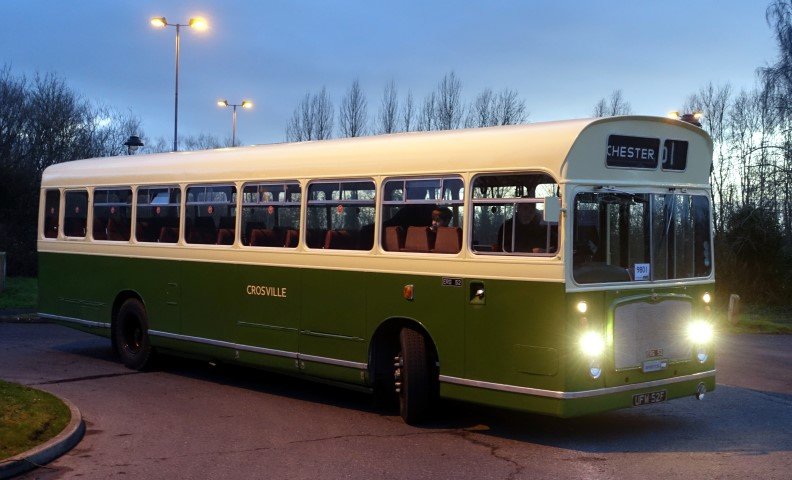
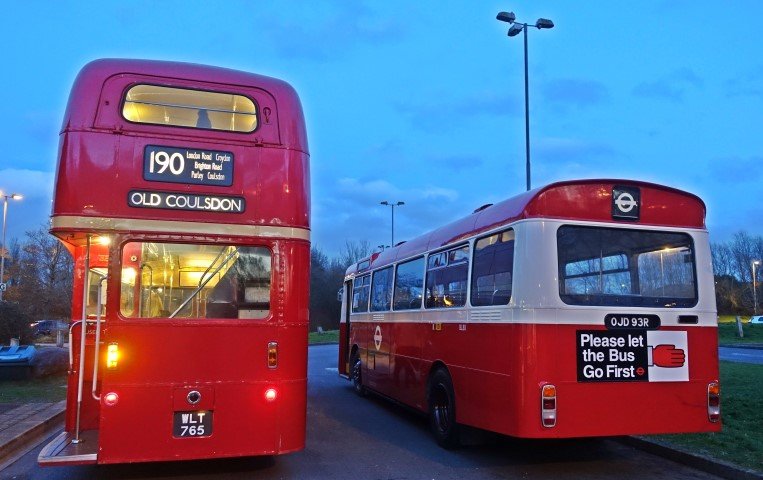
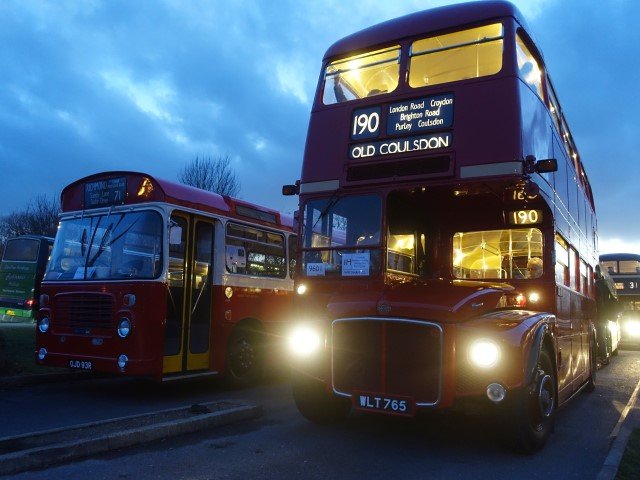
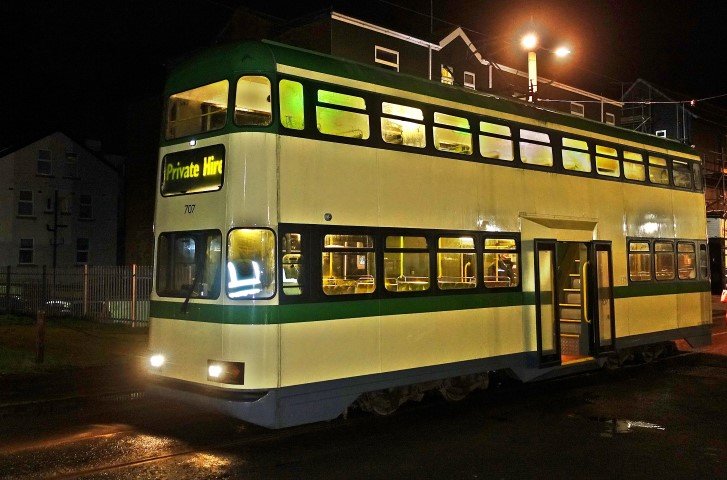

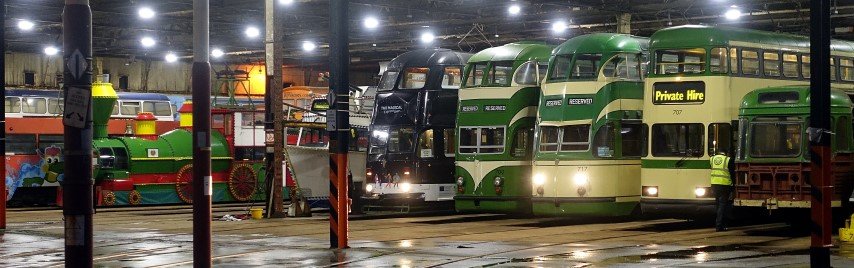

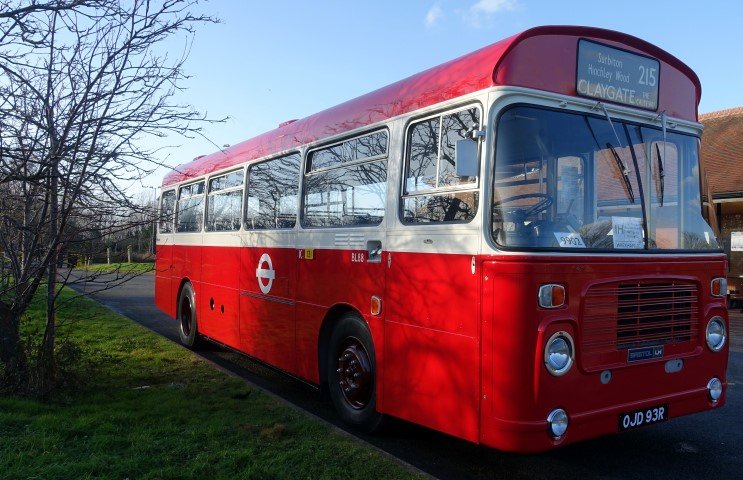
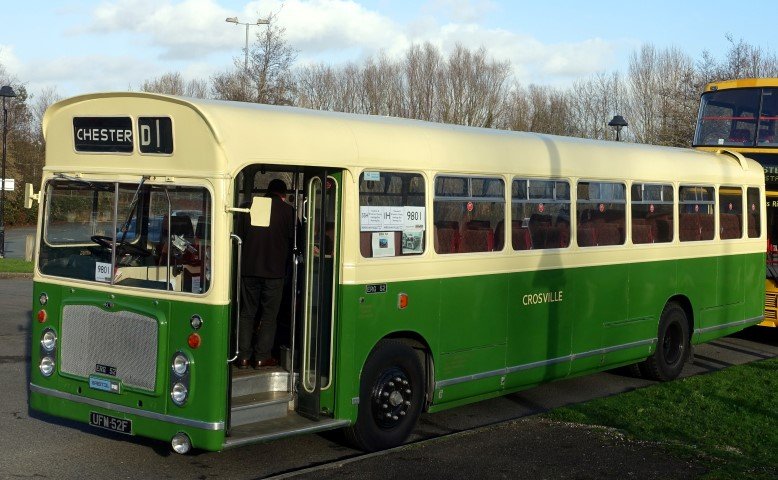
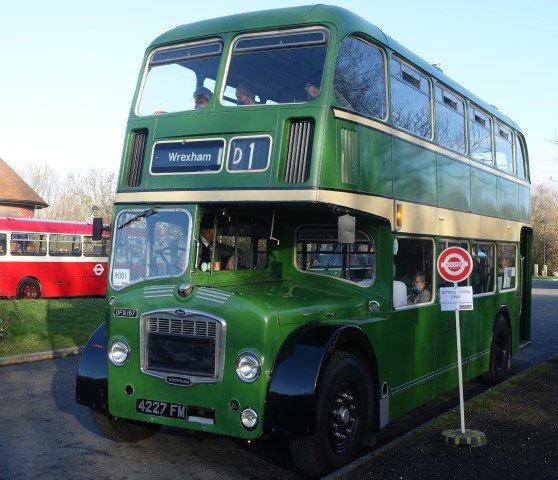
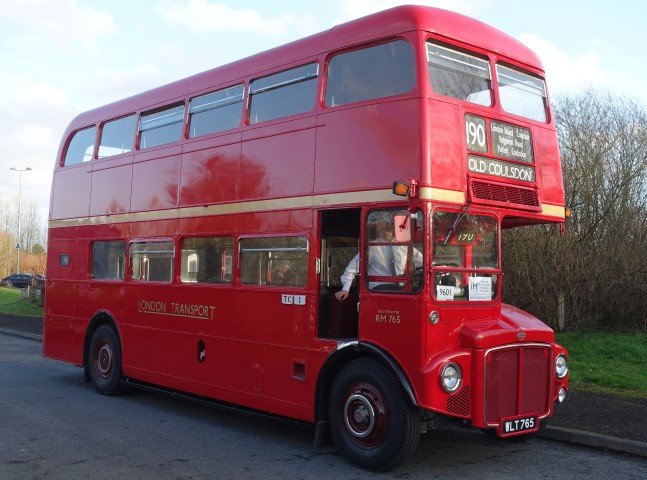
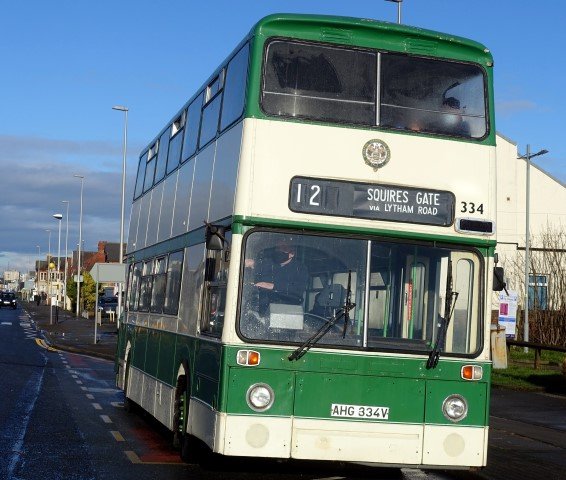
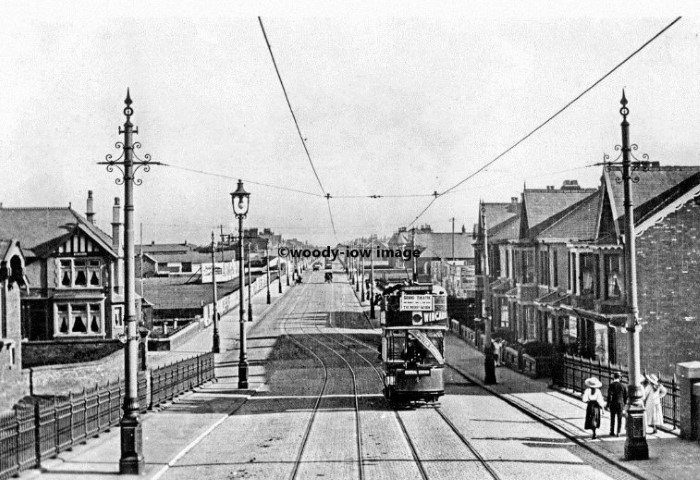
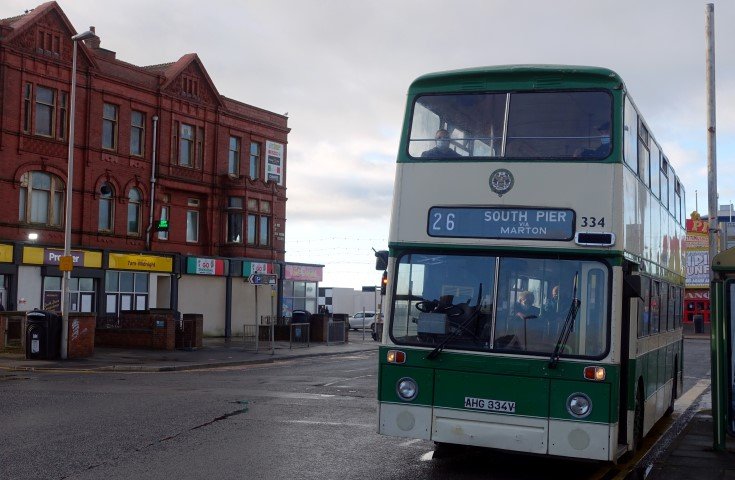
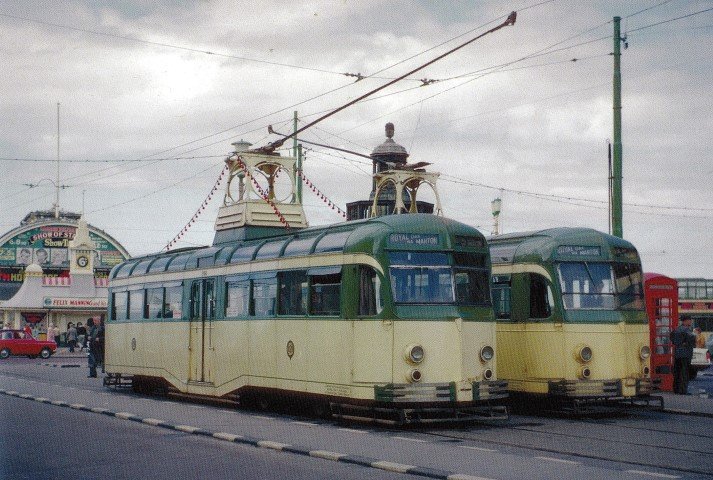
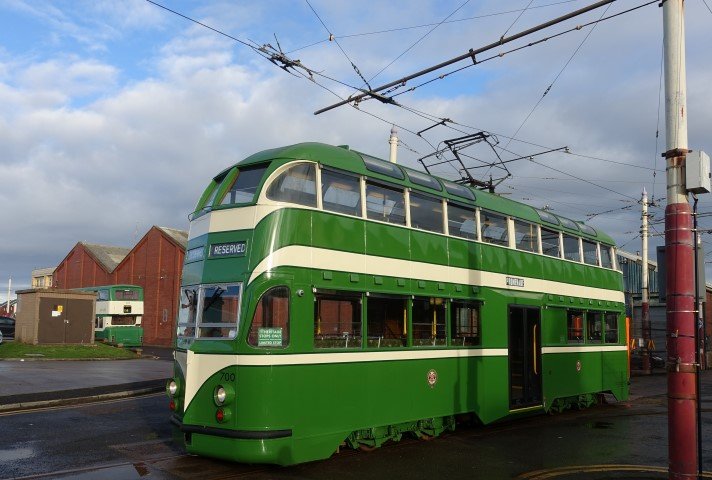
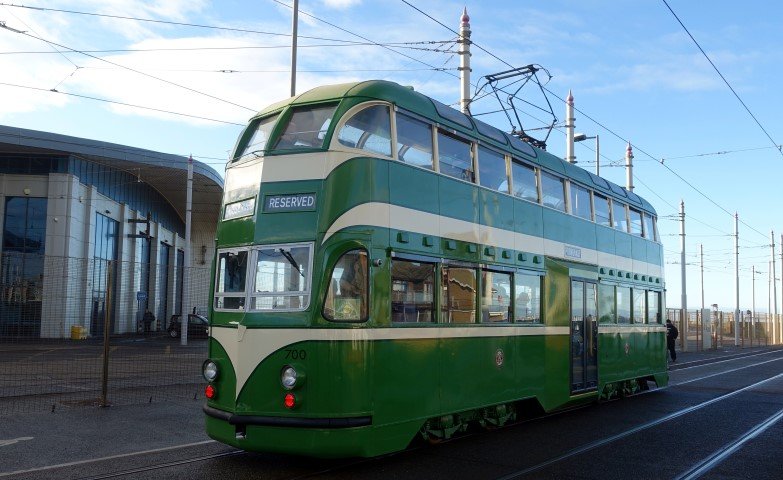

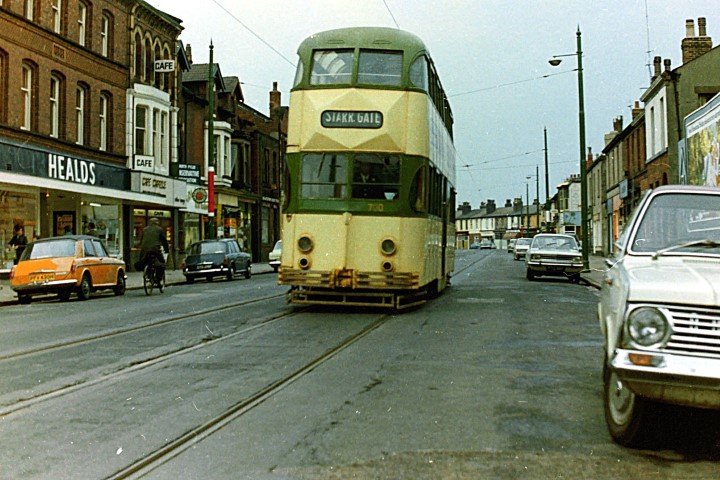


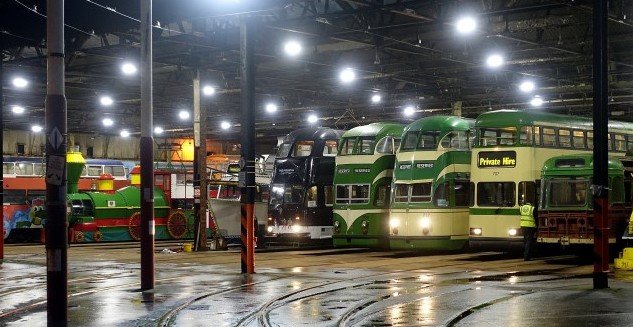
xc(Small).jpg.53fea4ede3a92738864e2029a9da76d8.jpg)
a(Small).jpg.1a70f1154b141ed629769cbcd3eb6186.jpg)
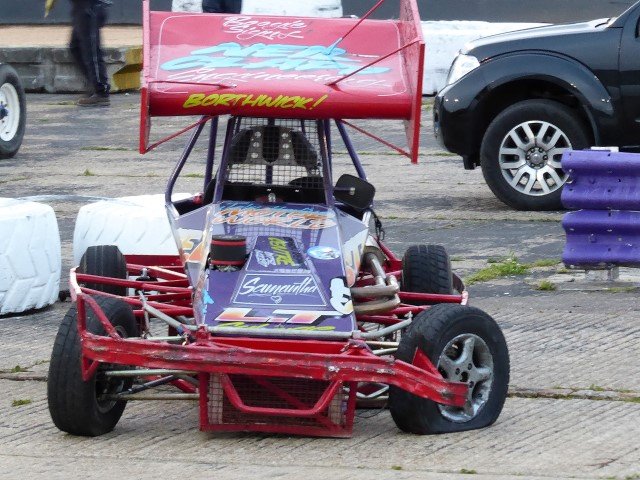
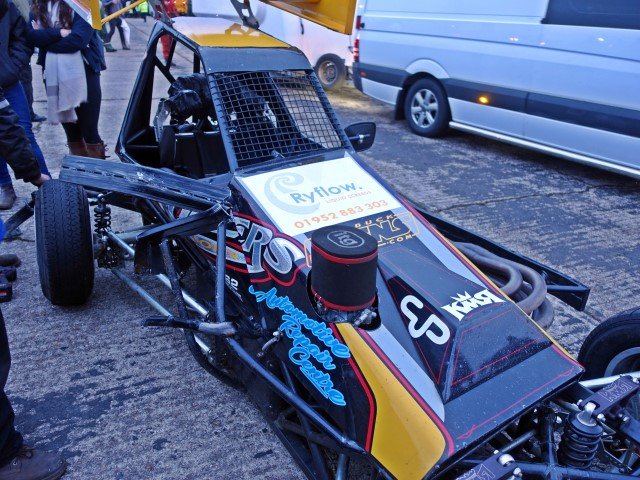
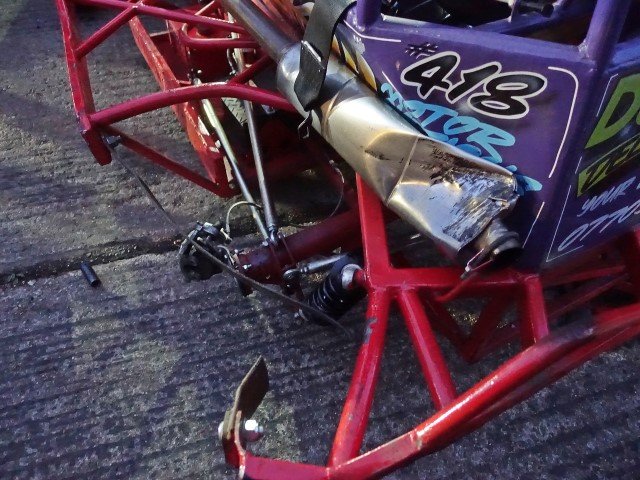
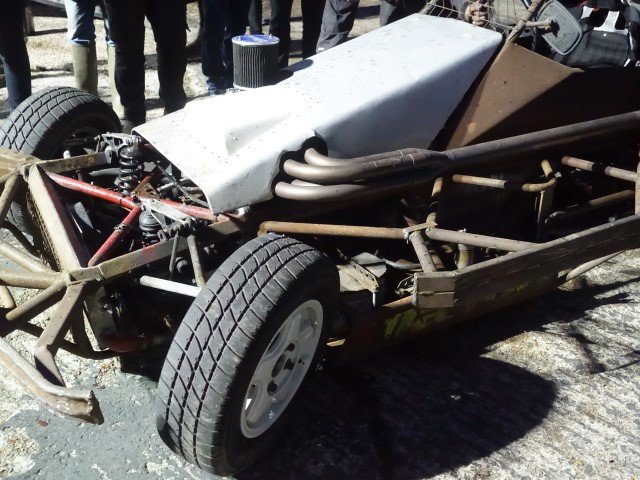
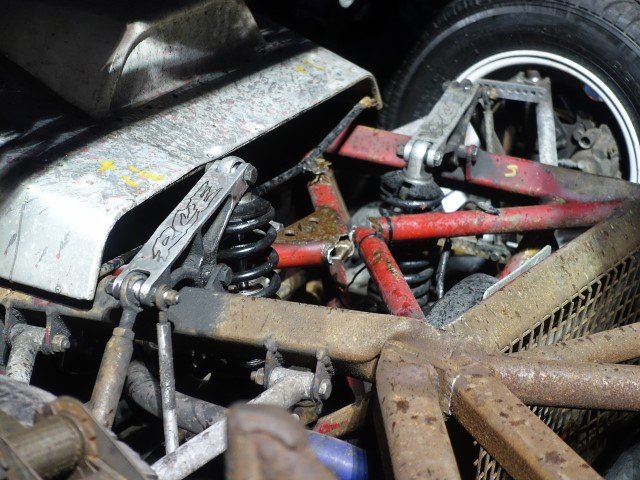
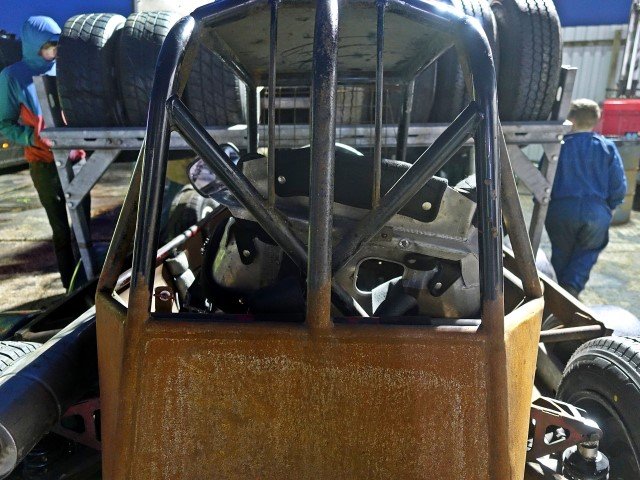
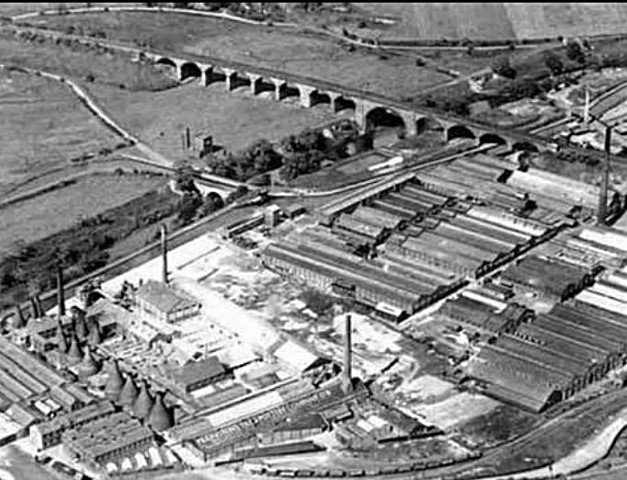
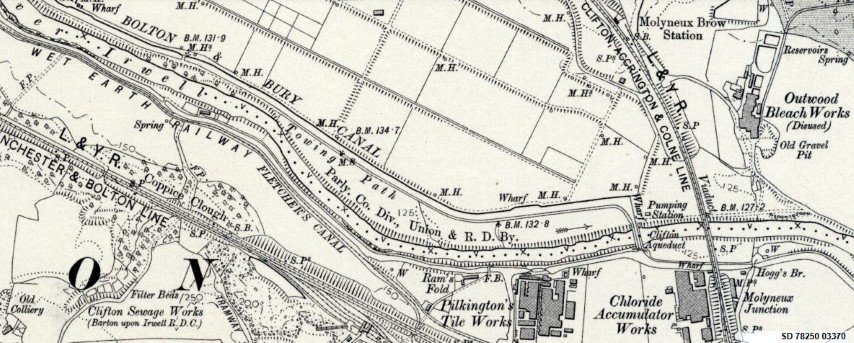
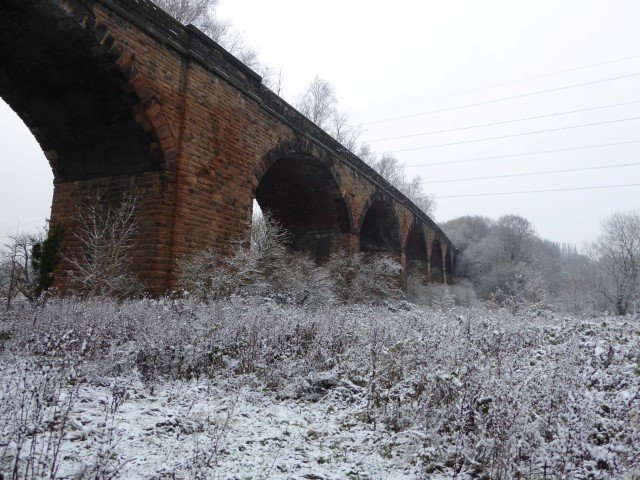


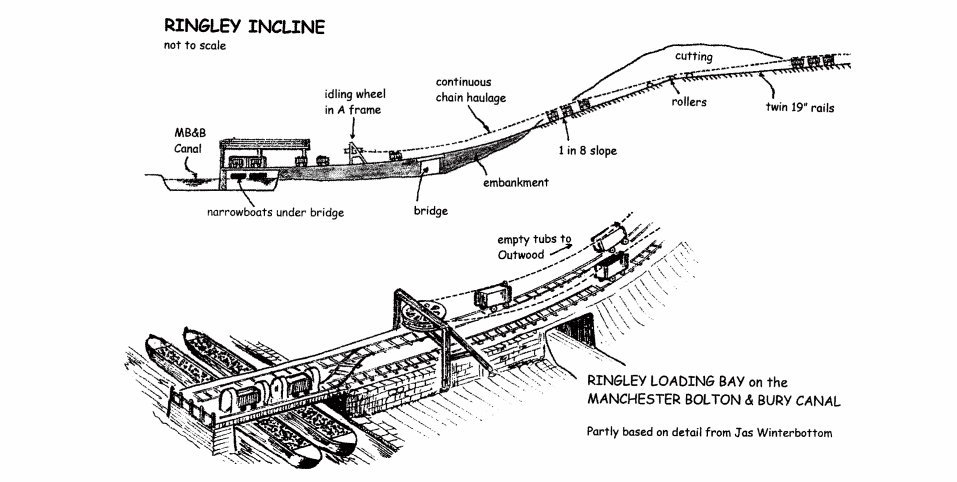
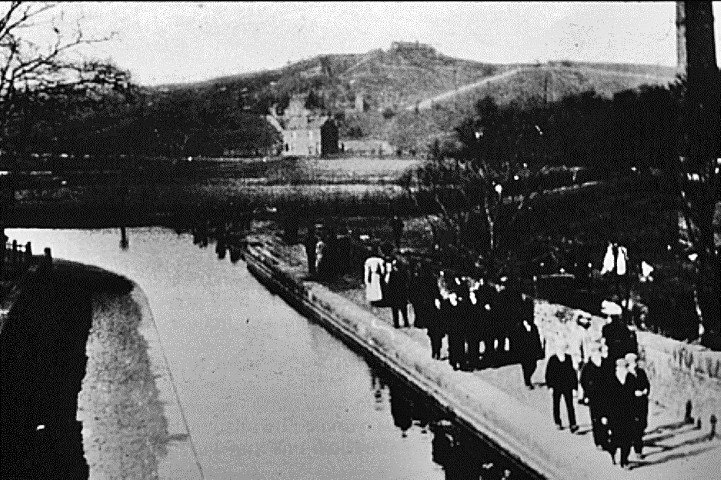
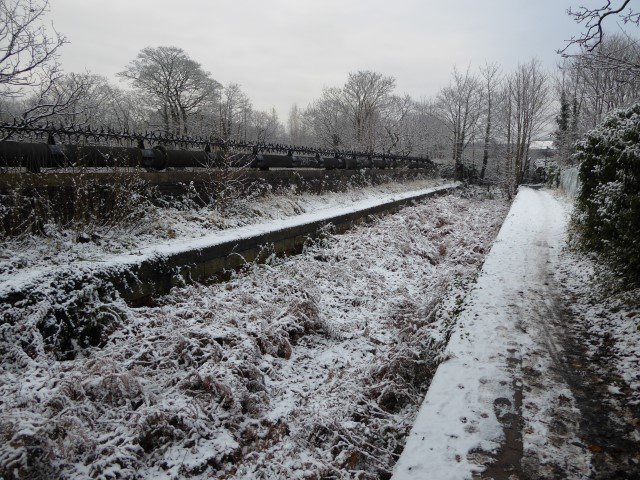
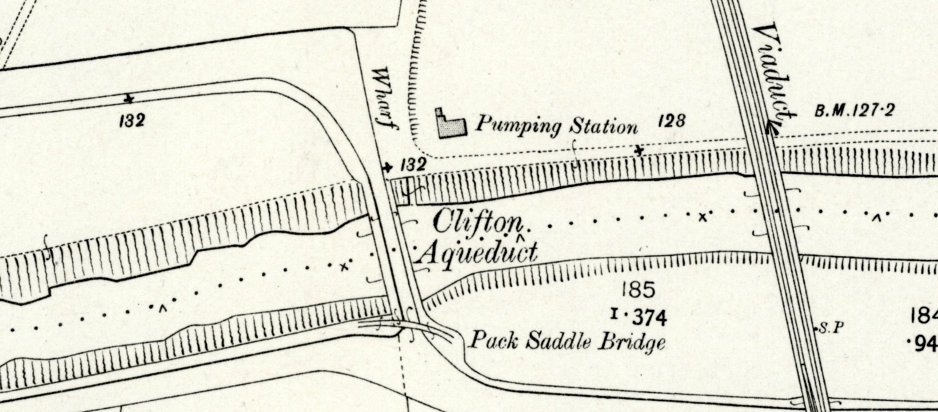
fromFletchersCanal_Thestonetowpath-ssedthecanalatitsjunctionwiththeFletchersCanalisnowgone_The.jpg.cea4596cd5781e638a1e28d22ac805f3.jpg)
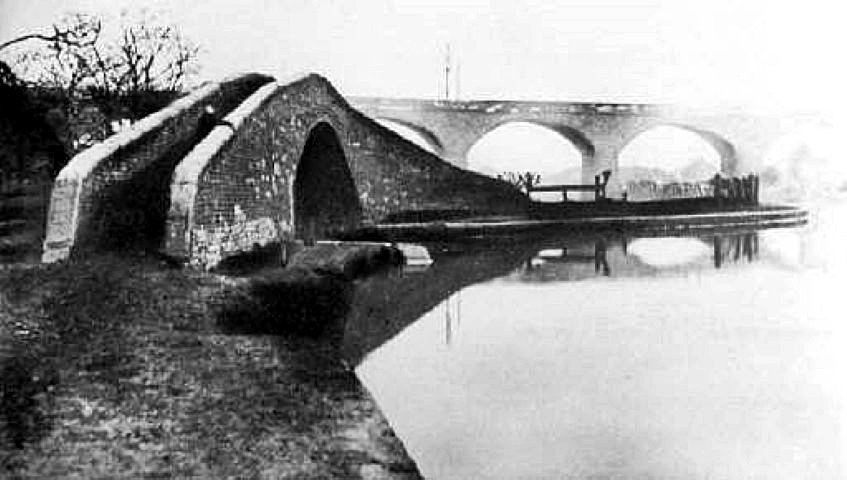
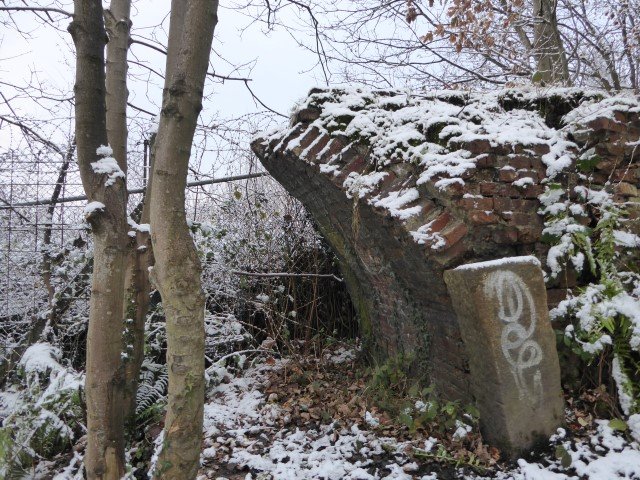
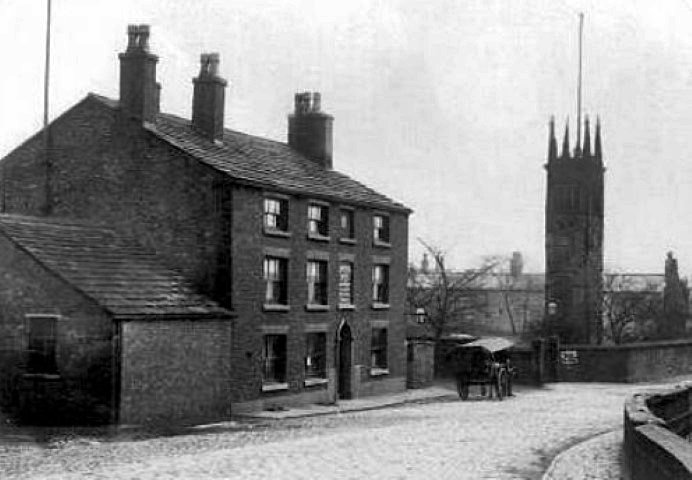
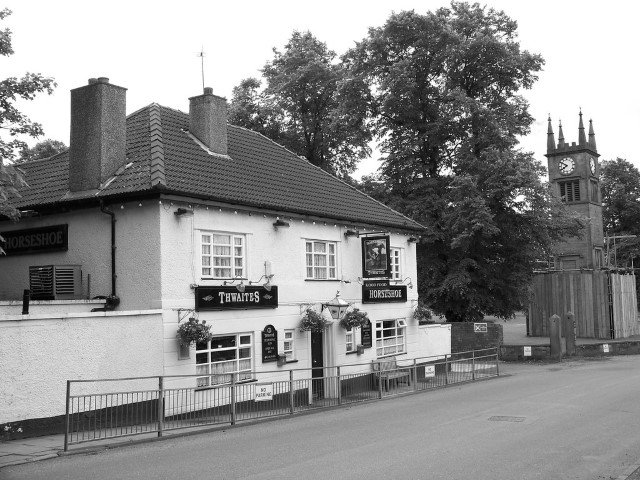
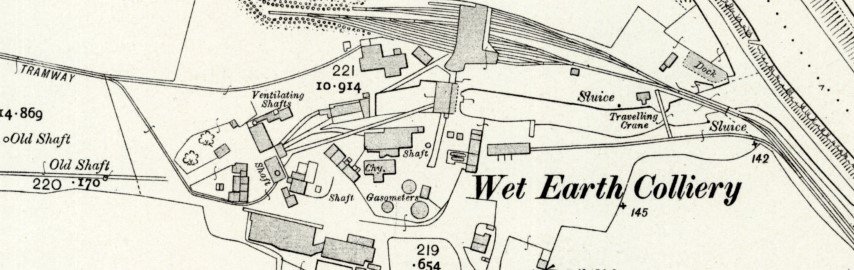

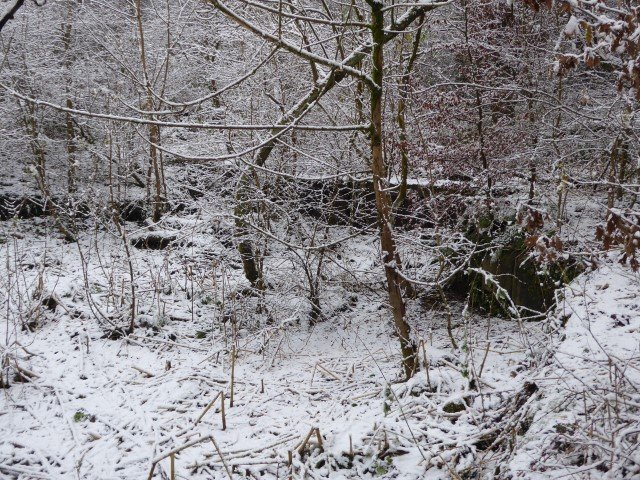
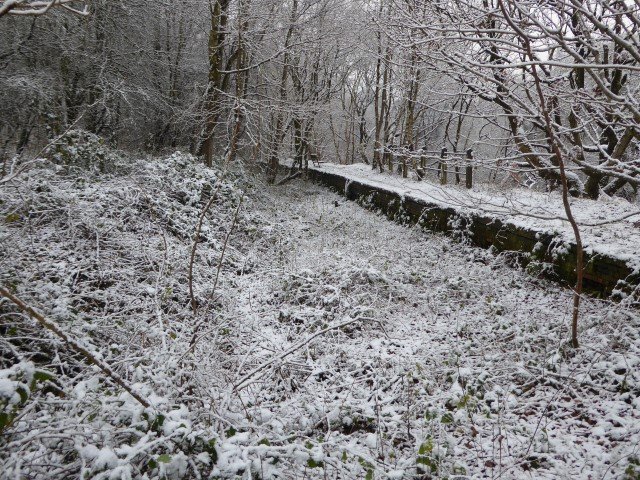

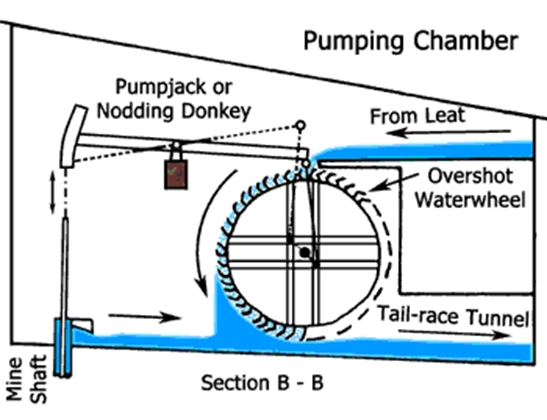
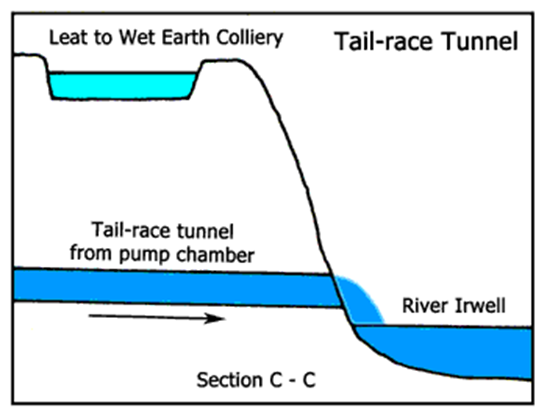
ba(Custom)a.jpg.556dbb9067267fea4a6094bd69025c8d.jpg)
ab(Custom).jpg.23a2f83136cada64f0f14a9597882d6f.jpg)
.jpg.c0cd111e1972c6c78c3ce67b9fcf8acc.jpg)
.jpg.fe9045979a3cd0d68a65081c88551659.jpg)
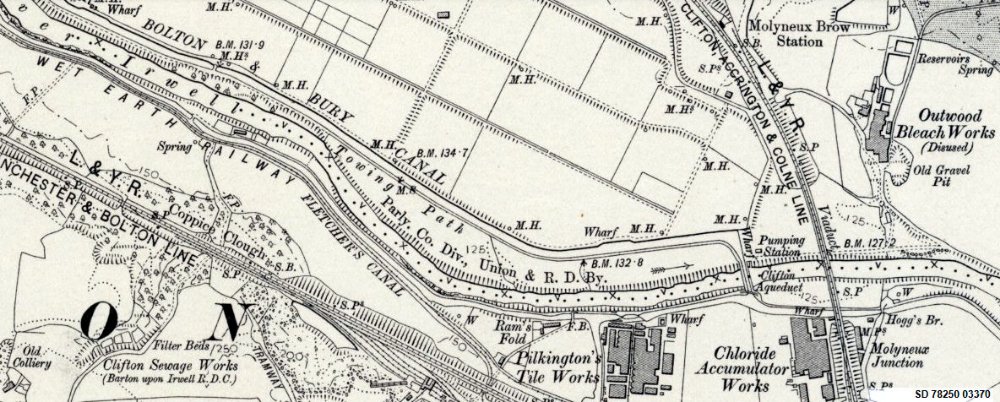
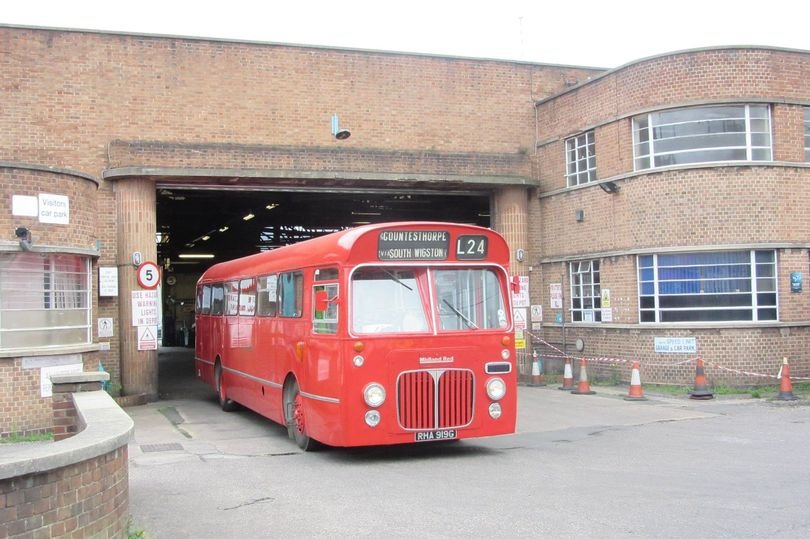
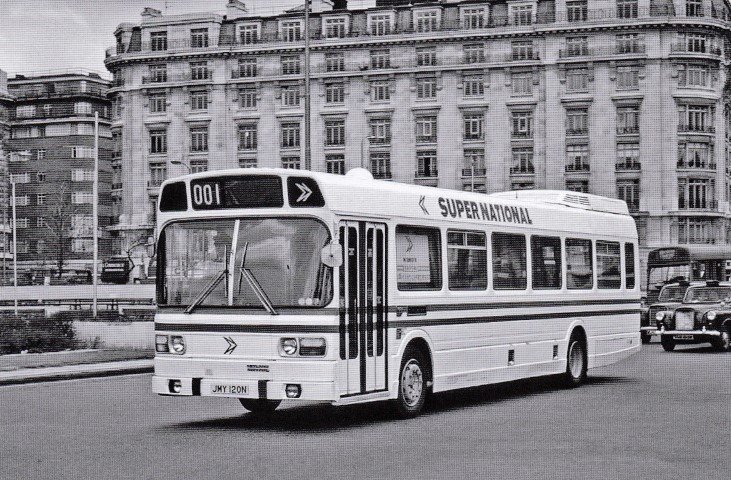
.jpg.e280f68fb78a5e6f2424c7aa4868779b.jpg)
.JPG.7430b967f7821c7b222b142d4ade335a.JPG)
.JPG.bceedac8cd3272e7b6f972a42ff905aa.JPG)
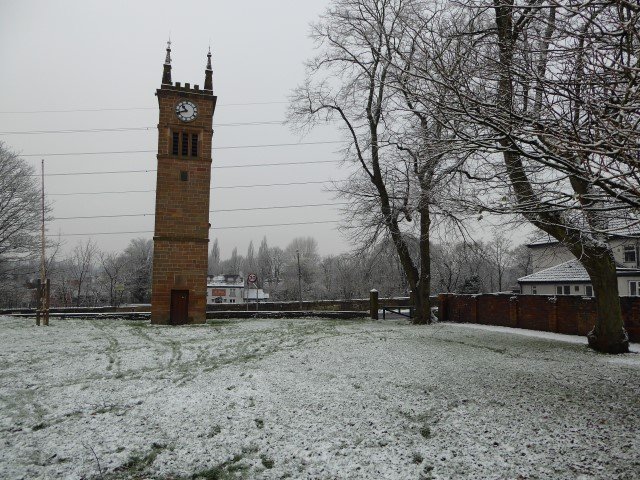
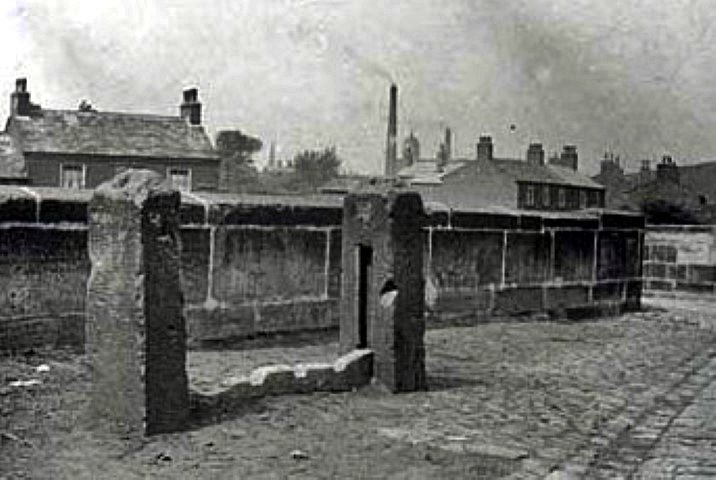
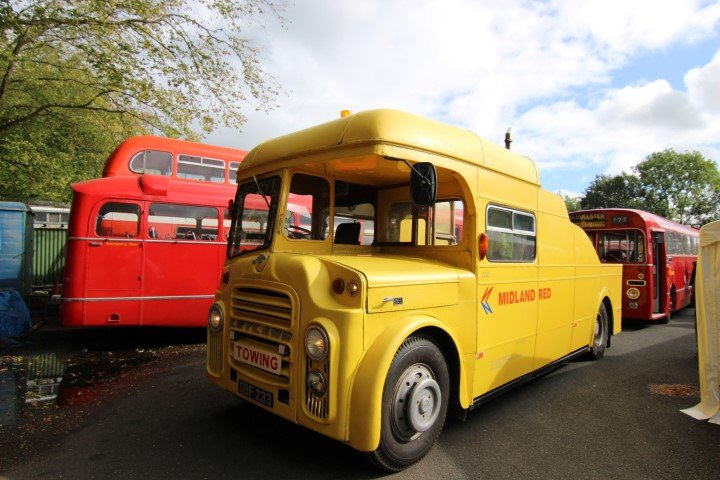
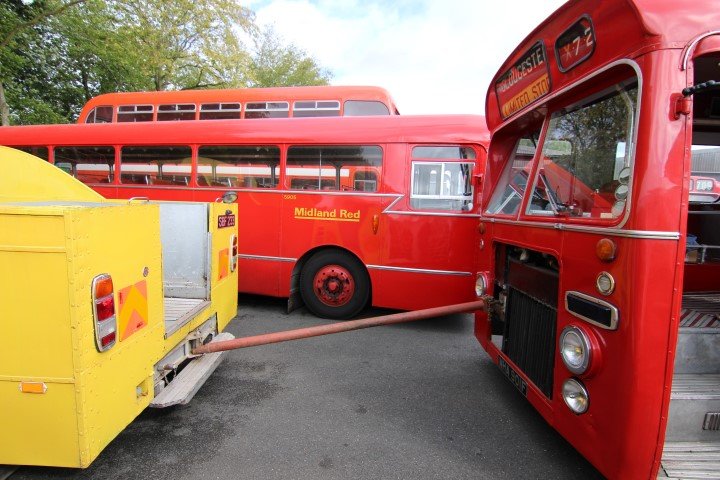
.jpg.5e7404d965c1fd37d30d4930571cff6c.jpg)