-
Joined
-
Last visited
-
Days Won
188
Everything posted by Roy B
-
Continued from above: Okay, let’s have another look around the Blackpool tram depot at Rigby Road. Don’t fall down any pits! In 2012, Blackpool’s trams were upgraded to run with light-rail trams, and since then around 60 volunteers have continued to operate a fleet of 20 heritage trams for tourists and residents. Whilst the Flexity trams are based at the newer depot at Starr Gate this Rigby Road depot houses the older fleet of trams. The roof needs a lot of work to remain water-tight, and a fund-raising effort is underway for this. The cost of repairs has been valued at around £1million. Plans are in place to regenerate Rigby Road depot into a museum, workshop, and stabling area for operational trams, but these plans cannot progress until the roof is repaired. £10,000 will pay for the replacement of all the guttering to help provide a short-term solution. Every £100,000 will mean that a portion of the roof can be repaired. The roof is made up of 5 apexes and replacing half would go towards preventing further damage. Two of the Illuminated trams were being prepped for the evening run Old and new in the bus yard A tank appears in the bus yard A Balloon tram’s underframe Somewhat overlooked is Engineering Car 754 which alone among the light rail fleet sports a singularly bright colour scheme - all over yellow. Built by East Lancashire Coachbuilders this tram is the latest in a line of overhead cars. Engineering Cars Starting with the former ex Conduit Car 4 which provided an additional role of shuttling bakery items from the town centre to the important military convalescent hospital built at Squires Gate during the Great War. Being fitted out with double opening doors in the sides - allowing removal of the large wooden trays of bread, cakes and other comestibles, number 4 had an extended life until replacement in the 1930s by its successor. Following a lingering afterlife at the very rear of Bispham Tram Depot over many years painted in a dingy all over dark green it resurfaced in 1960 as one of the quartet of vintage trams commemorating Blackpool's 75th Anniversary of electric tram operation. One thing led to another with number 4 of the very first tram fleet becoming a prized exhibit at the National Tram Museum - revisiting Blackpool for the memorable Tramway Centenary in 1985 carrying passengers in the formal procession. The successor was a former passenger tram with an interesting pedigree. Built originally as a two axle open top car number 31 in 1901 it was radically rebuilt with extended bodywork and given bogies until withdrawal. It was one of five similar rebuilds from this class - and through virtue of its new role as 'Engineering Car' numbered 4 in the somewhat haphazard Works Fleet roster - it gained immortality when after withdrawal it came under the custodianship of Beamish Museum. Here it was brilliantly restored to late 1920s appearance, regaining its original fleet number. Standard 143 was converted to an Engineering Car but has now been restored to it's original condition In 1958 Standard 143 was designated as replacement Engineering Car emerging from the bodyshop retaining its top deck enclosed balconies and renumbered 3. The lower saloon became home to a pensioned off diesel engine from a pre-war Blackpool bus allowing the tram to travel without need for the overhead power supply. Quite soon the confines of the upper deck features saw the end 'cabins' removed but Engineering Car 3 continued to sport its Standard car livery unlike the all-over green usually assigned to Blackpool's works fleet. Eventually it too saw its days ended, with a premature withdrawal due to an extensive fire in the lower deck. By then it had been relegated to pole painting work with the advent of the above mentioned brand new bespoke Engineering Car 754 ordered by Blackpool Transport - the very first instance of a completely new works tram on the system. Fortuitously yet again, longevity of works cars - saw 143 begin a return to its early 1920s open ended appearance. 143 returned to Rigby Road to see eventual completion of this important restoration which provided a comparison between the original design for the Standard class in 1922, to the final all-enclosed condition demonstrated by sister Standard 147 - itself a marvellous survivor. Surety of a tram's preservation certainly involves becoming a works car in Blackpool. Numbers 4, 31, 143 and eventually 754? Box 40, Rack 2, Grinders 1 and 2, Permanent Way Cars 167, 624 and the electric locomotive can also not be overlooked for future preservation. Inside the paint shop A couple of old advertising boards survive. Note the fares! Continues below:
-
Continued from above: An engine change on the 542 car Peter Gilbert works on the replacement Charlie Guinchard had a damaging end to his weekend courtesy of Brad McKinstry Willie Barnes took the Horry Barnes Trophy on parade before the race The bonnet of Timmy’s newer car Carl Boswell’s car had been in the wars The Harry Barnes car needed front end repairs after some hard hitting action More pics in the gallery Continued below:
-
Continued from above: Martin Ford had a tyre warmer on the front left #Love f2s Zoe interviews Rob on the grid Parc ferme Following an extended practice session for the World Finalists, the action began with grid-setting time trials for the overseas qualifiers. Amongst the eight drivers, five were from Northern Ireland and three from continental Europe. Two-time world champion Wim Peeters (H124) and fellow Dutchman Johan Schoutan (H55) overcame the extra cost, red tape of customs regulations and Covid quarantine requirements to travel with their own cars, while regular World Finalist Jan Bekkers (B96) borrowed machinery supplied by Gordon Moodie (7). Each contender made two solo runs, with the running order reversed for their second attempt. Peeters set the pace to secure the third row inside starting position. Graham Fegan (NI998) joined him on the outside. Following the trials a dummy grid was formed on the raceway and spectators were able to take part in a grid walk, take photos and collect autographs. The opportunity was then taken to gather all 14 F2 world champions present on the day, who could count an incredible 30 titles between them. The WF grid: Inside Outside 226 Billy Webster 606 Andrew Palmer 647 Chris Burgoyne 38 Dave Polley H124 Wim Peeters N1998 Graham Fegan 968 Micky Brennan 905 Rob Mitchell 13 Andy Ford 560 Luke Wrench NI747 Brad McKinstry B96 Jan Bekkers 527 James Riggall 183 Charlie Guinchard 149 Reece Cox 78 Henry King NI918 Shea Fegan NI467 Aidan McFerran 542 Steven Gilbert 126 Jamie Avery 618 Ben Lockwood 4 Martin Ford H55 Johan Schoutan NI175 Stephen Wright 324 Jordon Thackra 890 Paul Rice 9 Harley Thackra 24 Jon Palmer 801 Jack Cave 16 Craig Wallace 218 Rob Speak 674 Steven Burgoyne 629 Euan Millar 921 Jack Aldridge 7 Gordon Moodie After a couple of support heats the 35 finalists emerged on parade for the main event, greeted by plenty of cheers, and the odd good-natured boo. Having gridded up, the atmosphere went up another notch when on the first rolling lap the field fanned out to form a four-abreast salute to the crowd. It was reminiscent of the big sprint car meetings in the United States, but a first for racing on this side of the Atlantic. At the drop of the green Billy Webster took the lead from the man who started directly behind him, Chris Burgoyne, with Andrew Palmer in third. At the end of lap one Graham Fegan sent Micky Brennan into a spin which caught out some of the lower gridded cars as they entered turn four. James Riggall, Charlie Guinchard, Rob Speak, Steven Gilbert, Henry King and Jon Palmer were delayed in the chaos. At the front Wim Peeters moved into second, and Dave Polley passed Andrew Palmer for fourth. After five laps Burgoyne pushed Peeters into Webster, who in turn cannoned into the backmarking Schoutan. Burgoyne was through into the lead and as Webster ran wide it allowed Peeters and Polley to demote him to fourth. After a caution for Schoutan, who was sent hard into the wall in the incident, Burgoyne and Peeters both made untroubled restarts. Fegan thundered Polley around the fence who kept his foot down, although he dropped to the lower reaches of the top ten. It later turned out that he had broken his wrist in the incident. By half-way the leading duo were well clear, and Webster was having to try and defend against Wrench for third. Brad McKinstry bumpered his way past Fegan for fifth with the latter then getting involved in a battle with Gordon Moodie who had come from the back of the grid. As the frontrunners were negotiating traffic Wrench passed Webster for third, and Peeters sensed a chance to make an attack for the lead as the gap to Burgoyne narrowed. In went the bumper but only light contact was made as Peeters was too far back. He half-spun, and when he recovered Burgoyne was gone. Over the remaining laps the way ahead for Burgoyne opened up with no backmarkers to deal with. He reeled off the last few laps to claim his second world title. The gap of 19 years was only slightly shorter than Bill Batten’s 22-year wait for his final world crown in 2004. Burgoyne performed the victory donuts before celebrating on the roof of his car. The outgoing champion Moodie was among the first to congratulate the winner. Peeters had to settle for second, his fourth top-two finish in the past five runnings of the big race, although he had a scare when post-race scrutineering discovered that his under-seat safety protection plate was missing. While Peeters faced a heavy fine and suspended ban, the offence was not deemed worthy of disqualification so he held onto the position. Wrench completed the podium places, his pace in the closing stages not enough to overcome the gap the leaders had built. In the post-race presentations, an emotional Burgoyne admitted he would be able to savour his success more than the first time around all those years ago. “The first one was a bit of a whirl,” he said. “I was a bit young, didn’t understand it. But this one, it just feels so real now.” Result: 647, H124, 560, 226, NI747, 7, 801, B96, 674 and NI998. Gordon chats with the new World Champ A few pics from Sunday: Sunday morning’s job was to re-fit the engine A quick gold spray Chris about to start his lap of honour Continues below:
-
Hi there folks, Get yourselves a long brew, and a packet of biscuits and we’ll start first with a look back to the: 2021 F2 World Final at Skegness – Saturday 4th September 2021 At the 3rd August meeting a unique first for Brisca happened - two sisters racing at the same meeting. Jessica and Rebecca pose for a photo for the family album with a very proud mum and dad It had been eleven years since an F2 WF had been staged here and a huge amount had changed in the years between. A change of promoter, a repositioning of the pit gate, much of the fence replaced, and the bar beyond recognition. Earlier in the year, there were doubts as to whether there would be the usual representation from the Netherlands. Happily this had all turned out well in the nick of time. With some true tarmac experts amongst the entry coming across the North Sea, would we be seeing another Dutch victory? Stephen Wright from NI Wim Peeters from the Netherlands Speaky doing double duty this weekend Belgian Jan Bekkers was using a Gordon Moodie car Charlie Guinchard on the grid flies the Euro Champ flag Continues below:
-
Hi there folks, A good opening meeting today for the F2's at St.Day. A number of new/refurbished cars on show, and some entertaining racing. A nice refurb from Matt Westaway. It didn't end the meeting like this though after a massive hit into turn one from the man below. The Semtex Kid was back with a bang with an earth shaker of a payback hit on 835 A nice refurb from Matt Very nice RCE from David Simpson - ex Stock Rodder Looking good in grey for Adam Pearce A new WRC for Lauren Stack A perfect debut for WRC#49 winning Aaron the first Final of 2022 A good 31 car turnout raced to a full format meeting. Heat 1: 14 cars. A last corner sort out saw long time leader Dale Moon (302) go wide which allowed Kieren Bradford (27), and Steven Gilbert (542) through. Result: 27, 542, 302, 988, 835, 232, 464, 184, 208 and 572. Heat 2: 17 cars. Dave Sansom (352) in his ex-Reece Cox (149) car broke clear for the win from a closing Ben Borthwick (418) Result: 352, 418, 689, 979, 667, 320, 536, 35, 194 and 736. Cons: 14 cars. Result: 895, 736, 605, 828, 460, 572, 777, 928, 663 and 87. Final: 24 cars. A fast charging Matt Westaway (835) put a hit in on Dave Sansom entering turn one early on. The 352 car recovered immediately to give chase, and attempted to use another car as a snooker ball hit to get 835. This didn't work out though as 835 escaped and opened up a gap on his pursuer. However, a back-marking 928 car on the home straight slowed 835 enough for Semtex to get within range. A monster hit into turn one followed with Matt cannoned up the fence. A caution to get the winded driver out followed. Damage to the 352 car prevented him from continuing. Meanwhile the rapid 184 car had eclipsed the opposition to claim the first Final of 2022. Result: 184, 418, 542, 667, 27, 302, 689, 895, 460 and 35. GN: 19 cars. An opening lap shunt into turn one saw 928, 208 and a couple of others stuck on the outside line. Next time round 605 ripped a rear outside wheel off as he collected one of the stranded cars. A caution period to clear the cars fell in 184's favour as his lap handicap was reduced. On the restart he got into the top 3 and looked on for the win but got delayed momentarily which lost him track position which couldn't be made up in the laps that were left to run. Result: 418, 689, 542, 667, 27, 184, 302, 895, 736 and 572. More pics in the gallery.
-
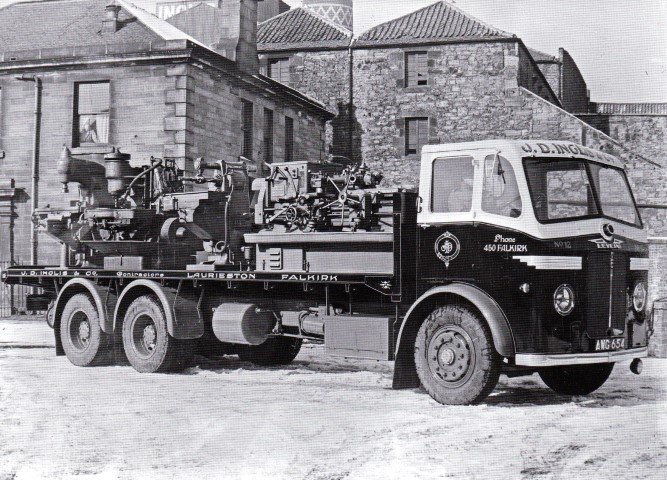
Continued from above: Miscellaneous Pics Rootes Group Works Transport A 1955 shot showing several new Superpoise tractor units on the left, coupled to car transporter trailers, and an impressive line-up of more Superpoise and Bantam tractor units on the right, behind the early post-war Superpoise dropsider. There are four QX models visible, including a van at the end of the line. These were used to transport car bodyshells from Pressed Steel to Coventry. Here’s another great line-up taken from the other direction. We see more of the Bantam tractor units and half a dozen 8 cwt ‘Express’ delivery vans. The lack of employees cars in the car park over the road suggests this was a Sunday morning job! The story of how complete cars were built inside the six-floor Singer factory is worthy of a book in itself. Here we see a rather snazzy 1½ ton FC van, operated by Rootes dealer Holmes & Smith, being unloaded by a white coated driver. Next door, a fork-lift is loading a complete new Humber bodyshell onto the top of some crates on a QX dropsider, while a Rootes internal transport Superpoise and what looks like another dealer’s QX completes the line-up. Even before Hillman Imp production resulted in a lengthy supply chain to Scotland, the Rootes Group often used rail transport to ship completed cars to the docks for export. The covered railway wagons on this train hauled by a BR Standard Class 5 loco were of ‘drive-through’ design to allow for end-loading. Next week: We’ll take a look at the F2 WF, and then have a stroll around the Rigby Road tram depot. Pics from the St.Day 2022 F2 opener will be on here tomorrow evening.
-
Continued from above: The view from the top deck as a Flexity approaches heading north The present and past side by side. Flexity 005 heads south, whilst the Western Train awaits its passengers at the North Pier stop. The Western Train’s tender trailer car dates from 1928. The Western Train 733+734 The idea for the Western Train came from then Transport Manager Joseph Franklin's wife, when watching a Western Film. Built in 1962, from Railcoach 209 (originally built 1934) and Pantograph 174 (built in 1928), the Western Train has delighted holidaymakers for over 50 years. Original features included smoke coming out of the funnel, and real logs on the roof of the tender section. It was used to transport guests to the official opening of the ABC Cinema in Church Street in 1963, and subsequently were the last trams to operate in the town centre as the Marton Route had closed during the previous year and the track was kept especially for the opening. Just like the Rocket, the Western Train was fitted with a remote controller and air brake at the rear of the coach in 1967. 1968 saw the Locomotive numbered 733, and the coach numbered 734. 733+734 were both rewired during the 1980s. In 1999 they were withdrawn in need of another rewire, whilst 733's underframe had started to droop, giving the locomotive a banana type look. Other than a further outing when both halves of the train were towed to Fleetwood for the 2003 Tram Sunday, they would languish at the back of the sheds until 2007, when it was announced that Heritage Lottery fund were funding a restoration of the train. The trailer's underframe and bodywork were found to be in excellent condition and a rewire and restoration of the interior to Pantograph car condition were carried out. The locomotive required more work. A new underframe was built, and the frame from one of the passenger saloons from Twin Car motor 677 was grafted on the new underframe for use as the tender, whilst the remaining framework from the loco also transferred onto the new frame. Following the rewire, re-panel, and fitting of new lighting, 733+734 were returned to service in 2009, regaining their rightful place on the illuminations tours. A superb sight at night, and a real head turner To finish here’s a couple of pics from a few years ago when there was some serious snow on the ground. An OMO tram marooned south of the Pleasure Beach A tremendous sight. The snowplough fitted 723, with two pushing clears the tracks at Norbreck Castle. Continues below:
-
Continued from above: The driver needed to keep the cab window open to stop it steaming up. At the peak of the snowfall he was getting more in the cab than outside! Balloon 717 heads north from Cleveleys to the Thornton Gate cross-over. 717 in 1930s livery. This tram dates from 1935 and still has original features and fittings. Balloon 715 in a near white-out at North Pier The same location within a couple of hours. It was blue sky and sun, and all the snow had gone! Here’s 648 at the North Pier stop. Heading for Fleetwood A thawed out 717 717’s swingover seats Continues below:
-
Continued from above: Last weekend (18-20 Feb) there was a special three day event held on the Blackpool tramway. Five 90yr old members, and one near 40yr old youngster of the original tram fleet were out on the full system for a hop on-hop off enthusiasts/ general public extravaganza. Depot visits were also available, as well as evening tours on the illuminated Western Train. However, the rough weather played its part as all trams were suspended on the Friday owing to the high winds which scuppered the evening tour. All went to plan during Saturday, and most of Sunday until the evening tour. The wind had picked up again to such an extent that the overhead wires were being blown sideways. The Western Train was heading north on the reserved part of the track where the wind was at its strongest. Loss of contact between the pantograph and the overhead occurred frequently which made for a nerve-wracking journey for the driver. With the wind whipping the wire back and forth there was a risk of the pantograph becoming tangled and smashed. Fortunately the tram made its way back undamaged, but very slowly. The whole fleet (including the Light Rail vehicles) were called back to the depot, and all services cancelled for the remainder of the evening. The pics below were taken on the Saturday where the rare (for Blackpool) snowfall added to the scene. The start of the snowfall looking north at Bispham from Centenary tram 648 Number two end of this 1984 built vehicle 648 on the Pleasure Beach turning circle A Loughborough built 1937 Brush car at the same location This is the 1960s green and cream livery English Electric controls A very clean interior Brush cars 631 and 621 at Bispham. 621 spent time in storage at Kirkham prison, and Beamish before returning to Blackpool in 2016. Like 631 it was built in 1937, but is painted in the 1950s livery. Continues below:
-
Continues from above: As Grandon lost a wheel and the associated suspension, that was overshadowed by the extensive front end damage which was suffered in the same incident by Carl Boswell (84). After the race was brought to another temporary halt, just five cars remained for the last segment. Darby looked in control, but a strong by Paris saw him relieve Darby of the lead for a lap. However, Darby fought back to claim first place and land the Cornish title. Bristol Sunday 30th August 2021 There was a massive crowd on hand on this gloriously warm and sunny day high in the Mendip Hills. The cars raced to a two from three format. Andy Smith helps out on the 921 car. Brad McKinstry (747) alongside. Top 3 results: Ht 1: 584, 931 and 828. Ht 2: 700, 895 and 667. Ht 3: 127, 700 and 584. Mike Cocks copped for some damage in his heat, but had it repaired for the GN Jack Bunter got his money's worth out of this three-wheeler in one of the support races Final: 667, 700 and 127. Tommy Farrell won the Final, and finished second in the GN GN: 700, 667 and 53. Continued below:
-
Continued from above: St.Day – Sunday 29th August 2021 The BBC were filming at this event. They were gathering footage for a documentary in the We Are England, Belonging series entitled: Cornwall’s Last Raceway. It is very good and is available on BBC iPlayer now. Returning briefly to the Semi-Final’s, there were 11 south-west based drivers who gridded but only three of them managed to make it through. Congratulations to Jamie Avery (126), Paul Rice (890) and Steven Gilbert (542). Justin Fisher (315) was a reserve at the Semi meeting, and did make a brief appearance in the non-qualifiers heat at the start of the meeting, but soon hit problems that left him needing to be pushed off, post-race, by one of the recovery tractors. Whether the mechanical issue was traced to a sandbag has yet to be confirmed. This meeting saw the Snell Family Trophy raced for. The sizeable trophy needs more than one person just to lift it! It was the fourteenth time in its history that this jaw-dropping piece of auto sculpture for the Brisca F2’s was being raced for. It was created by former Hot Rod star Tyrone Snell to be raced for each season at St. Day. The trophy features an array of motor components which are commonly found being used on modern day F2’s. The framework to the trophy which holds everything in place is finished in trademark lime green – the colour strongly associated with Tyrone from his Hot Rod racing days, and from his days as a famed and respected manufacturer and supplier of quality trailers. Top 3 results: Ht 1: 605, 828 and 35. Ht 2: 895, 667 and 418. Cons: 24, 584 and 325. Final: 24, 35 and 700. GN: 540, 605 and 689. Julian Coombes was out of the Final soon after the start JP was the winner of the Snell Family Trophy Despite there only being 13 Saloons in attendance they stole the show. During the opener the Phil Powell (199) car ended up with the back end mangled after Warren Darby (677) cannoned Simon Paris (672) into him. Phil’s car ended up exactly like this after an earlier season Taunton meeting. The Cornish Championship was on offer for the main event and this race brought multiple explosions. The first of these saw Junior Buster (902) bundled into the pits bend, and as he barrel rolled, Richard Regan (319), who was racing his ex-Diggy Smith car for the first time clambered up and on top of him in truly spectacular fashion. The race was stopped and when it resumed, the lead continued to change hands, before another explosive moment as Darby thundered Jack Grandon (277) into the pits bend wall. Various bits and pieces of the 277 car are retrieved off track. Continued below:
-
Hi there folks, A brief look at four F2 meetings this week, followed by some pics from last weekend’s tram event at Blackpool. Bristol – Wednesday 18th August 2021 15 cars raced at this last midweek outing. These welcome visitors were first to arrive The new Matt Stoneman (127) transporter brought him luck as he won Heat & Final Andy was kept busy Not a good night for Ryan Sheahan (325) Top 3 Results: Ht 1: 127, 736 and 325 Ht 2: 736, 127 and 315 - 390 eighth. Final: 127, 667 and 736 - 390 eighth. GN: 667, 315 and 736 - 390 fifth. Northampton Semi-Final Meeting – Sunday 22nd August 2021 The first Semi-Final lined up with the front row of Dave Polley (38) and Andrew Palmer (606). Missing from the line-up were Gordon Moodie (7)(ill), Tony Blackburn (225), who had lent his car to Jack Aldridge (921), and Courtney Witts (780), who was injured at King’s Lynn. Steven Burgoyne (674), Luke Johnson (194) and Michael Lund (995) therefore joined the grid from the reserve list. As the race got going Palmer nosed in front of Polley until the red flags came out for Jamie Jones (915) who ended up on his roof as the rear half of the grid piled into the third bend. 606, 38 and Luke Wrench (560) headed the restart. Wrench was pushed wide at the drop of the green which aided the front two to break clear. Mark Gibbs (578) lost a wheel and as he dragged his car to the infield ended up brushing the leader’s car which gave Palmer a scare. He and Polley safely negotiated the backmarking traffic to secure their places on the front two rows of the WF grid. Rob Mitchell (905) finished third, while Wrench and Charlie Guinchard (283) traded places a few times. Wrench hit the European champion wide on the last bend to claim fourth. Jamie Avery (126) and Paul Rice (890) could both be proud of their efforts to successfully qualify in their regular tarmac cars. Result: 606, 38, 905, 560, 183, 377, 78, 126, 4 and 890. The second Semi-Final gridded up with Micky Brennan (968) and Jon Palmer (24) on the front row. Second row starter Jack Cave (801) edged inside of Brennan at the start but the two-time world champion held onto his lead as, from the outside of rows two and three, Jack Aldridge spun, and Ollie Skeels (124) was clobbered. Matt Linfield (464) was another who had a spin, and with other pile ups occurring a caution was called. Brennan made a good restart and built a gap to the rest headed by Rob Speak (218), Palmer and Cave. However, the man making moves through the pack from mid-grid was Billy Webster (226). He used the bumper to good effect to shove Cave past Palmer and overtake them both in the process and move up to third. At half-distance Webster was lining up to pass the 218 car. The eight time world champion half spun, and was collected by the 226 car. While Webster managed to extricate himself from the scene, chaos followed, with Cave and Palmer among those to lose out a lot of ground before the yellows came out, with Speak unable to continue. With the exception of Brennan and Webster remaining in front the cars following them had changed completely. Chris Burgoyne (647), Andy Ford (13), Reece Cox (149), James Riggall (527) and Steven Gilbert(542) were next in line. Cave and Palmer were still running but outside the top 10 and with very hobbled cars. Brennan made what he thought was another good restart as he raced clear to win, but was penalised by the steward for his start-stop-start technique, which caused a concertina effect, and was docked two places. That promoted Webster to the win, and Burgoyne into second. Further action between Cave and Palmer, which also caught out Courtney Finnikin (55) didn’t help their cause and both were shown technical exclusion flags, for a broken exhaust and wheel guard, respectively. Result: 226, 647, 968, 13, 527, 149, 542, 618, 324 and 9. Other top 3 results from the day: Ht 1: 286, 47 and 209. Cons: 218, 995 and 55. Final: 13, 69 and 183. GN: 226, 69 and 38. Tommy Farrell’s 20+ year old wing Continued below:
-
Continued from above: Looking quite at home representing Stevensons MFR 41P is former Grampian No.60 (ORS 60R), a 1977 Leyland Leopard PSU4C/4R with Alexander Y-type 45-seat body. This is a great pic. The driver of an unidentified LMS ‘Patriot’ 4-6-0 leans from his cab as a New Cross Speedway Supporters Club special comes past Albury, on the WCML. It has been suggested the train was heading for Manchester on 21st August 1937, where the supporters were due at the first leg of the National Speedway League final against Belle Vue. (Credit to Mike Morant) With only three weekends left from now until the F1 season returns i’ll not be able to give full coverage to all of the remaining eight F2 meetings from 2021 that i’ve got left. Instead, i’m going to list the results, and put any photos of interest on for these dates over the remaining w/ends. However, i will be looking in depth at the WF meeting, and the last ever Birmingham. These will be in a fortnight’s time along with our last walk off the beaten track this winter. We’ll be having a look at an area out in the wilds where the highest railway viaduct in England once stood. In addition to this there’s not one, but two abandoned signal boxes to see! Next weekend sees the first Brisca F2 meeting of 2022. This is at the United Downs Raceway, St. Day. Check back here and we’ll have a look at any new cars, drivers etc. In addition I’ll put some pics on of this weekend’s Blackpool Trams Heritage event.
-
Continued from above: Coal stock had a storage capacity of 250,000 tons. (Many thanks to the Gang of 3 for these great photos) The ‘Five Sisters’ have been gracious enough to reveal all of their secrets, and have been the perfect date, so now i think it’s time to leave their ghostly embrace. A final look at this vision of beauty More pics in the gallery Trams in Trouble With the wild weather over these past few days it’s the track of the Blackpool tramway from earlier storms that is in the spotlight this week: High tide and storm, Manchester Square, Blackpool. Saturday 12 November 1977 Further south down the promenade at Watson Road, Blackpool. Saturday 12 November 1977 Storm damage, Pleasure Beach turning circle, Blackpool. Saturday 05 February 1983 (Pic credits to Ian 10B) Miscellaneous Pics The oldest bus in the Delaine Heritage Trust collection is this splendid 1956 Willowbrook-bodied Leyland PD2/20 No.45 (KTL 780), passing through Bourne on its way from Rippingdale. No.47 is a Yeates Europa-bodied Leyland Tiger Cub seen here setting off from Market Deeping. Beautifully restored by Leicestershire Museums. Continues below:
-
Continued from above: In Derby back in the 70s & early 80s there always seemed to be a bit of "mystique" about the 202xx ex D83xx batch of 20s as none were ever Toton based back then, the only ones were occasionally the Tinsley based ones, though they were far from common at Derby where the bog standard Toton based machines reigned supreme. In 1983 this monstrous ex-Scottish one, 20217, along with equally monstrous 20179 which was ex-Haymarket appeared on the scene. 20217 & 20179 arrive at Willington power station with a coal train from Denby on 21st September 1983. Back in the 70s at this location you would never in your wildest dreams expect to see these ex-Scottish 20s. At full load the two stations together burnt a total of 8,400 tons of coal every 24 hrs At full output the 6 boilers would burn 52,000 tons of coal a week Each train brought around 1000 tons of coal The Derby to Burton main line to the right Continues below:
-
Continued from above: The hot water inlet pipe goes straight up the centre into a mushroom shaped water spray nozzle assy In close up. The water then travels back down through the cooling fins. The supports for the brick cooling fins There was a slight breeze blowing on this visit. However, the updraught within the tower was that great it was difficult to remain upright as you were buffeted around. It was a perfect example of how they worked. I had to lie on my back to get this shot. I could have easily remained in this spot for a long time just watching the sky drift by far overhead. From this position it looks like the view of planet Earth from space. Spot the light aircraft. There are plenty of uncovered drains and tanks to fall into which always keeps you on your toes. Numerous glimpses of rail appear here and there. These were for the coal drop area of Willington ‘A’. The next set of pics show the various loco’s that brought coal to the site. Continues below:
-
Continued from above: with a fence thrown in for good measure Their sheer size up close has to be experienced to be believed. Standing inside these giants is a once in a lifetime experience. This is one of the two that have been stripped out and the base filled in. It is amazing to think that the whole structure is held up by the ring of slender concrete pillars around the base. Sound makes the most wonderful echoes spiralling around and up to the sky It is an amazing place and ranks as one of my favourite explores Three towers are still complete internally. The concrete hot water inlet pipe. When in use this base would have been filled with water. As on a previous visit. It is a 10ft drop off that pipe. Continues below:
-
Continued from above: Coal for the boilers – a million tons a year, just for the ‘A’ Station – found its way into the railway sidings, through a specially constructed connection at Stenson Junction. This shows the sidings and the line which went between the two towers of Willington ‘A’ The 19,000 yards of sidings could store wagons containing 7,000 tons of coal. The Central Electricity Generating board, as the nationalised industry had become known, owned a pair of Drewry 0-6-0’s diesel shunters built in 1956, for moving the coal wagons from the yard into the coal tipplers. In there, a chain ‘beetle’ would drag the truck in, then back out after it had been tipped onto its side and its contents emptied onto a conveyor. Coal was either fed straight into the station bunkers or stacked on a large area of ground to the north of the site – almost over shadowing the nearby Findern primary school. A largely overlooked waste product of power station operation is ash from the boiler. In the case of Willington, the geography of the area was fortuitous in that gravel extraction from the alluvial flood plain of the Trent was (and still is, of course) widespread. Thus there was a readily supply of large holes in the ground in need of filling in. The trouble was that the majority of the gravel extraction of the time was taking place on the other side of Willington village, closer to Burton. The solution, rather than transport this ash by lorry through the village – with the attendant nuisance that would create – was to build a pipeline. This prominent feature was buried underground through the village, but otherwise snaked its way along the south side of the railway – with the need for ramps and ladders wherever public footpaths encountered it! Although a generally successful method of transporting the ash, it was not without its problems. Around the point the pipeline disappeared underground a house called Ivy Cottage stood. This was the first building on the left after passing under the railway bridge on Twyford Road. Despite significant efforts by the CEGB to cure it, this section of the pipeline was troubled by considerable vibrations – with consequent nuisance, and even damage, to the nearby house. The solution was that the CEGB bought the property and demolished it. The detached garage of Ivy Cottage survived until 2002 before being demolished to allow a new house to be built on the site. A twin 16" diameter ash disposal pipeline ran down the railway embankment and crossed under the Twyford Road on its way to fill the in the gravel pits off the Repton Road, with pulverised fuel ash from the power station. Ivy cottage, close to the bridge, had to be demolished as a result of this causing vibrations. Perhaps as a testament to the solid nature of the work the power station achieved, there were few notable events during its working life. The “big freeze” of 1962/63 was to place great strain on the system – with the link between the station and the National Grid freezing and tripping out – leaving the station “all revved up with nowhere to go” – an undesirable state of affairs. Even the coal in the railway wagons was frozen solid, so that when they were tipped upside down to empty them their contents remained fast! Sadly the wagons were designed by a committee and were an utter disaster in winter conditions. The original idea was to supply coal on an 'as needed' basis to the boiler hoppers and have no coal stocks put to ground. It worked fine in summer months, but due to the design of the door closing mechanism, the doors would not open when the contents of the loaded wagons froze solid in freezing winter conditions. Wagons would not empty and had to be put into sidings to thaw out and to keep the stations operational, vast stock-piles had to be put to ground. It was these very large stocks on the ground at each Power Station that kept the Electricity supplies going during the Miner's Strike. The CEGB built a huge freezer unit at High Marnham Power Station to try and find ways of discharging HAA wagons frozen solid in said freezer! It had to be done in the summer months, because the situation was so dire in the winter on these stations. The discharge problem arose because the NCB modernised their coal extraction methods and instead of the mined coal being in small lumps, it was much more of a fine powder - what would have been called 'Slack' when the coal man dumped 5 cwt of powdery rubbish down the cellar grate! The NCB added to the problem because they washed the mined coal to remove dust - they did try adding antifreeze to the washing water and even coating the wagon interiors with non-stick coatings! So in actual fact the continual 'shuttle service' of HAA wagons never did work in the way it was intended - coal face to boiler hopper direct. There was always a 'heap on the ground' as well. In 1973 the ‘A’ Station won a CEGB award for its exceptionally high availability during the winter – 98.56 per cent. The 1980s was to prove a significant decade. In 1981 British Rail introduced a new system for handling the coal delivered to power stations. The practice of bringing wagons of coal to the power station for the CEGB to empty them into their tipplers at their leisure was inefficient – as was the reverse procedure at the collieries. The solution was the “Merry Go Round” system where a fixed formation of coal hoppers would shuttle back and forth between colliery and power station being loaded and unloaded via ‘drive through’ bunkers in a heavily automated process. At a stroke, therefore, Willington’s eleven through sidings used to store coal wagons until they were needed became redundant – as were the two Drewry shunting locomotives. Whilst most of the sidings were soon torn up and taken away, the shunters remained on site – apparently seeing little or no use in the later days. Happily, at least one lives on in preservation — albeit under an assumed identity! The miner’s strike of 1984 saw railway deliveries of coal suspended for the duration. A token picket line of Welsh miners under the railway bridge at Findern (referred to as the ‘picnicker’s at the time, such was the laid back nature of their presence!) was sufficient to prevent the railway unions from delivering. Lorry drivers had no such compunction and coal stocks were maintained by a procession of 30 tonne tipper lorries. Given this was before the A50, it pushed the capacity of the A5132 to its limit. Several open days were held at the power station during the 1980s and were always immensely popular with locals. and not-so locals alike. Also during this decade, visitors from far and wide – including tv crews and press photographers – were attracted to the cooling towers. All to crane their necks and peer through binoculars at a pair of nesting peregrine falcons. Apparently, to a falcon, a small ledge high up on the side of a cooling tower is a more than adequate substitute for a remote cliff face. Arguably, the beginning-of-the-end arrived at Willington on 16th August 1989 when privatisation saw the power station become part of National Power PLC. Ironically, this event was heralded with bands and fireworks. Without getting too political, the crux of privatisation is that there is no stone left unturned in the pursuit of a profit. If an asset is weak it will be cast aside with thought only for its scrap value. 27th January 1993 saw Unit 3 of Station ‘A’, having the highest hours at 179,579, shut down, followed a few months later by Unit 4 with 174,343 hours. At this time, the station was operating on short term contracts selling its electricity to National Grid PLC at fixed prices – but this was only a short-term expediency until National Grid could upgrade their installation at Willington to allow it to operate without input from the adjacent generating station. With the expiry of the last of the short term contracts, Willington Station ‘A’ was finally “de-synchronised” from the National Grid with due ceremony at 1830hrs on 30th September 1994, the Unit concerned being the oldest – No.1 – having operated for 173,464 hours. Closure was a formality and took place on 31st May 1995. Meanwhile the ‘B’ Station was still going strong. Local rumour had it at the time that the policy of National Power was to run it into the ground – in other words to run it at full capacity with minimal maintenance until something broke. This certainly seemed to be borne out by the amount of coal the station was receiving at this time – as much as any other period in its history according to observers on the railway. Another clue to this policy is available in a report from the Office of Electricity Regulation (“Ofgem”) – the Government’s means of keeping some control over the once Nationalised industry. This wordy document, in a nutshell, illustrates that as a condition of its licence, a private electricity generator must justify why it wants to close a generating Unit – more specifically, why a competing company can’t take it over; such are the priorities of privatisation. Thus, in September 1997, National Power notified Ofgem of their intent to close Unit 5 at Willington, leaving just Unit 6. It was reported that Units 5 and 6 had operated for 162,000 and 161,000 hours, each being due for a major overhaul in 1998 and 1999, respectively. National Power’s case was strengthened by the fact that Unit 5 had “suffered extensive damage to the HP/IP turbine which has adversely impacted on both capability and thermal efficiency and hence economic viability of the unit ” (NP 30 September 1997). Ofgem appointed a company of independent assessors to investigate National Power’s plans – and it is this report which is publicly available. The assessor performed a series of complex calculations based on a cost/benefit ratio and concluded that the closure criterion was generally satisfied for Unit 5. The closure of the power station was not proposed by National Power. They appeared to be resisting closure of the full station in favour of closure of the unit that requires imminent overhaul. National Power’s case for the closure of only one unit appears to be based mainly on the availability of constraint payments for the remaining unit. However it was believed that these payments were unlikely to materialise. The reluctance to propose full closure of Willington Power Station may relate to a strategy to retain ownership and operation of the site, and thereby to deny the site to other users and, in particular, a competing generator. It was also revealed in this report that National Power had recently bid for and acquired a 72 per cent shareholding in Hazelwood Power Station in Australia. The Hazelwood generators were reportedly in poor condition compared to those at Willington and a part of the success of the bid to run the Australian power station was the identification of the use of the Willington Unit 5 AEI Generator. They therefore intended to ship the generator stator and rotor from Unit 5 to Australia to provide spares to cover Hazelwood’s needs. Consequently the end for Willington Power Station was in sight. Unit 5 was allowed to close as proposed on 31st March 1998, leaving just the sixth and last unit to struggle on. By now down-rated to 188Mw, Unit 6 took its turn to be de-synchronised a year later on 31st March 1999 — thus ending the 41 years, 3 months & 14 days history of electricity generation at Willington. Demolition commenced in November 1999 with a specialist company called Abel Ltd winning the contract for the work. By then the site was the property of Innogy Holdings PLC as, by amalgamation or takeover, this is what National Power had become. The demolition of the majority of the site left the most distinctive features standing - the cooling towers. These remain for the new owners of the site (whoever that may be) to deal with. An update from 2011 stated: As has been widely reported, a new gas-fired power station is to be built on the site of Willington ‘A’ & ‘B‘ Power Station — logically, to be known as Willington ‘C’. In August 2016 a planning application was submitted to South Derbyshire District Council resulting in permission to demolish the five cooling towers of Willington ‘A’ & ‘B’ stations being granted. The notice indicated that the demolition would take place between January and June 2017. In mid-November 2016 contractors moved onto the site and replaced the perimeter fence and restored the access from the A5132 for heavy machinery. Preparatory work on Willington ‘C’ seemed to be beginning. Then again... Nothing at all substantive happened. Apparently, the owning company was bidding in an energy supply auction... but didn't win. That meant it wasn't economically viable for them to advance any further with Willington ‘C’ at that time. The diggers and workers disappeared. Presumably there will be another auction in the future? Whatever the holding company that owns the site happens to be called by then will (probably?) bid again and (maybe?) they will be successful. Then again, maybe they won't? (Many thanks to Dave Harris for the above info) There they stand to this day, five sisters, 300 feet high, 145’ diameter at their brim, 122’ around the neck, 218’ at the base and weighing 6.500 tons. Each tower had an effective cooling surface of 858,000 square feet, together handling up to 6.9 million gallons every hour. One company that used to make regular trips to the power station was the Blue Bus Service. Anyone who has moved to Willington within the last 25 years may be forgiven for having never heard of The Blue Bus Service. Those who lived in the Derby & Burton area in the 1980s may remember the name being used on the City Transport coaches, but not know the connection with Willington. However,The Blue Bus was integral to daily life in Willington for much of the middle part of the 20th Century. During the pioneering days of rural motor omnibus services in the 1920s a fledgling service began between Burton and Derby. The route passed through Newton Solney, Repton, Willington and Findern and saw fierce competition with the already established Trent Motor Traction service. The vehicles in use then appear somewhat primitive to the modern eye. Reputedly, on at least one occasion, the combination of poor weather and the climb up the valley side between Burton & Newton Solney required the passengers to get out and push. The regular driver, a chap named Jack Dean was apparently quite a character - beginning a tradition of friendliness with which The Blue Bus was to remain synonymous. This early start gradually grew, via a series of partnerships; Jack Dean and Arthur Allen, then Jack Dean and Percy Jowett Tailby, followed by Jack Dean, Percy Tailby & Harold George, and finally, in 1927, Tailby & George. The service these men provided had become known as The Blue Bus Service and in about 1930, the company moved their operation to premises on Repton Road at Willington. The company had expanded their operation to include a second route between Derby and Burton, this time via Etwall, Egginton and Stretton. On 9th October 1939, the company became Tailby & George Ltd. and entered a period of steady, reliable and, above all, committed service, continuing under the branding of Blue Bus Services. Passenger numbers were such that during the Second World War, the company began operating double-deck vehicles requiring special low height vehicles due to the 13’6” headroom of the railway bridge in Willington. Despite the odd scrape (and one quite heavy thump on the Twyford Road railway bridge in 1968) the double-deckers were very successful. The seriousness with which the Blue Bus company regarded its duty to its passengers was not lost on the local population and the company was a much loved part of Willington village life. Staff were urged to bear in mind they were providing a service and without the customers there would be no job. Politeness was the watch-word with passengers each receiving an individual thank you as they alighted. The company outgrew the original garage which was on the east side of Repton Road and new premises were built on the opposite side of the road, opening in June 1956. The low stone wall on either side of the entrance to this garage can still be seen just on the village side of Saxon Grove. Throughout much of their history, the company were loyal to Daimler as suppliers of vehicles, which was rewarded by Tailby & George being heavily involved in the trial of a prototype vehicle during the 1960s and receiving two of the first vehicles off the resultant production line. Since the untimely deaths of their spouses in 1955 & 1957 respectively, the company had been run by Mr Tailby & Mrs. George. Percy Jowett Tailby died in 1957 leaving Bunty Marshall (the daughter of the Tailby’s) and Katherine George as partners until Katherine's death in 1965. The remaining shares in Tailby & George Ltd. were then acquired by Douglas (a Spitfire pilot in WWII) & Bunty Marshall. By the 1970s public transport was in a state of serious decline. The railways had been decimated by Beeching, and the majority of the bus industry was either nationalised (i.e. Trent) or in the hands of the local council, as in Derby and Burton. Small independent companies like Tailby & George faced fierce competition from the bigger companies. On 1st December 1973, the then proprietors of the company, Mr. & Mrs Marshall made the decision to retire. After much speculation the operation of the Blue Bus Service passed from Tailby & George Ltd to the Derby Corporation. The transaction cost Derby Corporation £212,039, for which they gained a fleet of 23 vehicles and a tremendous amount of Goodwill. The passing was mourned by locals and bus enthusiasts alike. Careful and skilled maintenance of the fleet had meant that as well as a steady programme of new vehicles, older examples were still available for duty, leading to a certain nostalgic charm whilst maintaining a more than functional day-to-day service. Transition to Derby Corporation (Derby Borough Transport from 1974) was slow but steady. A gradual integration of the fleet, livery and, notably, working practices took place such that by early 1976 the future of Willington as a bus depot was questionable. At best the garage was likely to retain the ever growing private hire business with the Burton & Derby service buses moving completely to Derby. Thus the writing was already on the wall for Blue Bus Services to become Derby Borough Transport's private hire brand when fate leant a helping hand. The last vehicle into the garage had been parked up and the garage locked at 23:05hrs on the night of Monday, 5th January 1976. For many it had been the first day back at work after the long New Year holiday and, as was normal practice, the entire fleet had been fuelled on returning to the garage ready for the next day’s work. In all 19 buses and a van were in the garage when, at 23:25hrs smoke was reported issuing from the building. By the time the fire service arrived the entire garage area was engulfed and the fleet was wiped out The premises were destroyed along with a number of unique and historic vehicles as well as the spirit of Blue Bus Services. Derby Borough Transport hastily acquired replacement coaches to maintain its services and private hire commitments but all operations were now centred on Ascot Drive garage in Derby. Two former Blue Buses which were at Ascot Drive awaiting disposal were reinstated after the fire, but were subsequently scrapped when the unexpected need for them was ended by replacement vehicles. The Blue Bus garage was pulled down and the site lay empty for a number of years. In the 1990s Saxon Grove and the appropriately named Tailby Drive were built on the site. Even the name Blue Bus Services has vanished from commercial use. Derby Borough Transport became Derby City Transport and subsequently privatised. Quaint names with local historical significance don't fit into the corporate world of 21st Century transport. A number of vehicles from the Blue Bus fleet did survive, having been preserved before the 1976 fire. Now that their connection with Willington has been severed, who knows if they'll ever visit the village again? (With thanks to David Stanier for info in this article) Let’s make our way in and have a look around. This site is guarded by killer attack security sheep who inform the locals of any incursion. The route in means negotiating mud and water-filled dykes and stinging nettle infested undergrowth Continues below:
-
Continued from above: The ‘A’ Station comprised four generating Units, each of 100 megawatt capacity. To service these, a pair of 425 foot chimneys (each reportedly amounting to 5,000 tons!) were provided, along with just two cooling towers. Hailed as a revolution of the time, the design of the ‘A’ Station was of four “semi-outdoor” boiler units, only the burners and steam drum of which were enclosed, arranged in a square formation. The outdoor part of the design was indicative of the austerity of the period; by restricting the cladding around the boiler areas to a minimum, significant cost savings were achieved. The design, however, was not popular with the staff who had to brave the elements all year round. Even as the ‘A’ Station was taking shape in early 1957, the Central Electricity Authority were exercising their statutory powers by applying to the Minister of Power to extend the Willington Generating Station with a second section to be known as Willington ‘B’. The ‘B’ station was to be only two Units, albeit each of 200MW capacity – equalling the output of the ‘A’ Station with half the hardware. Only one 425 foot chimney was required for the ‘B’ Station, but three cooling towers were provided. Of course the cooling towers are the largest and therefore most distinctive features of any power station. The three structures provided for the ‘B’ station were set at right-angles to the north of the pair for the ‘A’ Station. The towers are 300 feet high and have 145’ diameter at their tops, 122’ at their “throat” and 218’ at the base. Each tower had an effective cooling surface of 858,000 square feet. By the end of 1957 the ‘A’ Station was nearing completion. The construction had not been without its cost – three workers lost their lives in falls, a hazard faced daily by the transient population of builders who moved from site to site on this work during the 1950s and 60s. The first Unit of the ‘A’ Station was commissioned on 17th December 1957 with Unit 4 bringing the station up to full operational capacity on 10th July 1959. An official opening ceremony was performed on 2nd October 1959 by the 11th Duke of Devonshire. Such was the demand for electricity (calculated to be doubling every ten years at that time) the capacity of the four Units of the ‘A’ Station were up-rated to 104 megawatts. The net effect of this was to significantly reduce the spare capacity of the station – meaning the plant had to be driven hard almost all the time. Once Units 5 & 6 in the ‘B’ Station came on line a few years later, the whole site settled into its work-a-day job of providing electricity to the adjacent National Grid sub-station. The water for the cooling towers being sucked out of the Trent to cool the steam prior to its return to the river (the same water probably went through the process half a dozen times before it reached the Humber!) meant that the Trent in the area had a somewhat higher temperature than it would naturally, thus making for excellent fishing. Ken Lucas, a former employee shared his memories: “I served my time as an electrical fitter at Willington from 1965 to 1969 and remember that the exciter on one of the B station units, No.6 I think (the one on the left as you looked out of the workshop window towards the coal plant) had burnt out and was going to be away for repair for many months. Don Eddison came up with the idea of using a diesel loco to supply the excitation for the unit. The links from the loco generator to the shunt drive motor were removed and cables were run to the alternator excitation terminals. A set of loco controls were installed in the plant control room to allow raising and lowering of the speed of the diesel and thus the excitation. The loco was actually moved two inches per day back and forth to prevent brunelling of the wheel bearings. I seem to remember someone calculated by the amount of fuel used and the average revs of the diesel that the loco would have travelled twice around the world had the loco been in normal service. The loco was called THE ROYAL PIONEER CORPS. I think it was a D class loco. I had my picture taken on the footplate which later appeared in the company newspaper that used to be called the Power News.” This appears to be the press clipping that Ken is referring to. D54 “Royal Pioneer Corps” (later Class 45, No. 45 023) was built at Derby in 1962 and received its name at St. Pancras on 14th November 1963. It was withdrawn by British Rail in 1984 and cut up in Leicester two years later. Continues below:
-
Continued from above: Both the Smith girls were in attendance. Jessica having raced there on a few occasions, whilst Rebecca was making her track debut. The top prize for this evening was the Roy Goodman Perpetual Challenge Trophy. After a remarkable and outstandingly successful racing career that spanned more than 50 years from 1954 to 2004, Roy finally hung up his helmet but with a wish to instigate the trophy as a lasting legacy to the sport that had been his life. Heat 1: From the yellow grade it wasn’t long before Jessica Smith (390) passed early leader Mike Cocks (762). She stayed there until the closing laps when Neil Hooper (676) took advantage of traffic to nudge her wide, with Matt Stoneman (127) doing likewise on the next corner. Hooper stayed just far enough ahead of the 127 car to take the win. Result: 676, 127, 390, 315, 667, 302, 988, 762, 835 & 881. Heat 2: Two complete re-starts were required after some dramatic opening laps which saw almost half the field lost to the early clashes. They included Luke Trewin (529) and Paul Rice (890) walloping the Honiton bend wall, Archie Farrell (970) spinning and getting collected by Charlie Fisher (35), and Josh Weare (736), Jamie Jones (915), Ben Goddard (895), Lauren Stack (928) and Ian England (398) all ending up in a heap – and that was just the first attempt! Luke Trewin doesn't have much luck at Smeatharpe! The second period of red flags were required when Ryan Sheahan (325) and Matt Hatch (320) collided on the home straight before the 325 car was collected at high speed by Jon Palmer (24). On the third start Rebecca Smith (931) and Jack Bunter (128) both had spells in front before Charlie Fisher moved ahead to take a comfortable win. Result: 35, 418, 184, 736, 931, 398, 128, 903, 572 and 194. Consolation: Richard Andrews (605) led until Ryan Sheahan took over and went on to win from Rice and Palmer, all three having been caught up in the action in the previous race. Result: 325, 890, 24, 320, 605, 232, 895, 114, 446 and 915. Final: Jamie Ward-Scott (881) was the early leader before Ben Spence (903) moved ahead, but Spence’s fellow ‘B’ grader Weare was setting a strong pace and moved past both into the lead. Spence initially stayed with him and had Jessica Smith following close behind, as Stoneman led the star grade challenge. Stoneman passed Smith and finally pushed Spence wide on the Honiton bend to take second with a lap to run. Cheddar driver Weare was sufficiently far enough ahead in his ex-Luke Wrench (560) car to take his maiden Final win from Stoneman and Spence, with Jessica holding onto fourth ahead of Palmer. Result: 736, 127, 903, 390, 24, 320, 325, 881, 35 and 184. GN: This race for the Ash Sampson Memorial Trophy was led out by Ash’s grandfather Roy Goodman, and Mick Whittle in his latest magnificent recreation from yesteryear. Spence’s start in the race was deemed too good, and he was shown the black cross, but it helped propel him into the lead early on and from there he never looked back as he went on to take the flag first. Behind him, Vaight, Tommy Farrell (667), Stoneman and Palmer enjoyed a great scrap as they fought through the field. They finished in that order in positions two to five, but Vaight inherited the win when Spence was docked two places. Result: 184, 667, 903, 127, 24, 931, 605, 33, 988 and 302. A heavy World Championship weekend at Mildenhall for the Saloons no doubt contributed to a lack of visitors but whilst the 13 car entry was unspectacular the action on track was far from it with a trio of entertaining and hard hitting races. Heat 1: Sole white top Marc Chenery (281) broke away at the front as the six yellow graded drivers battled, while Jack Grandon(277) and Junior Buster (902) traded blows with Warren Darby(677) at the rear of the field. Yellow flags were required after Bryn Finch (314) went head on into the Honiton bend wall, which brought Phil Powell (199) onto Chenery’s tail. Powell used the bumper to take the lead and drove to a comfortable win as Junior Buster worked his way into second, and Ian Govier (28) shifted Chenery for third on the last bend. Result: 199, 302, 28, 281, 677, 489, 276, 799, 444 and 672. Heat 2: This race began in similar fashion but ended spectacularly for Powell when a tangle and spin on the home straight left him open to being collected very heavily by Darby. The 199 car was left with significant rear end damage which ended Powell’s night, but he was able to extricate himself from the wreckage. Govier had pushed Chenery wide to take the lead before the stoppage and went on to win. Junior Buster had worked his way into second but was docked two places for a jumped restart, putting Chenery back into second and Grandon third. Result: 28, 281, 277, 902, 677, 799, 489, 444, 33 and 672. Final: Just 10 cars had survived for the Final in which Chenery was able to build a huge gap, which this time couldn’t be closed down as he went on to take a second consecutive Final at the track. Behind there was action all around with spins and shunts galore to conclude an evening’s racing which promised little and delivered a whole lot more than the car numbers would suggest. Result: 281, 33, 902, 276, 444, 799, 28, 672 and 489. Pics from both meetings in the gallery. It’s date time! Welcome to Derbyshire, and the abandoned Five Sisters of Willington: Maybe not what you were expecting, but still a magnificent scene. This place is unlike anything else. There are few sites you can see five or so miles before you get to them. The five cooling towers completely dominate the area. You don’t really get the scale of them until you get up close and their size sinks in. Three of the five have still got the inner cooling systems fitted, while the two nearest the main road have been cleared and are just shells. It gives a surreal feeling to this fantastic place with its titans to power generation. Here is a very brief summary on how a cooling tower works: Natural draft cooling towers provide air circulation. The towers are usually very tall in order to induce adequate air flow, they are also expensive to construct and are only used for applications where a large constant cooling requirement over many years is required. Cooling water is pumped from the cooling tower basin to the power plant. The cooling water is heated by the process and its temperature increases. The warm cooling water is now pumped back to the cooling tower to be cooled. The incoming warm water is distributed through spray nozzles inside the tower. The spray nozzles spray the warm water evenly over a set of cooling fins. Water passes downwards through the fins whilst air passes upwards. As the water travels downwards through the fins, some of it evaporates which causes the remaining water to be cooled (evaporative cooling). As air travels through the fins, its temperature increases and it rises to the top of the cooling tower due to the stack effect (hot air is less dense than cool air and thus rises above it). The air exiting the top of the tower draws in more air at the base creating a natural air flow from bottom to top; this is the stack effect and it is continuous providing cooling water is constantly circulated. Natural draft cooling towers have a very unique shape for several reasons. The first reason is that the shape reduces the amount of construction material required when building such a large tower. The second reason is that the paraboloid shape of the tower accelerates the air flow through the tower, which increases the tower’s cooling capacity. Natural draft cooling towers are sometimes referred to as hyperbolic towers although the correct term is hyperboloid. A history of Willington Power Station: The Power Station once dominated the village and was the landmark by which Willington is most often characterised. For many locals when travelling by road the sight of these said clearly that they were approaching home! Willington Power Station was comprised of two almost entirely independent generating stations situated on the same site. With separate management and staff, the few facilities they shared amounted to the coal and water supply. The two stations were formally known as Willington ‘A’ and Willington ‘B’, with the ‘A’ Station closest to the main road. (The A5132 was then known as the B5009). Post-war Britain saw a sea change in the way electricity was produced. The National Grid, which had been devised in the 1920s, allowed the removal of the small generating stations located in urban areas, to be replaced with large, purpose built, “Power Stations” linked together to deliver electricity wherever it was required. While the location of the customer was no longer a high priority in siting a power station, ready access to raw materials of fuel and water certainly were. The Trent valley, with its obvious water supply and proximity to the Nottinghamshire & Derbyshire coal fields – which were then thought to be inexhaustible – was an ideal choice. An extensive, although already clogged, railway system was also on hand to move the coal from pithead to power station. Small, previously unheard of villages and hamlets became well known landmarks; High Marnham, Staythorpe, Ratcliffe & Drakelow to name a few, followed by Willington. The beginning of 1954 saw the bulldozers move onto a 286 acre area of pasture land, a small covert and boggy, unused scrub between the B5009 and the Derby – Birmingham railway. No buildings were at peril – at least not yet – but Marples, Ridgeway & Partners Ltd, the company responsible for site clearance, foundations and the railway works, had a long job ahead of them preparing the site – especially the boggy land which was to form the railway marshalling yard. Thousands of tons of sand were tipped to build up the ground away from the water table. The consulting engineers Ewbank and Partners were responsible for the design, engineering, construction & commissioning of the ‘A’ station with a legion of sub-contractors being tasked with the multitude of disciplines required in building such a station. Continues below:
-
-
Hi there folks, This week we have the 2021 Saloon World Final from Mildenhall where history was made as three brothers filled the podium places for the first time in any major stock car championship. It’s then F2’s/Saloons from Taunton, before we get our heads turned on our date with the curvaceous ‘Five Sisters of Willington’. The Scrapco Redlodge Ltd Saloon Stock Car World Final from Mildenhall – Sat 14th August 2021 This was the 39th running of the race and was the biggest event held here under the current promoting team. The Saloons had been an integral part of the Mildenhall scene throughout its history. It was the sixth time it had been held here. They were keenly supported by the previous promoters – RDC, and since the takeover of the stadium, by the same promoting team that run the Spedeworth and Incarace group of tracks. Mildenhall is the smallest track on the Saloon schedule but it certainly packs a punch and the action here just at a run of the mill domestic meeting is explosive, put a major championship on the line and it is likely to be ballistic! The one regret was not having the defending champion on the grid, due to a technical infringement racing ban. Nick Antwerpen (D153) made it over from Germany and was the only driver from mainland Europe. With a number of hard surface only racers not taking up their grid spots Scottish racers Ian McLaughlin (684) and Kyle Irvine (85) had an opportunity to move onto the grid in the reserve spots. The 60 car entry was Mildenhall’s highest since 2005. With 29 seeded entries, and four of the remainder without any World Ranking points, that left 27 to contest the last-chance qualifier, with six places up for grabs. Last Chance Qualifier Jack Rust (172) on pole led Tommy Parrin (350) and Tam Rutherford (5) away as Kegan Sampson (329) was put into the wall with Ivan Street (420) following soon after. An early caution flag flew with more chaos around the circuit. The resumption of racing saw Rust pull clear whilst Harry Barnes (126) jumped up to second. Half-distance saw Rust with a safe lead from Barnes and Tom Yould (214), who then spun, before a fire in the Jordan Cassie (697) car with four to go brought out further yellow flags. At this stage the qualifying places were held by Rust, Barnes, Shane Emerson (888), Rutherford, Rowan Venni (370) and Wesley Starmer (525). Emerson and Rutherford spun on the restart allowing Charlie Morphey (92) and Yould into the top six. Starmer moved inside Venni for third, but apart from this all looked safe for those in the top six. However, this all changed on the final bend when Morphey launched a suicidal last-bend hit which took out Starmer and Venni as well as himself. Rust and Barnes cruised to first and second and were joined in the all-important top six by Yould, Dom Davies (261), a quickly recovering Starmer and Michael Boswell (328). Result: 172, 126, 214, 261, 525, 328, 129, 364, 888 and 30. Three support races followed before the WF. Each competitor entered the track between bursts of flame to receive mementoes from Diggy’s wife Sally, and a handshake from Deane Wood before forming the 35 car grid. OUTSIDE INSIDE 730 Deane Mayes 600 Barry Russell 399 Cole Atkins 389 Ryan Santry 902 Brad Compton-Sage 161 Billy Smith D153 Nick Antwerpen NI747 Matt Stirling 349 Michael Allard 670 Ross Waters 199 Phil Powell 26 Tommy Barnes NI811 Kieran McIvor NI153 Ryan Wright 84 Carl Boswell 120 Luke Dorling 171 Adam O’Dell 428 Lee Sampson 170 Ryan Patton 131 Timmy Barnes 618 Stuart Shevill Jnr 277 Jack Grandon 229 Graeme Anderson 573 Marty Lake 38 Barry Glen 570 Simon Venni 561 Aaron Totham 57 George Boult Jnr 341 Austin Freestone 126 Harry Barnes 172 Jack Rust 261 Dom Davies 214 Tom Yould 328 Michael Boswell 525 Wesley Starmer World Final Unfortunately the track had dried out by now making for dusty conditions. Polesitter Barry Russell hit the front at the drop of the green followed by Santry, Stirling and Smith, as the outside line escaped the mayhem, before Stirling was among the many spinners. They also included, further back, Timmy and Harry Barnes. The lead two opened a small gap to Smith who was closely followed by his uncle, Tommy Barnes. Russell’s hopes of securing a major title took a big blow when he clipped the broadsided Anderson car and he spun on the home straight with Santry also delayed. Smith now took over at the front from Tommy Barnes, Santry, Allard and Watters, before Santry spun a lap later. As Barnes challenged he half spun, which sent Smith into a full spin towards the infield and he dropped right down the field. Russell was sent up the back straight wall soon after and got driven over by McIvor bringing out the first caution. Having dropped several places Mayes had managed to make his way through the chaos into the lead spot. Timmy Barnes was now up to ninth followed by younger brother Harry. Dorling and Lee Sampson spun out of 5th and 6th spots as Tommy pushed through on the inside to take the lead followed by Allard who then spun the 26 car. Allard’s attack now let Mayes back in front. With Smith’s chances now gone he turned his focus to helping his uncles. He spun onto the infield and rejoined behind Mayes, then spun him out on the pit bend. That put Allard into the lead, with Timmy passing Watters for second. He then took advantage of backmarking traffic to hook Allard out on the back straight and take the lead of the race. Freestone was the next driver to require a caution after being cannoned hard into the turn three fence by Billy Smith. Timmy now led from Watters, Harry Barnes, Tommy Barnes, the quickly recovered Mayes and Venni. Harry dived inside Watters for second on the restart with Tommy following through. The Barnes brothers were now, incredibly, sitting 1-2-3 in that order. Tommy moved into second but Timmy was well clear as the race reached 5 to go. Another caution was called when a fire broke out on the Allard machine. A four lap Barnes brothers showdown was on the cards with Mayes, Sampson, Watters and Venni ready to take advantage if the trio took themselves out. However, Timmy shook off Tommy’s initial challenge and the remaining laps passed without incident with the 131 car far enough ahead to escape any last bend attack by the 26. Harry exchanged places with Mayes to clinch the historic 1-2-3 on the final corner before going for a roll on the slow down lap. Mayes had to settle for 4th, ahead of Venni – the only driver from outside Norfolk in the top six – and Sampson. Leading Scot Shevill Jnr came home 7th in the car that had taken him to British Championship honours some 15 years earlier. “Brilliant!” Timmy Barnes declared, after the brothers were joined on track by their delighted father Willie and other family members. “I couldn’t ask for anymore. I got spun out straight away but the track dried up and the thing was like it was on rails. I was hoping not to get a yellow but it is what it is – you’re going to get it around here. Luckily enough I got going at the restart and couldn’t have driven any better. The car’s been on form – well, all our cars have been on form on shale. It was either me, Tommy or Harry, wasn’t it – it was meant to be!” Result: 131, 26, 126, 730, 570, 428, 618, 525, 84 and 277. Consolation White top Ashton Armstrong (527) initially kept clear of the chaos to lead until he was spun out by back-marking Dorling who had been an earlier spinner himself. Kegan Sampson inherited the lead until he was overtaken by Street who took the win. Result: 420, 811, 329, 349, 670, 92, 573, 610, 250 and 389. Final Brad Dyer (48) led the field away but was briefly demoted as Will Morphey (129) passed him until Dyer spun him out to move back in front. However, Dyer was then taken out by Michael Boswell (328) who led until halfway when he was passed by Emerson and Watters. Scotsman Watters motored through to the victory. Result: 670, 570, 389, 525, 126, 730, 811, 573, 26 & 328. Allcomers The meeting finished with a busy allcomers race. Allard was cannoned up the wall amid a chaos filled event. Thomas Howard (30) fought hard to claim his maiden win. Result: 30, 561, 389, 26, 399, 386, 126, 570, 370 & 525. The F2’s were also on the bill for the weekend. 56 cars were in the pits. Heat 1 Result: 584, 606, 129, 226, 225, 464, 78 and 296. Heat 2 Richard Rayner (413) led for the majority of the race until being passed by Rob Mitchell (905). Rob then tangled with a back marker and Rayner re-claimed the lead and subsequent win. Result: 413, 94, 38, 324, 55, 414, 618 & 9. Heat 3 Result: 231, 103, 543, 183, 81, 374, 43 & 612. Consolation Pat Issit (113) wins the race which included Scotsman Euan Millar (629), and West Country driver Steven Gilbert (542) each having a shale outing before the World Semi-Finals at Northampton in a week’s time. Result: 113, 761, 377, 992, 69, 905, 286, 724, 209 & 629. Final The 33 car race sees a chaotic opening lap with a group of ‘B’ graders in a pile on the exit of turn four. Matt Linfield (464) had climbed to second place by quarter distance and spins out Charlie Sime (584) for the lead. Result: 464, 606, 94, 183, 905, 103, 324, 38, 81 & 55. GN Result: 94, 38, 225, 905, 183, 324, 43, 9, 4 & 542. Sunday 15th August The Sunday morning family pic Pre-meeting lap of honour for the new World Champ The Saloons were in fine form on day two with a mesmerising display of action-packed races. Heat 1 Armstrong led before Boswell went in front whilst Santry spun Timmy B. Boswell’s pace was so great that even with a spin he still took the win. Result: 328, 561, 129, 697, 30, 428, 131, 747, 316 & 389. Heat 2 The fourth Barnes boy of the weekend was out in this race. He led until Dyer took over. Petters, Emerson and Venni engaged in a battle over second being joined by Allard. Venni took the lead from Allard and going down the back straight for the last time Allard got him sideways which sent the youngster into a marker tyre ending his race. Result: 349, 888, 26, 386, 126, 730, 573, 350, 570 & 600. Consolation Venni’s luck didn’t change in this race when he took up the lead before Dyer spun him out. Georgie Boult Jnr then spun Dyer with Dorling going through to win. Nick Antwerpen finished second but was not given the place although he was allowed to take part in the Final. Result: 120, D153, 57, 370, 399, 902, 277, 364, 38 & 298. Final An early caution was called for when Russell became stranded on track. Boswell led away the restart with Emerson soon taking over. Boswell stayed with him and tried a last bend attack which came close to succeeding. Boult fired Compton-Sage hard into the fence rolling the 902 car. The race ended in more drama with Emerson being docked handing the win to Boswell. Result: 328, 730, 570, 399, 30, 126, 131, 428, 561 & 120. Dash For The Cash The start was predictably explosive as Lee Sampson, Venni and Trent Arthurton (610) came together on the exit of turn two, with the 610 car ending up on its roof. The restart saw the new champ Timmy B take up the challenge after sending Santry wide to claim the cash. All done in a car that is over ten years old. Result: 131, 389, 126, 26, 399, 38, 370, 129, 349 & 570. Just under 50 F2’s made it for Sunday. Heat 1: Tony Blackburn (225) crosses the line first but is demoted by the steward. Richard Rayner (413) inherits the win after losing it on the last lap. Result: 413, 464, 225, 542, 4, 195, 38, 544, 226 and 69. Heat 2: Josh Rayner (414) keeps it in the family with victory in this one. Result: 414, 905, 183, 103, 81, 606, 377, 324, 149 and 375. Consolation: Matt Clayton (231) claims the win after Aaron Cozens (76) had led the majority of the race. Result: 231, 43, 76, 127, 57, 9, 296, 55, 286 and 209. Final: A chaotic last few laps sees confusion reign as to the rightful winner. In the end it is given to Marcus Gilbert (43) after he survived a last bend tangle with the 225 car. Result: 43, 225, 57, 183, 226, 129, 464, 905, 81 and 195. GN: In a repeat of the previous evening Stu Sculthorpe (94) races away to the victory. Result: 94, 38, 129, 464, 183, 231, 542, 55, 43 and 226. Taunton – Monday 16th August 2021 The run of four consecutive Monday nights’ racing for the F2’s came to a close with an excellent 39 car turnout on a dry but cool evening. With the addition of a pair of St. Day meetings, and a couple of Bristol fixtures it had been a real challenge for the region’s drivers. Mick Whittle unveiled his latest creation. A truly stunning piece of craftsmanship was on display in the pits and it took to the track alongside Roy Goodman later in the evening to run some laps. Continues below:
-
Continued from above: Onto Trams in Trouble: It’s the turn of a bus this week to be in the spotlight Blackpool, Leyland Titan PD3/1 bus 361, Rigby Road bus yard, Blackpool. September 1976 The bus had collided with the canopy of a petrol station in Thornton. A Miscellaneous couple to finish: Coppull Colliery's Leyland F2 steam wagon. Birkacre is an old industrial area just to the south of Chorley, near Coppull, and in 1778 a water mill was leased by Richard Arkwright for cotton spinning. In 1779 it was the scene of a notorious Luddite riot and the cotton mill was set on fire by machine workers and destroyed. Sometime later the mill was rebuilt and used for calico printing, dyeing and bleaching. Water power was replaced by steam and Birkacre Colliery opened in 1880 to supply the works. Nearby, Coppull Colliery had been in existence long before the one at Birkacre and in fact it closed soon after Birkacre opened. Back in 1852, on 20th May that year, there had been an explosion of fire damp, found to be caused by a lighted candle; 90 men escaped, suffering from chokedamp or burns, but 36 men and boys died. That colliery was renamed Hic Bibi Colliery in the 1860s. Road transport for Birkacre was mechanised in 1906 with the purchase of a Coulthard steam wagon. This was made in Preston just before the firm merged with the Lancashire Steam Motor Co to form Leyland Motors. The vehicle pictured has poppet valves and was new in 1921. It ran until the closure of the mine in 1933. A Leyland Hippo 19.H/7 with bodywork by Wilkinson for J.D. Inglis & Co of Laurieston, Falkirk, new in January 1947. Next time: It’s the Saloons WF weekend from Mildenhall, and the Roy Goodman Perpetual Trophy F2 meeting from Taunton. We then need to be on our best behaviour as we’re off to meet some beautiful sisters.
-
Continued from above: If you look carefully enough there is usually a solitary tile marked with the manufacturer’s name. In these tunnels it is W.B.Simpson & Son. W.B. Simpson: William Butler Simpson was born in 1798, and inherited his talent as an artist from his father, and founded the family firm in 1833. He gradually built up the business during his lifetime. In 1852 his two sons were apprenticed to the firm and later were made partners. The company has been passed down through the family ever since. In 1858 an arrangement was made with George and Arthur Maw of tile manufacturers Maw & Co for the sole agency of their products in the London Postal District. Simpson’s own tiles were made in kilns under the South Western Railway arches at Vauxhall, and later at Chandos Street which became the Civil Service Stores. A large business was also done in hand painted tile decorations for theatres, restaurants, and cathedrals, many of which still exist today such as the Criterion Theatre, and Holborn Restaurant. The company was reorganised to meet the demands of large scale plain tiling required for many new operating theatres, toilets and clinics throughout the country. Around this time they had to meet the challenge of the largest contract ever undertaken by a single tile company at the time - the London Underground. They had a long history with tiling the underground stations going back as far as the late 1880s. This new contract comprised station work to the Hampstead & Highgate Railway, the Piccadilly & Brompton Railway and the Bakerloo line. Within the price of £100,000 was included the necessary equipment to crane the materials to the subterranean site, and their own trains for moving about underground. The company’s tiles can be seen all over London stations including but not limited to Swiss Cottage, St. John’s Wood, Kentish Town, Chalk Farm, Camden Town and Tufnell Park. In the 1990’s they were called upon to work on the Jubilee line extension including North Greenwich, Canada Water and Southwark stations. They have also put their mark on some of the busiest stations in the capital such as King’s Cross St. Pancras and Waterloo. The Gatwick monorail is also part of their portfolio. As can be seen on the tile above Maw & Co were the appointed agents. Maw & Co The company was formed in 1850 by George Maw and his brother Arthur when they bought an ailing tile business in Worcester. They manufactured floor tiles and quickly gained a high reputation. However, they had to contend with the same problems as the company they had bought out – the local clays were unsuitable and materials had to be brought in at great expense from Shropshire. In 1852 they relocated to Shropshire to the Benthall Works at Broseley where they could make use of the clay as well as coal. The brothers soon opened their own mines. At first the company barely covered its expenses and full commercial production did not begin until 1857. A few years later medieval style tiles became the height of fashion. Maw & Co were the first to use six and more colours. Mosaic tiles also formed a large part of Maw's business. In 1862 a patent mosaic tile was introduced. At the same time George Maw was experimenting with transfer printed and hand painted picture tiles, as well as relief tiles and gilt ones with the entire design executed in gold. By the 1880’s Maw & Co had become one of the most influential and important tile manufacturers. To help meet the increasing demand Maw & Co made more and more mechanical improvements using steam driven tile presses for example, and in 1883 moved to new premises at a more appropriate site at Jackfield covering five acres with every convenience in services and layout. At the height of the tile boom the company produced over 20 million tiles a year and published lavishly printed catalogues. Maw’s “lists of persons and establishments supplied” ran to five pages and included the Royal Family, Alexander II of Russia, two maharajas, nine dukes, twelve earls, the railway companies, thirteen cathedrals, thirty-six hospitals, fifty-three public buildings, nineteen schools and colleges, and five warships. At the end of the century Maw & Co was the largest tile factory in the world. Art Nouveau designs were followed by unique Art Deco geometric styles. Unfortunately the recession at the end of the First World War, building restrictions, and the closure of the railway in the decades following World War II were very detrimental for tile production in Jackfield, and eventually the factory closed in January 1970. It’s not everyday that you get to stand at the bottom of a lift shaft that has been empty for 90 yrs. You can see two openings where passengers would have accessed the lift from two levels. This shaft has been sealed off with the exception of an inspection hatch at the top. After escalators were fitted in the 1920s, former lift shafts, landings and passageways were closed to the public. The emergency staircase was removed, and the shaft converted to provide ventilation to both lines. This was aided by a large extractor fan, and an opening cut into the wall at platform level covered with a grille through which air could freely flow. A unique view is seen in this old pic. It’s possible to see the southbound line of the Bakerloo line from the very end of the northbound platform. Back out of the abandoned section into the ‘live’ booking hall now to have a look at a new memorial honouring Frank Pick. Artists Langlands & Bell were commissioned to design the permanent installation to celebrate London Transport’s first chief executive, Frank Pick, the mastermind of many of London Underground’s designs, including the Johnston typeface and roundel. Mounted on the wall of the ticket hall the memorial comprises a roundel with “Frank Pick” written in the centre, and is made of bronze, vitreous enamel, LEDs and marble. Pick is widely credited with transforming London’s transport network into a design-led organisation in the 1930s, commissioning famous designs including many of its Underground’s Art Deco stations, the Johnston typeface and roundel. Frank Pick: the man behind London Transport’s identity Frank Pick, Chief Executive of London Transport, was a towering figure who had an unrivalled flair for design management. During his 30-year career, Pick changed the face of London Transport. He believed in ‘fitness for purpose’ and the power of good design to enrich life. This ethos aimed to enhance the quality of the passenger environment through innovative architecture and design, and attention to detail. Pick successfully cultivated a large network of artists and designers. His vision brought London’s transport system international acclaim for its architecture, graphic art and design. Climbing the ladder Frank Pick was born in Lincolnshire on 23 November 1878, but grew up in York, where he attended St Peter’s School before being articled to a solicitor. On graduating with a first-class degree in law from the University of London in 1902, he returned to York to join the North Eastern Railway as a trainee manager. After two years in the Traffic Statistics Office, Pick became Personal Assistant to the General Manager, Sir George Gibb. In 1906, Gibb took over as Managing Director of the struggling Underground Electric Railways Company of London (UERL), often known as the Underground Group. He invited his young assistant Pick to join him. The Underground Group had recently taken over the debt-ridden District Railway and were in the process of opening three deep tube railways at this time. By 1907 the new Tubes were in serious financial trouble and a new General Manager, Albert Stanley (later Lord Ashfield), was brought in as a last-ditch attempt to save the company. Stanley gave his staff six months to turn the business around, and in doing so gave Pick the freedom to follow his instincts in publicity. Despite a lack of experience, Pick found a natural affinity with this role, establishing a series of pictorial posters to encourage travel, before addressing the appearance of stations, signage and branding, with Stanley’s support. By 1909 Pick oversaw a new Traffic Development and Advertising Department for the Group, which led to his later role as Commercial Manager in 1912. Pick revolutionised transport poster design, injecting new life into a conservative, largely text-based medium. He was aware that almost every attraction in London was within reach of the Underground, or at least could be marketed as such. Eye-catching posters enticed prospective travellers indirectly, by focusing on the destination rather than the mode of travel. Imagery never seen before on the Tube let commuters know that a trip to the countryside, the theatre or the zoo was within their reach. Posters promoting off-peak travel were designed by some of the foremost artists of the time in a variety of styles. Rambling for routes Pick was interested in all aspects of transport. He played a major role in the planning and joint promotion of bus and Underground services after the Underground Group took over the Capital’s biggest bus operator, the London General Omnibus Company (LGOC), in 1912. Seeking to optimise bus routes and Underground connections, the ever thorough and hard-working Pick walked miles researching and discerning patterns for potential demand. He provided new routes, services and interchanges between bus and Underground that stretched further than they had before. These were advertised on posters and proved popular among commuters who were now venturing out during their leisure time, demanding an increased service. A type to last In 1912, Pick started to experiment with a new typeface to replace all the various ones used by the previously separate companies. In 1913, the calligrapher Edward Johnston was commissioned to design an official typeface known as Underground Railway Block, better known simply as Johnston. He continued to tweak the lettering until 1929 and, even today, an updated version called Johnston100 is used exclusively by Transport for London (TfL). Brand loyalty The Underground Map With an intuitive grasp of branding and corporate identity, Pick hit upon the idea of presenting the disparate underground companies as a coordinated network in 1908, to increase ticket sales. Deals were made to allow the cross-selling of tickets between companies and the first colour-coded maps of the whole system were printed under the heading Underground. The same branding was added to station exteriors. The Roundel This is the earliest known drawing of the Underground's standard bullseye design from 1925 Around the same time, Stanley had developed the original solid red disc ‘bullseye’ symbol to add impact to the name signs on station platforms. Pick was unsatisfied with the solid disc, thinking that it did not ‘hold the eye’ sufficiently. He sketched a ring in place of the circle and turned to Edward Johnston to work it into a final design, who brought all the elements together by incorporating the ‘UndergrounD’ branding in his new typeface. Finally, Pick had a unique visual symbol that the organisation could be associated with. The ‘bullseye’ was applied to all the Underground Group services – to be seen and recognised everywhere. Known as the ‘roundel’ since 1972, the emblem has changed little over the years and is one of the most recognised organisational symbols in the world. A philosophy of architecture During the 1920s and 1930s, the Underground expanded massively. Pick chose the architect Charles Holden for much of this work. The pair had first met through the Design and Industries Association (DIA) in 1915 and were kindred spirits, sharing a similar principled approach to architecture. Buildings should be easy to use, with clean simple lines, in keeping with the DIA’s slogan ‘fitness for purpose’. Starting with a new entrance to Westminster station in 1922, the two collaborated until Pick left London Transport in 1940. Examples include stations on the Morden extension on the Northern line (1926), the Underground headquarters at 55 Broadway (1929) and the stations of the Piccadilly line extensions (1931-1933). The latter are often considered Holden’s finest work. Pick worked closely with Holden, to the extent that the resulting buildings are almost considered their joint achievement. When Piccadilly Circus station was rebuilt, it was Pick’s idea to incorporate the circular booking hall, which Holden then designed. The pair travelled around Europe together in search of a ‘new architectural idiom’ in 1930. Sudbury Town station, opened in 1931 on the Piccadilly line, was chosen to demonstrate the new ‘house style’ and described by one critic as ‘a landmark not only in the history of Pick’s work but also in that of modern English architecture’. To Holden, Pick was a ‘tower of strength where his sympathies lay’ and a ‘friendly and genial’ travelling companion, with an understated sense of humour. Attention to detail Pick oversaw a coordinated design policy for London Transport, but retained his focus on details, partly because he was reluctant to delegate responsibility. He remained interested in every aspect of LT, its vehicles and services. He commissioned designs for train interior details like arm rests and lampshades, station furniture and even signal cabins and substations behind the scenes. Pick was the first to commission unique designs for the seating upholstery known as moquette on trains, buses and trams. As with his approach to posters, the best of both established and up-and-coming textile designers were commissioned. Moquette continues to be a prominent feature of TfL’s vehicles today. A lasting legacy Pick was appointed Managing Director of the Underground Electric Railways Company of London (UERL) in 1928. In 1933, he became Vice Chairman and Chief Executive of the newly formed London Passenger Transport Board, better known as London Transport (LT). He set and expected high standards, which he usually achieved. His publicity campaigns and commissioning initiatives cast a long shadow and are still much admired. His portrait hung at 55 Broadway, London Transport’s headquarters, for many years. Pick’s sharp administrative skills were utilised in both world wars. In 1917 he oversaw coal rationing for the Board of Trade, then chaired by his Underground boss Lord Ashfield. As the Second World War approached, Pick helped coordinate London Transport’s involvement in the mass evacuation of civilians. Pick left London Transport in 1940, after a technical disagreement with Lord Ashfield over government interference in LT finances. For a short but unhappy time he was Director General of the Ministry of Information. However, Pick clashed with Prime Minister Winston Churchill on another point of principle when he refused to distribute false propaganda in Germany. He moved to the Ministry of Transport, studying the usage of Britain’s canals and rivers. A complex man, Pick appeared shy to some, but overbearing and arrogant to others. His work was his life, though he refused offers of a knighthood and a peerage. Pick died suddenly at home in Hampstead shortly after his retirement in 1941. That completes our look at Piccadilly Circus - an iconic station. More pics in the gallery. Continues below:
-
Continued from above: This reduced staff costs and improved passenger flow at a time of rising passenger numbers. Annual passenger traffic at the station was 1.5 million in 1907, but by 1922 the number had risen to 18 million. The effects of this growth were clearly felt in the station with large queues in the booking hall and crowding on the platforms. Escalators were required to improve the flow of passengers, but they could not be installed within the existing station design. The only way of fitting escalators in would have meant going on an incline which would end up in the basement of the adjoining Criterion Hotel. So, a brand-new station was proposed, to be constructed underneath Piccadilly Circus itself, right in the heart of London. A drawing from 1928 shows the complexity of the newly constructed station below Piccadilly Circus AN ENORMOUS UNDERTAKING To achieve this ambitious vision of building a station directly beneath one of London’s busiest thoroughfares, the proposed design was meticulously planned and tested with a full-scale mock-up erected at the Earl’s Court Exhibition Centre. The final design included a flat steel roof deck able to bear the weight of the traffic above, a circular booking hall connected with several subways to the surface, and a total of 11 escalators connecting to both Underground lines below. Construction began in 1924, shortly after the statue of Anteros (commonly known as Eros or The Shaftesbury Memorial Fountain) was relocated to Victoria Embankment Gardens. A 5.5 metre (18ft) wide, deep shaft was sunk in its place from which all the construction was undertaken, starting with the fortified steel and concrete roof, installed in stages to minimise disruption to the roads above. It’s amazing to think that the entire station’s enormous space underneath was dug from this one tiny shaft. With it being one of the busiest thoroughfares in London it was not practical to stop traffic going through there for years on end even in the 1920s so it was a brilliant way of constructing the entire station. THE UNDERGROUND’S FLAGSHIP STATION The new station was commissioned by Frank Pick, Managing Director of the Underground Group, and designed by architect Charles Holden. Pick’s vision was for a flagship station, to project a sense of sophistication and modernity for the rapidly growing railway company. Holden created a concept which celebrated the Underground using his signature ‘Art Deco style’ design. The beautiful Art Deco ticket hall There was a problem with damp permeating the ceiling from the road which was close overhead. This was rectified in short order. Notice the ‘world clock map’ installed on the right. It showed the time around the world with London at its centre. Still there today The station theme was ‘The Heart of London’ and opulent finishing materials were used to offer a luxurious experience to 50 million annual passengers. They enjoyed Travertine marble from Tripoli, bronze poster frames, telephone booths, shop windows and lampshades, and red scagliola marble finishes on the concourse columns. The Underground also commissioned artist Stephen Bone to paint a grand mural (now lost) above the escalators. The rebuilding of the station cost a total of £500,000 and the main opening ceremony was held on Monday 10 December 1928. The old station was closed the following year on 21 July 1929 and a shopping arcade was built on the site, utilising the three original station entrances. SHELTERING FROM THE BLITZ Up to 2000 people a night sheltered down here During the Second World War, when the Blitz started in September 1940, Londoners started seeking shelter from the air raids in the Underground, at first without official permission. London Transport resisted allowing people to shelter on the platforms since the company’s priority was for the Underground to run a good service, so people could get to work and support the war effort. However, the devastating effects of continuous bombing forced London Transport to reconsider and allow sheltering at their stations. At first the conditions were very unpleasant. Hundreds of bodies were packed together on the cold platforms, trains were still running with passengers trying to get on and off and there was very little in the way of lavatory facilities or first aid posts. The situation grew increasingly dire and members of the public complained to their MPs, and the management of London Transport asking for basic facilities to be installed. In November 1940 the old passageways of the Leslie Green station were adapted to provide 24 toilets for male and female shelterers. The toilets were emptied into a holding tank and the waste was pumped up to the sewers using compressed air. The unpleasant job of emptying the buckets fell to station staff. Piccadilly Circus being so centrally located and one of the main Underground stations for the West End, and the many social clubs of Soho, was continually packed night after night with up to 2,000 people seeking shelter. The platforms were often so full that shelterers would sleep on the escalator landings and even on the escalators themselves. Shelter wardens supervised the shelterers but the wardens did not always get on well with the station staff whose main priority was to keep the railway running and serve passengers. By 1943 over 50 female staff were working there as women stepped into roles previously occupied by men. KEEPING SAFE Toilets were not the only thing kept in the disused passageways of Piccadilly Circus. On 22 and 23 of March 1941, over 150 crates of artwork from the Tate collection and London Museum were moved in to a secure storage especially built for safekeeping purposes. The collections had been stored at Dover Street station (Green Park) in the disused passageways there since the beginning of the Blitz in 1940. In 1941 the entire collection had to be moved but in secret, away from the curious eyes of the shelterers by erecting screens on the platforms at both stations. A special train with covered windows transported the collection between the two stations. The collections stayed there until 1946 when they were restored to their respective homes. STATION INNOVATIONS AND REFURBISHMENT As a flagship for the Underground, Piccadilly Circus has often been prioritised for station upgrades. On 2 October 1945 it was the first to receive fluorescent lighting, a state of- the-art technology at the time. It made the station appear bright as day compared to the gloom of the Underground elsewhere. By 1969 all the escalators had been upgraded, and by 1979 powers were being sought to modernise the entire station as a part of an upgrade programme planned for the 1980s. The refurbishment included a new subway leading up to Haymarket and Anteros (or Eros), and a complete retiling of the landings and platforms. The new tiles were designed especially for the project, inspired by the bright lights and the atmosphere of Piccadilly Circus above. The tiles were fixed directly onto the old tiles, this method having been successfully tested on the disused platform at Aldwych station in 1983 before being used at Piccadilly Circus. As well as improving the passenger environment the upgrade included improvements to staff facilities and ventilation. Piccadilly Circus was intended as a stop on the proposed Chelsea- Hackney line in the 1970s. This was planned as the next major construction project after the Victoria and Jubilee lines. It was designed to relieve pressure on other Tube lines in south west London. For financial reasons the line was not built, but the idea has recently been revived in proposals for Crossrail 2. However, after much consideration a station at Piccadilly Circus has been ruled out due to constraints underground. So, Charles Holden’s cleverly designed station will continue to offer a glimpse of the best of Transport for London’s heritage for years to come. Today’s passengers hurrying through the station booking hall are unaware that forgotten parts of history that you never get to see are just feet away. The corridors that closed in 1929 are at the bottom of a secret gated spiral staircase. Let’s get ourselves down it. This was the original construction access dating from the early 1900s. Entering this abandoned world is like entering a time warp. The first thing you notice is the coloured tiles which are different to the present day. The tile pattern and colour scheme was designed to make each station distinct. A lot of people were unable to read in 1906 so relied on the individual colours to let them know which station they were at. Continued below:



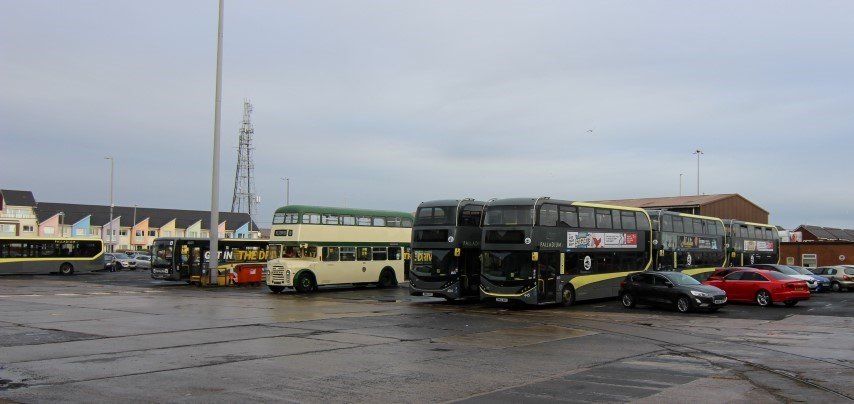
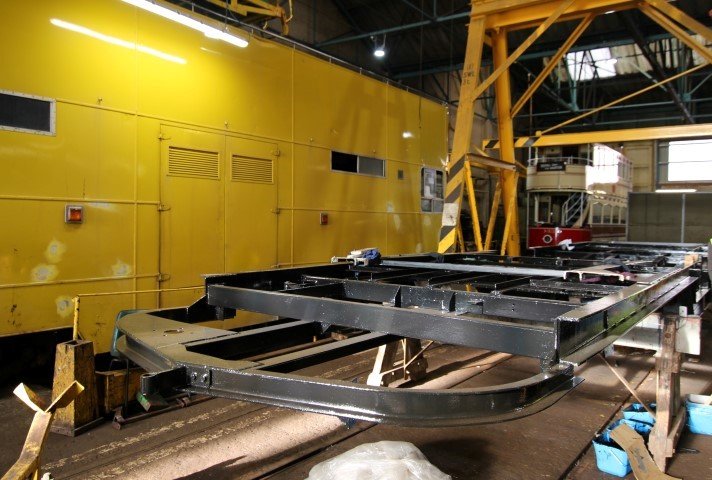
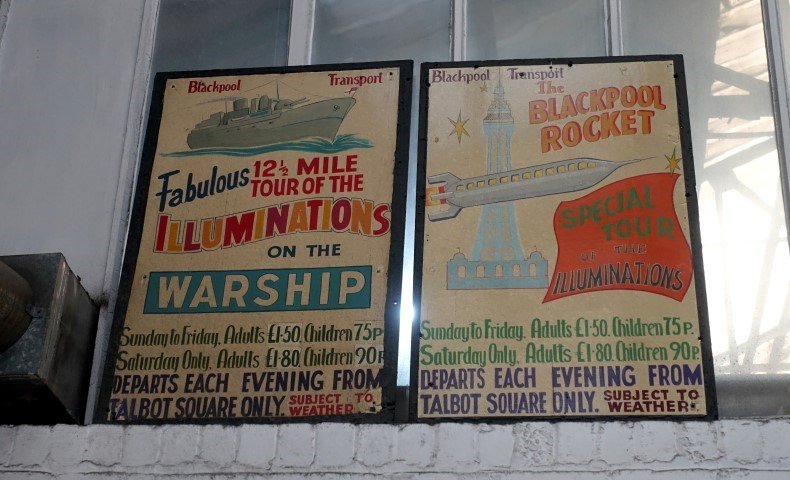
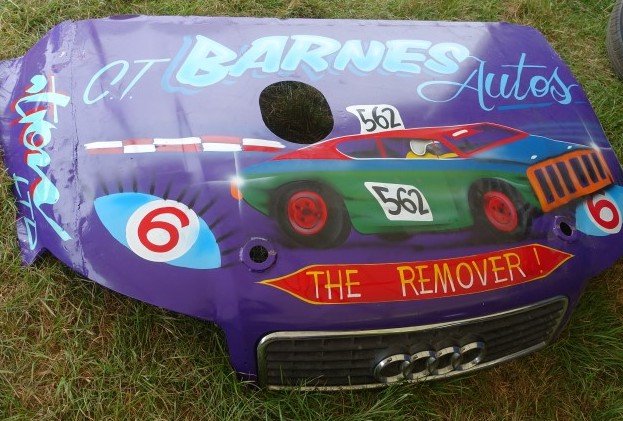

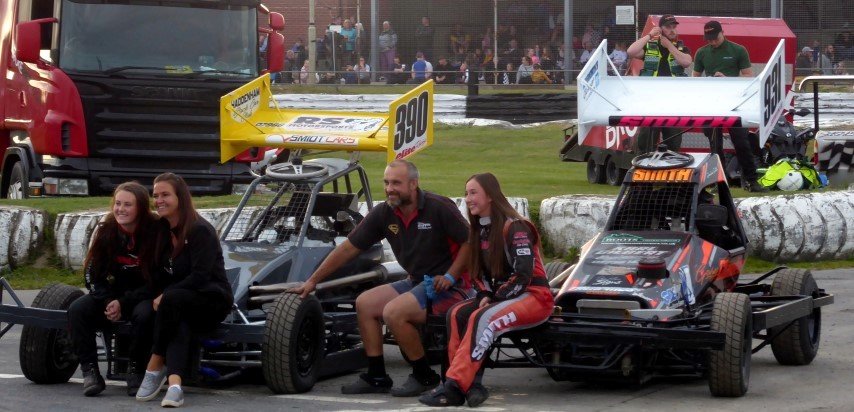
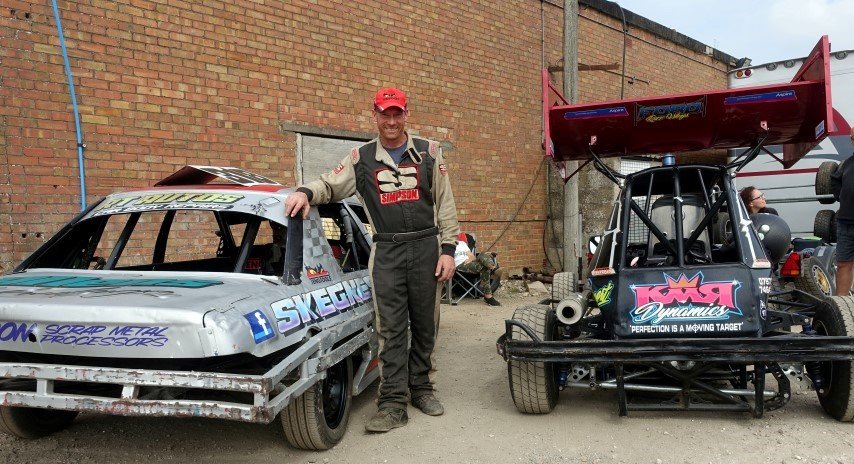
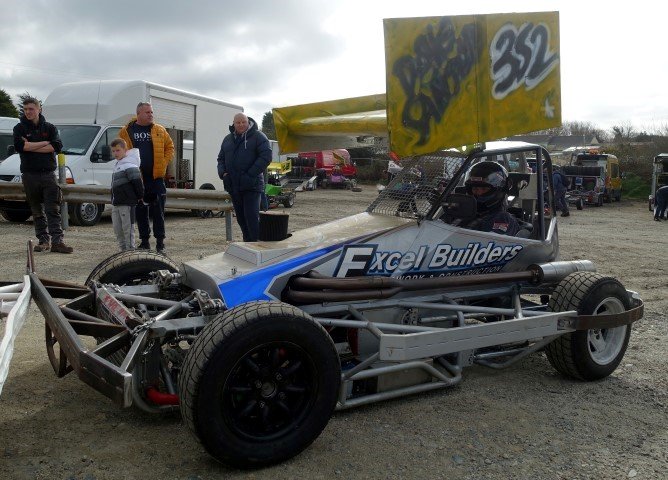
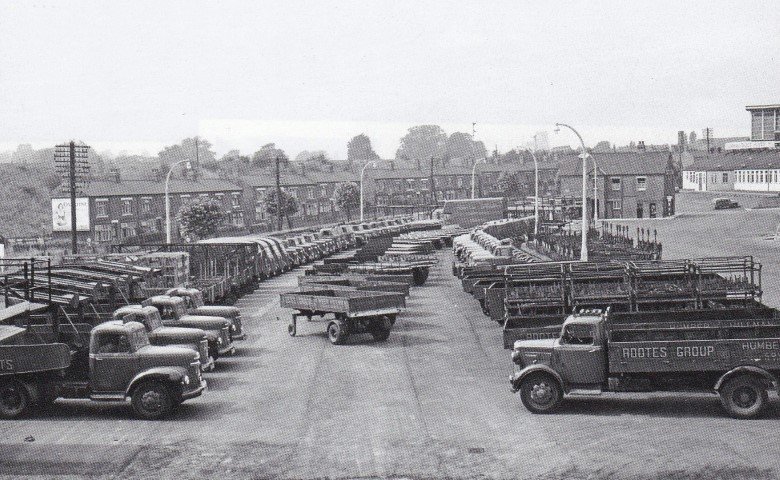
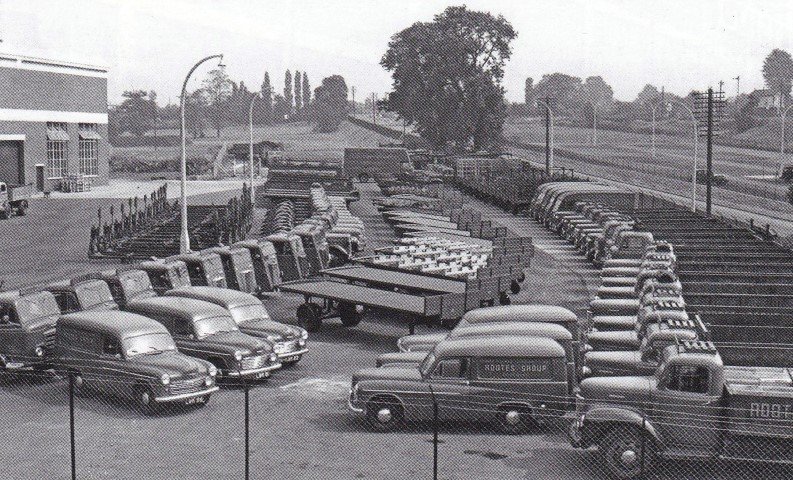
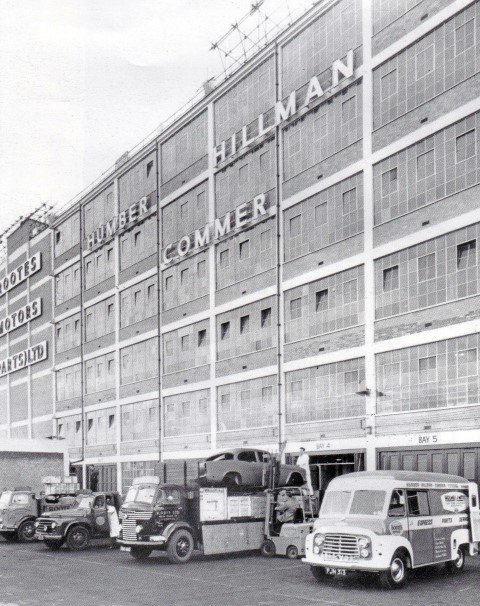
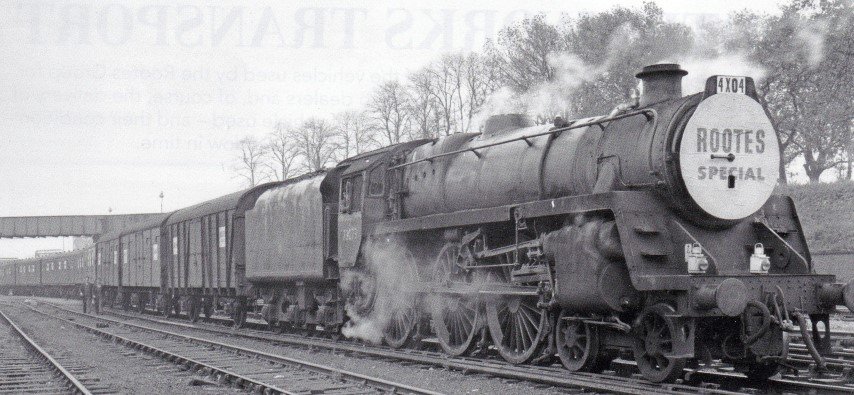
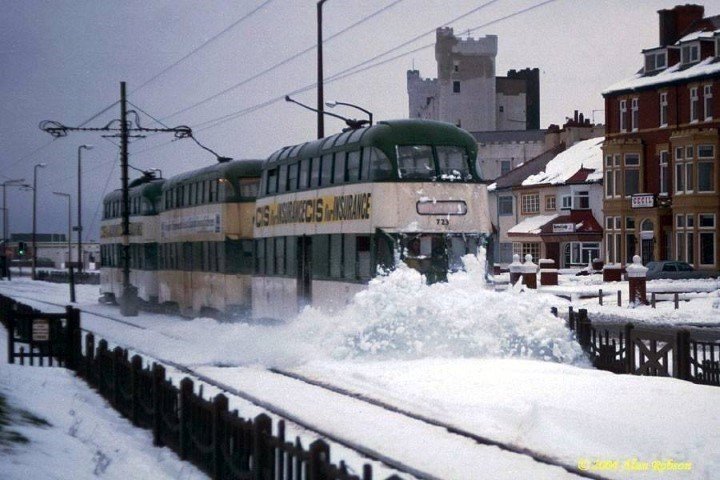
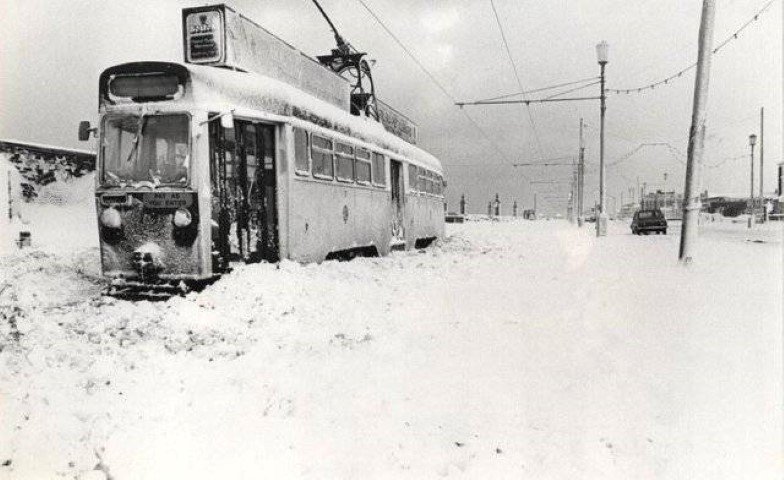
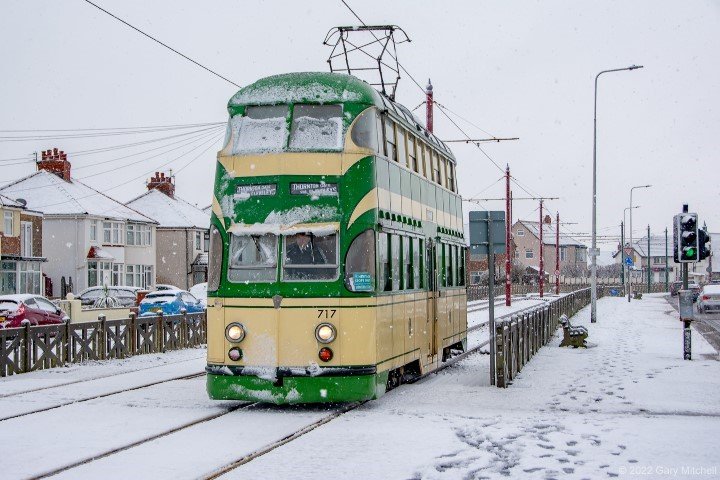
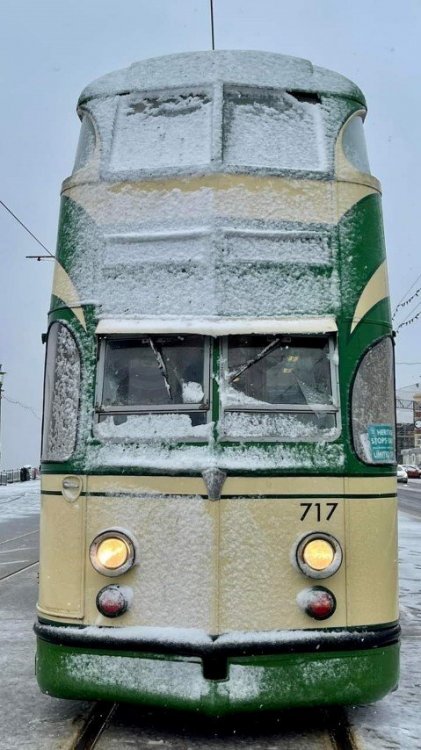
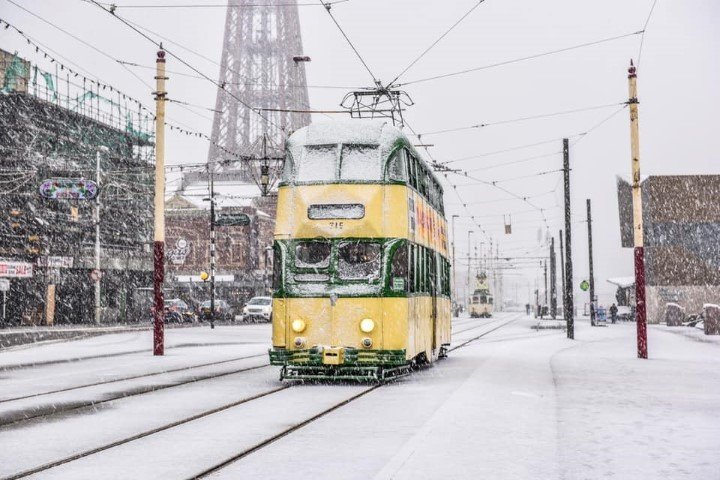
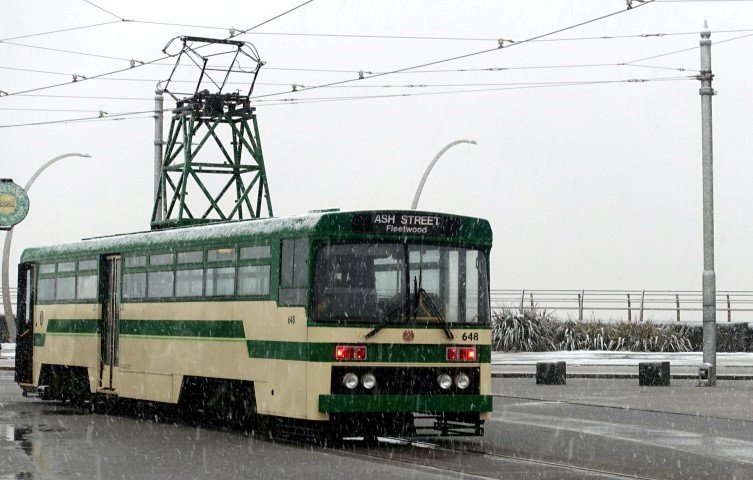
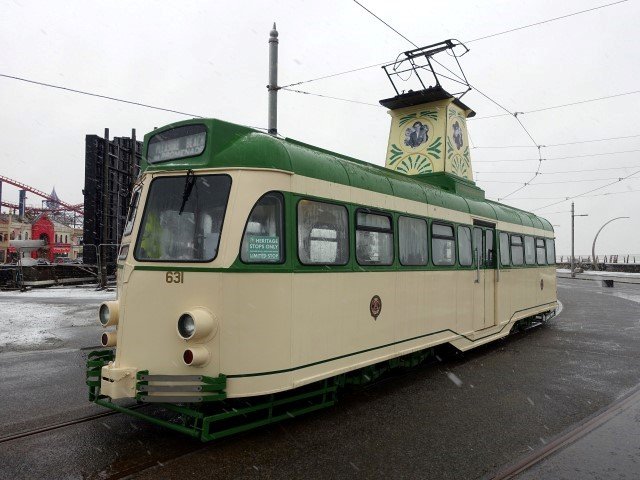
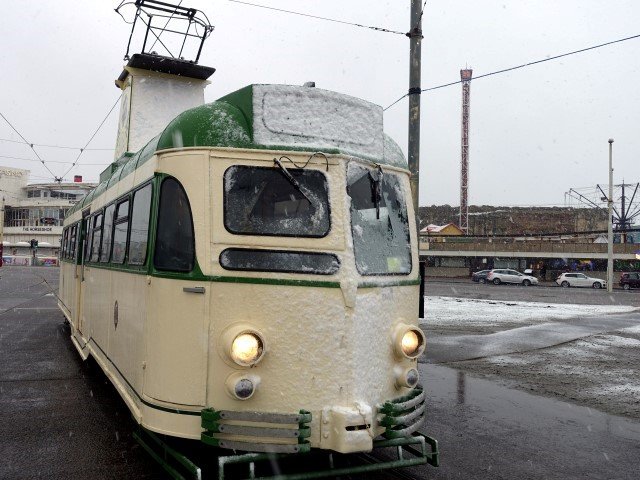
alongside..jpg.60568cbec3b46bc67824808f6a3b0c3e.jpg)
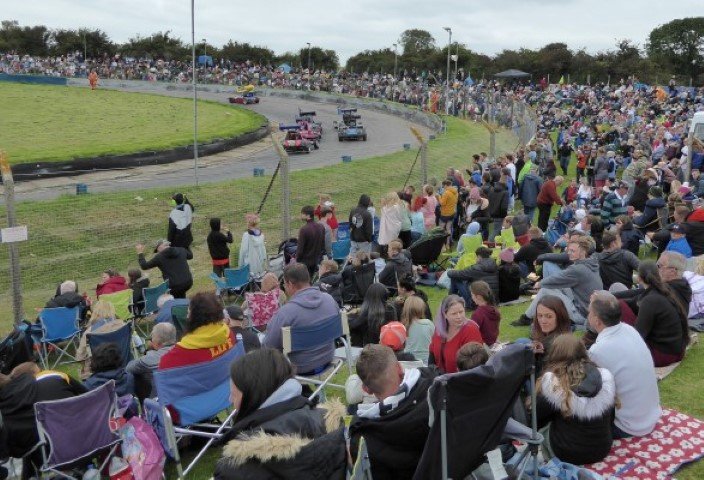
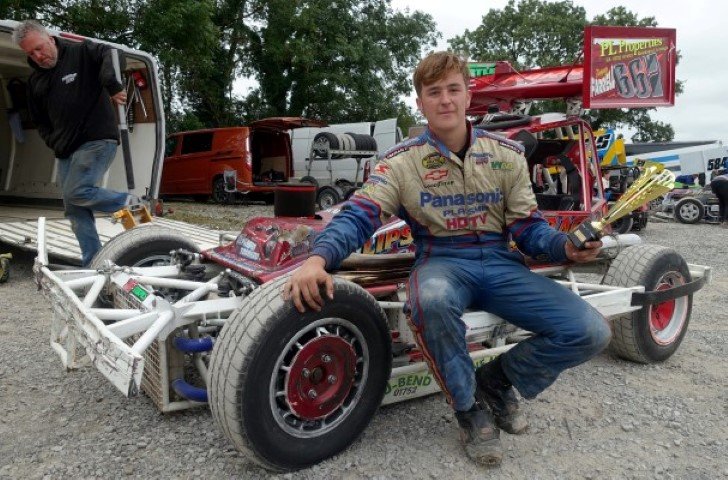

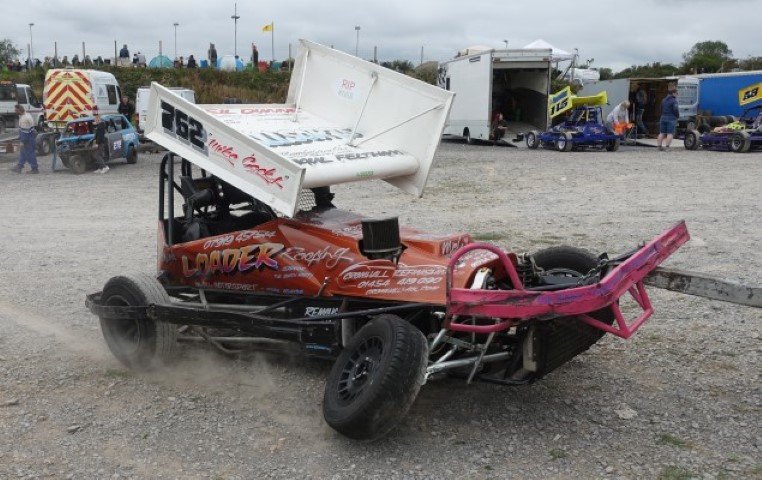
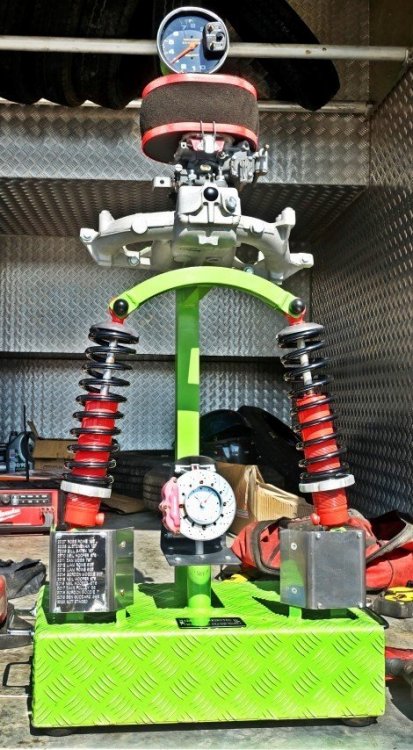
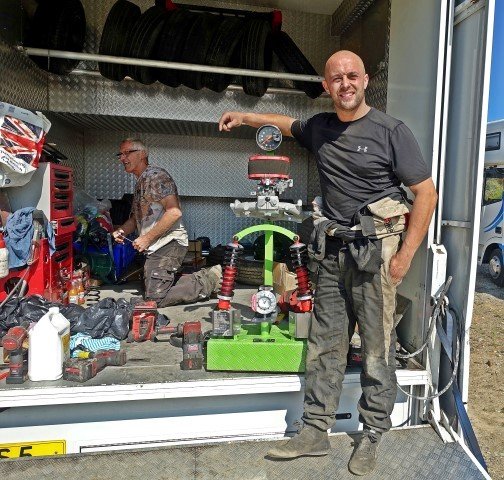
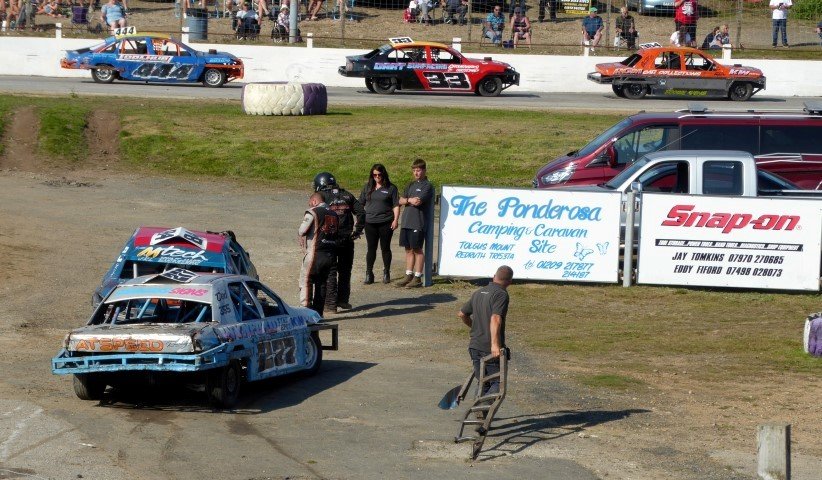
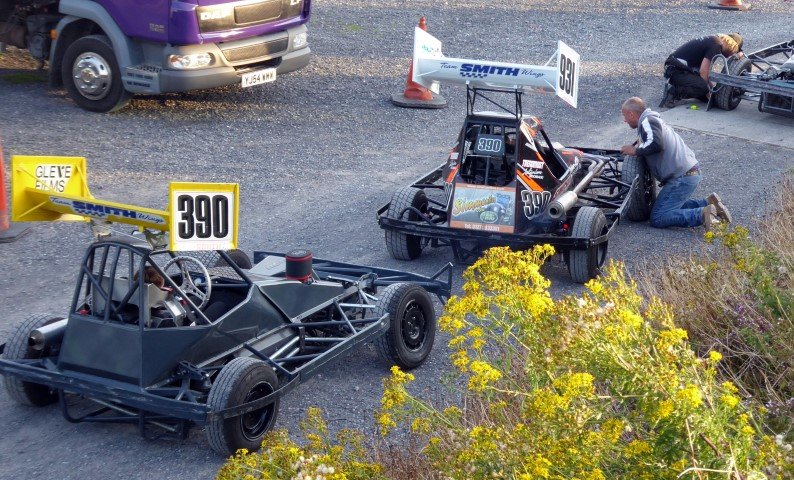
.jpg.9421823f580b4fb41f80a8459e03f74f.jpg)
.jpg.8b1ce4d845af7fae7e3a8c7a1170ea0b.jpg)
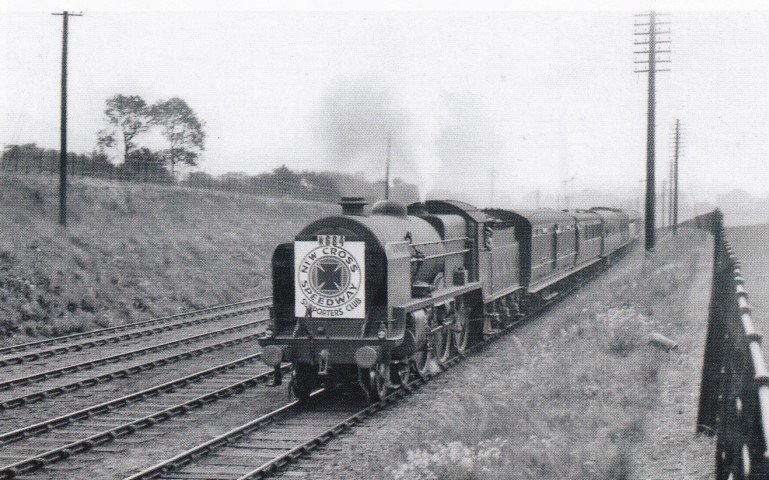
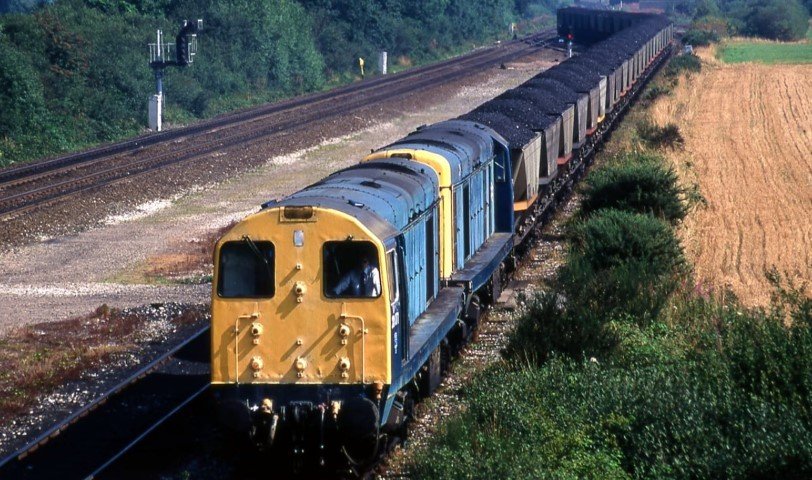

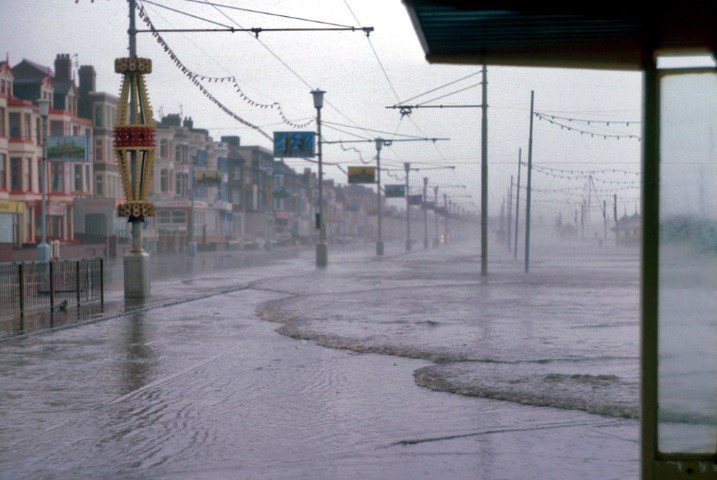
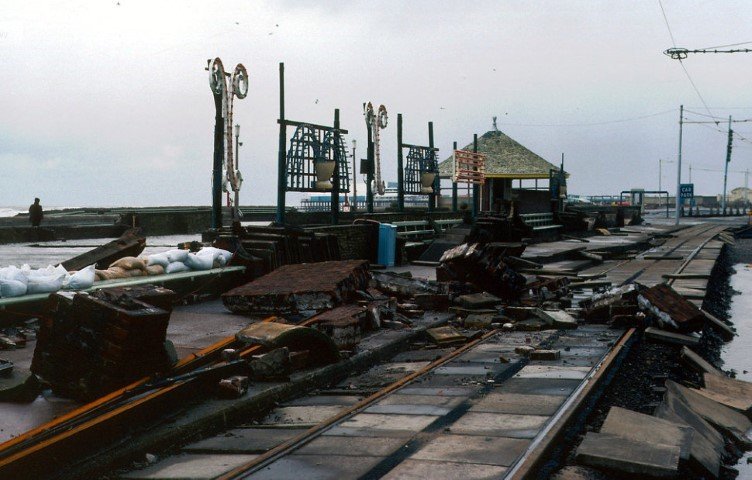
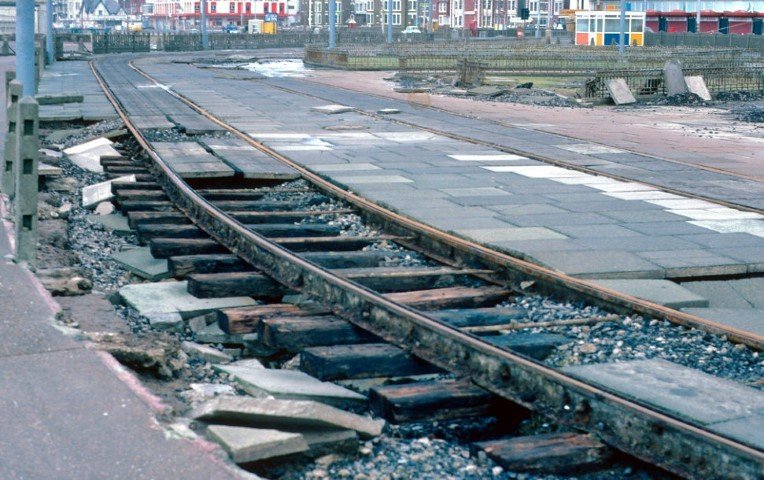
.jpg.b500df22a772e927c27d51c588a661a7.jpg)
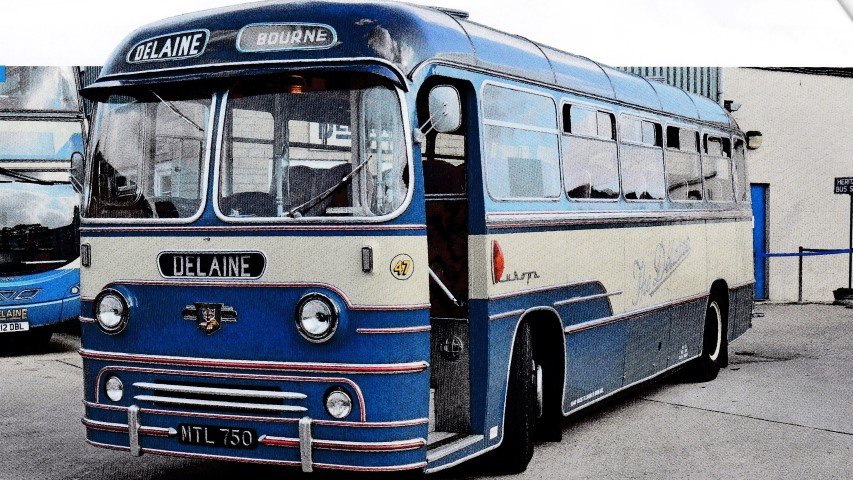
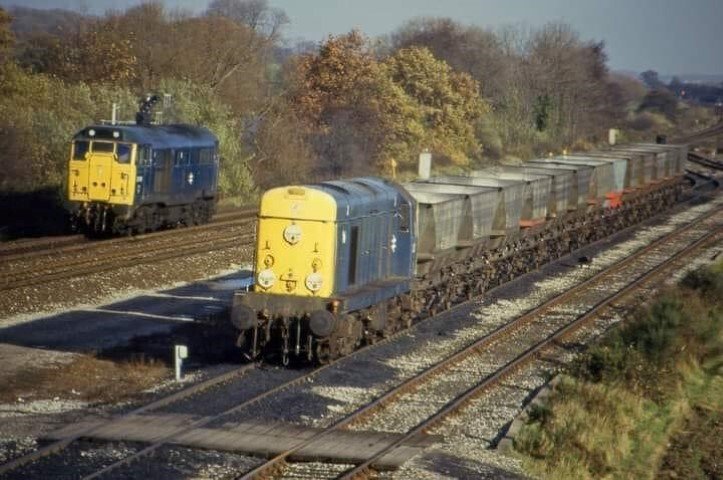
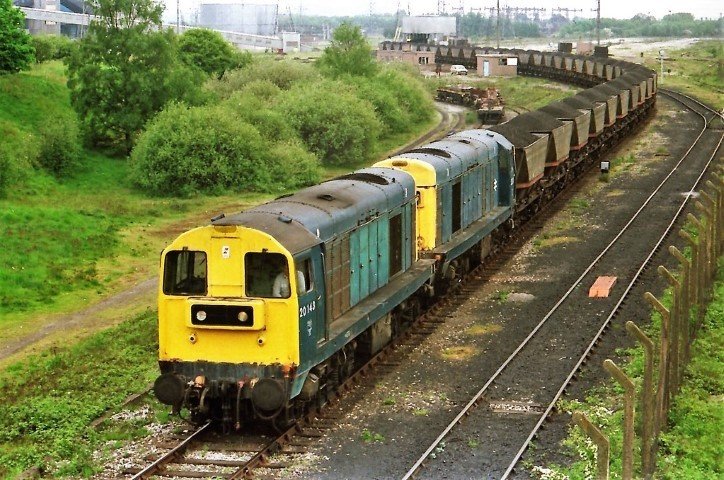
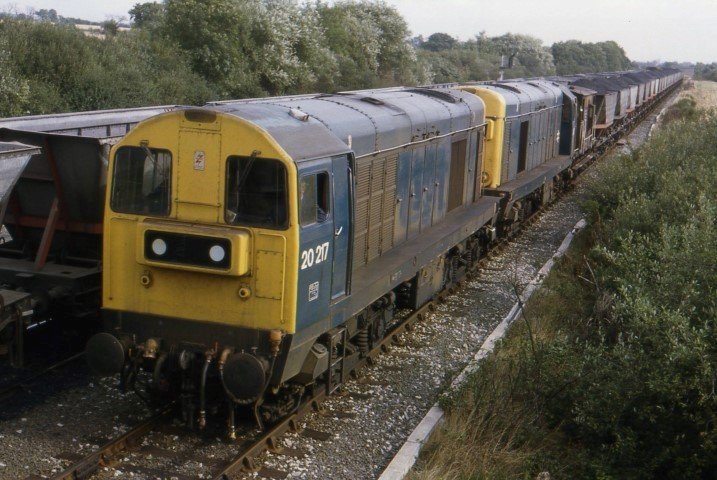
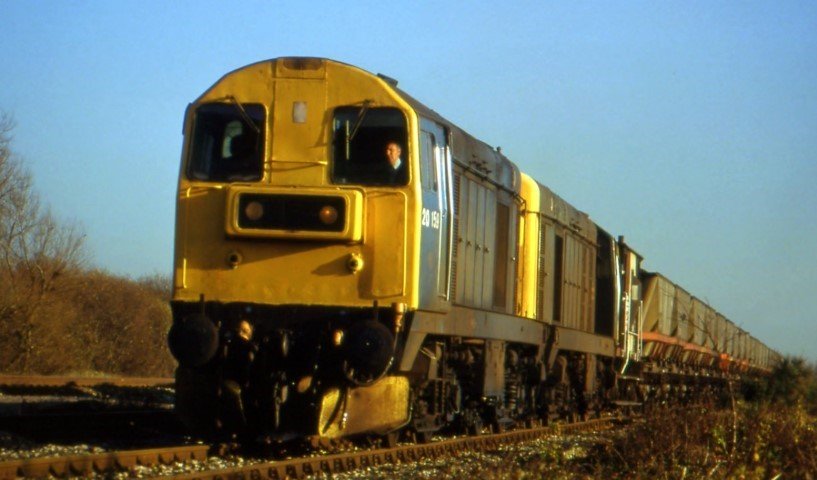
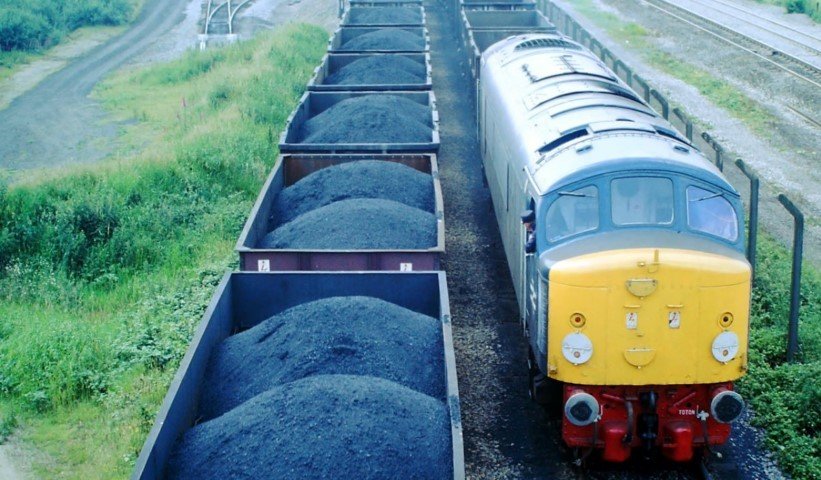
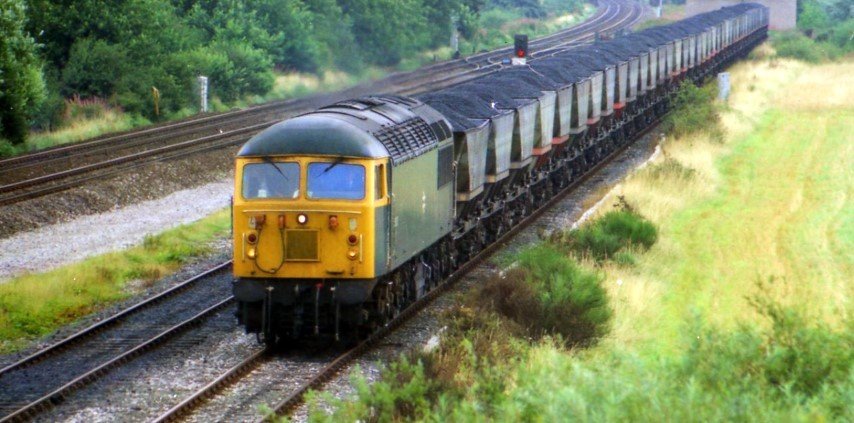
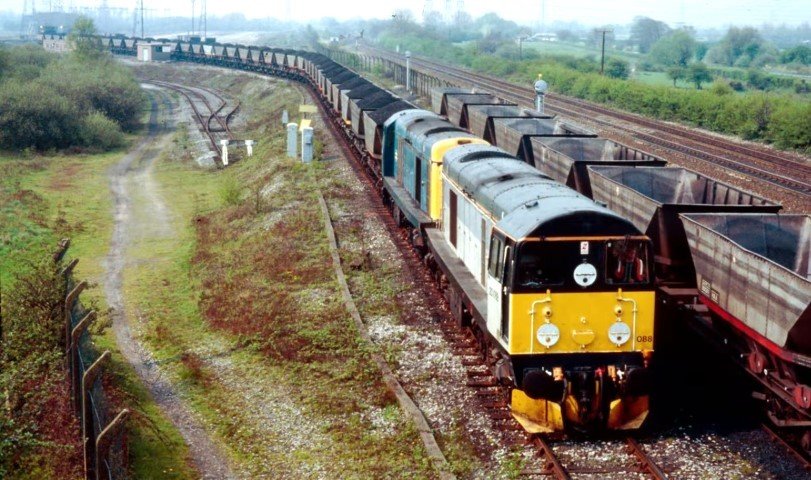
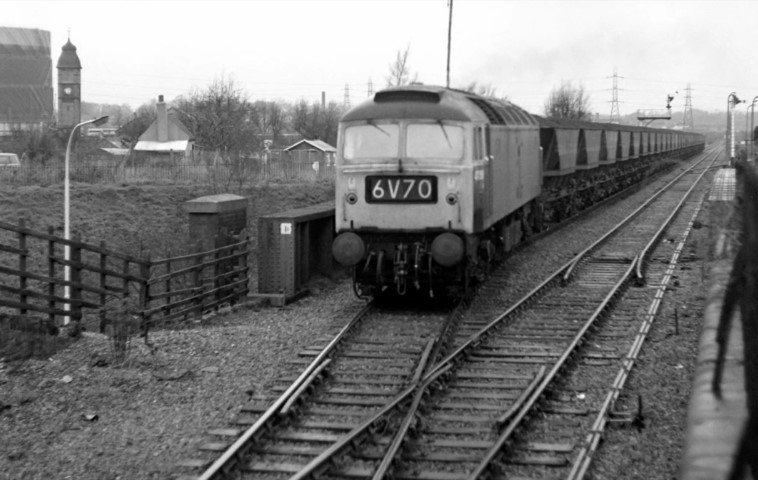
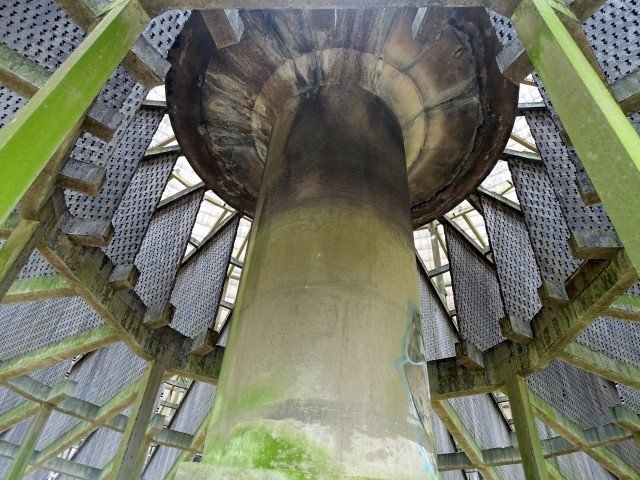
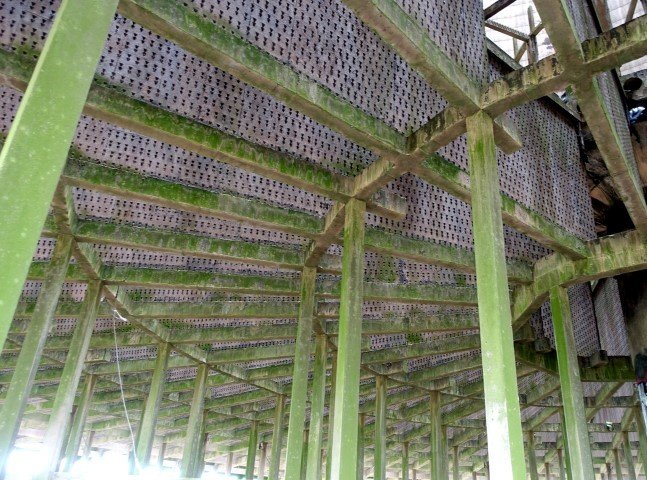
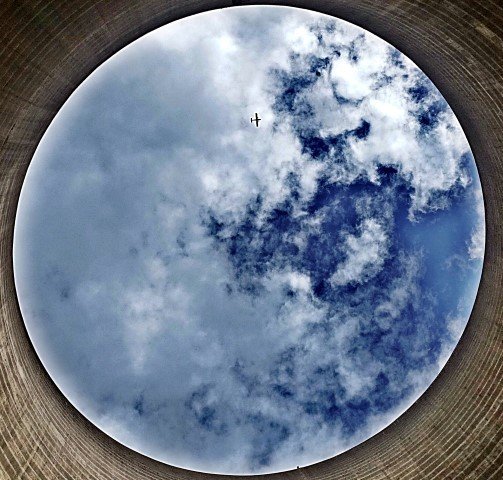
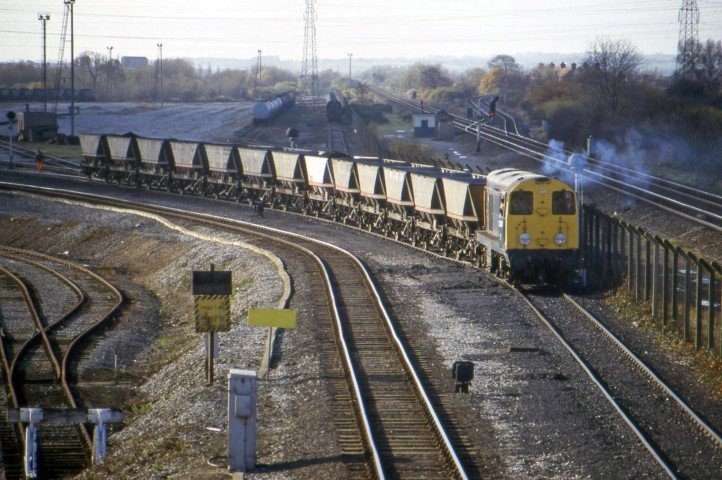
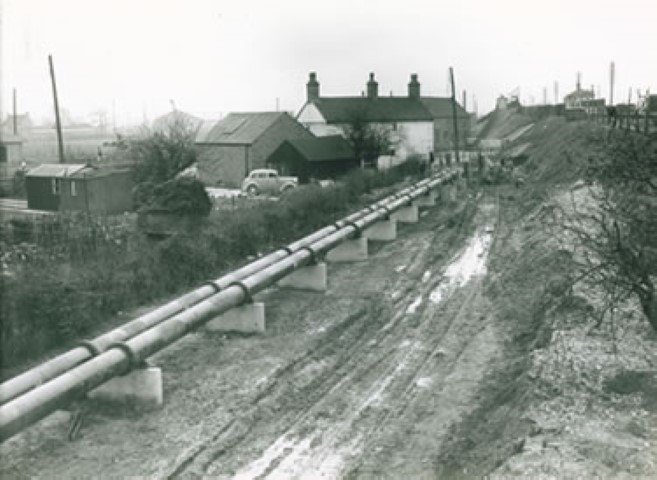
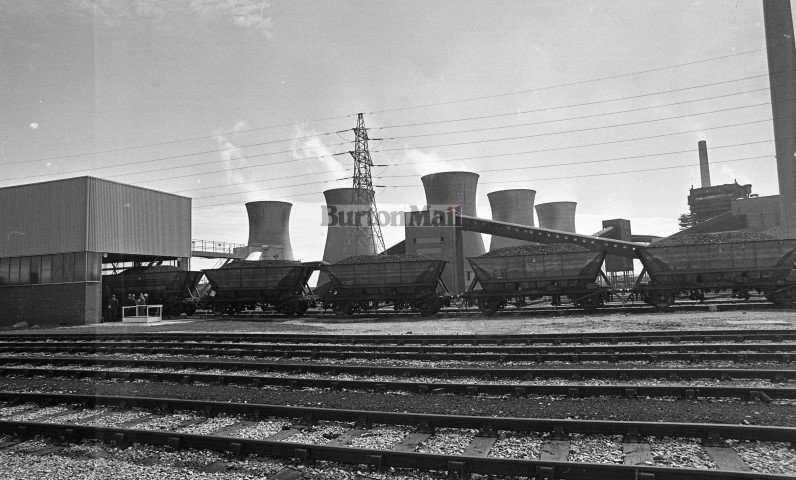
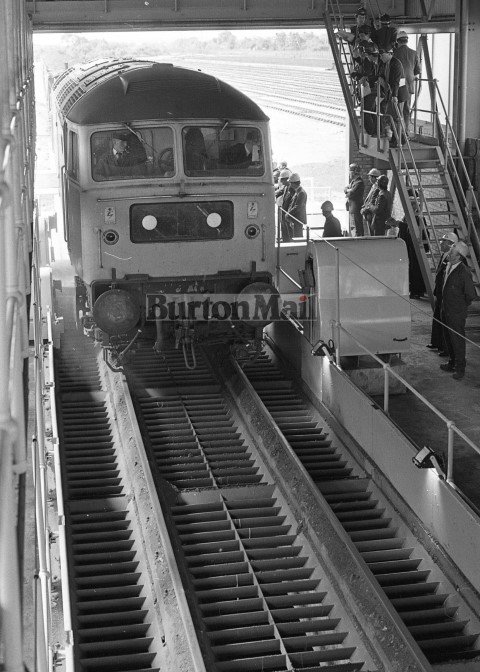
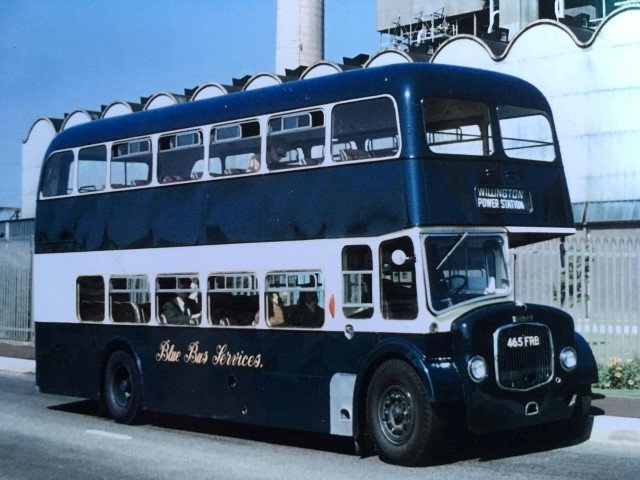
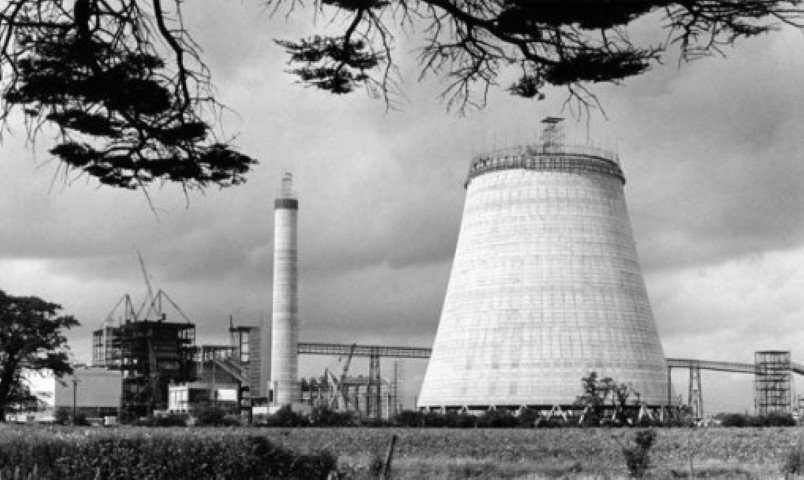
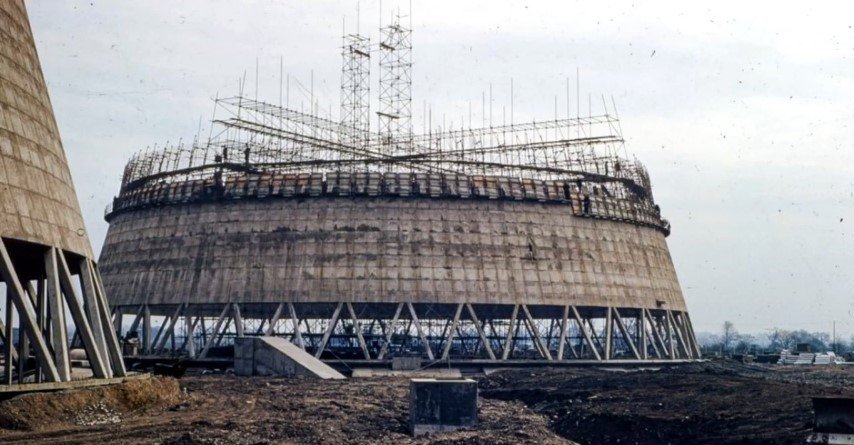
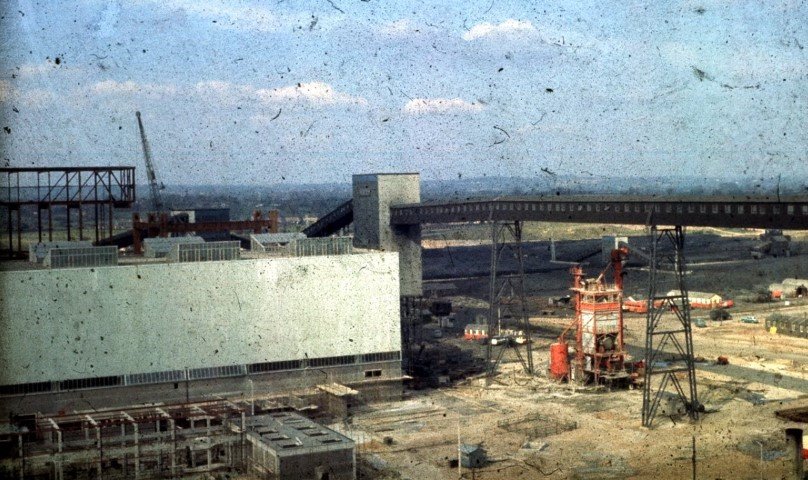
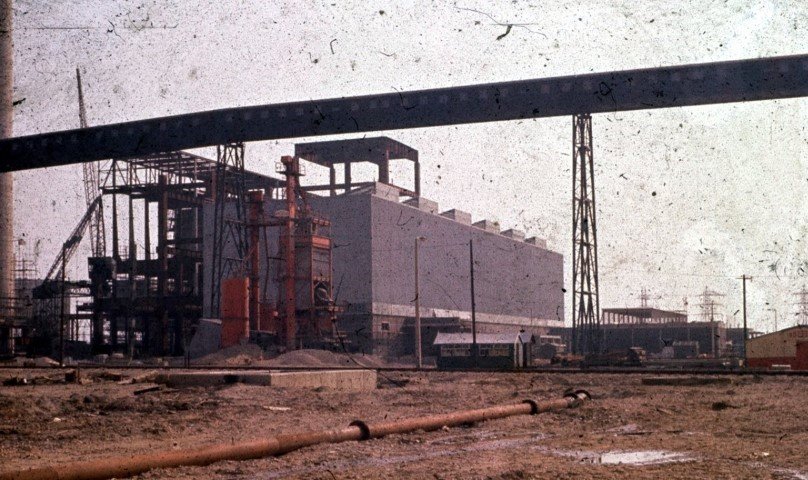
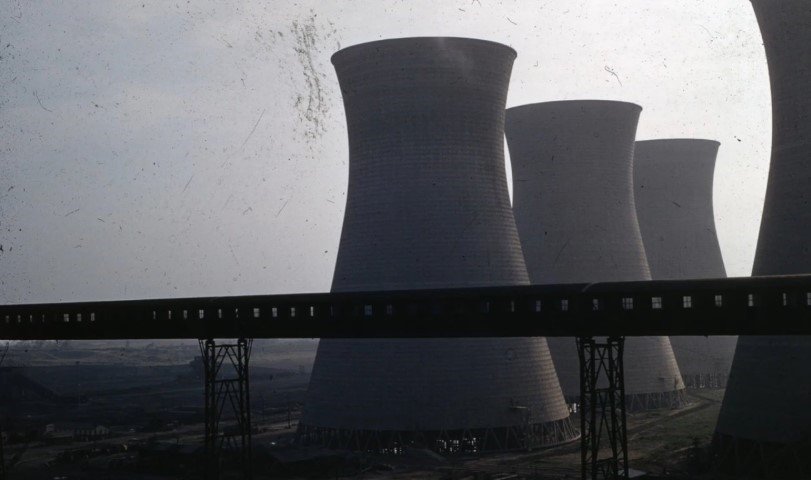
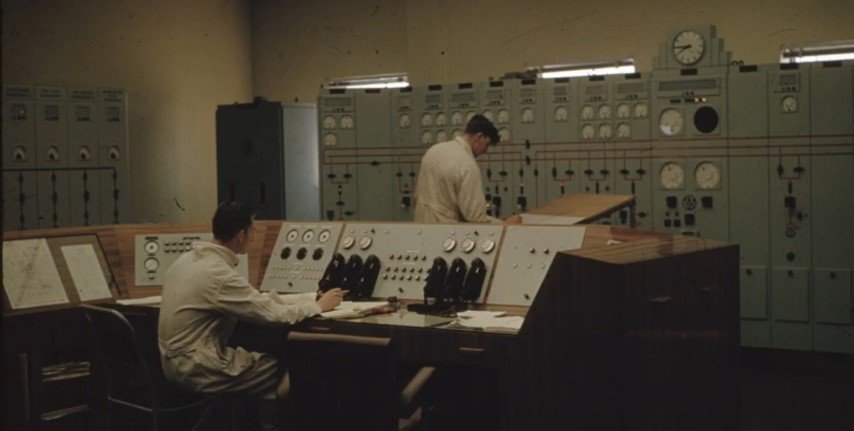
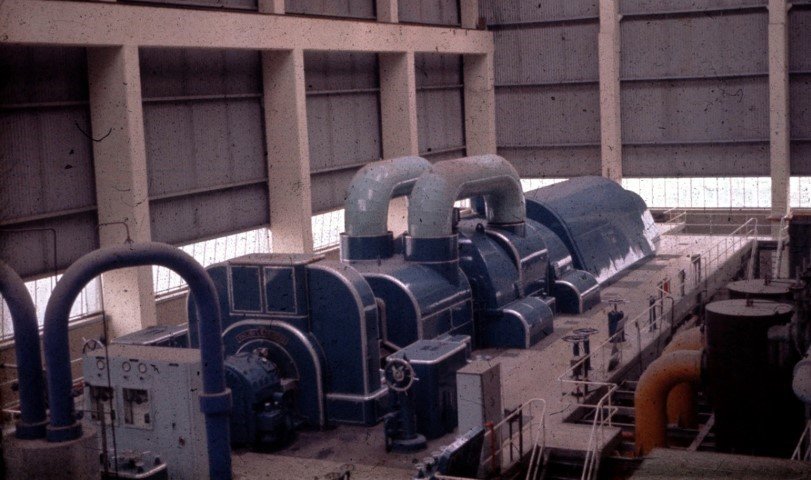
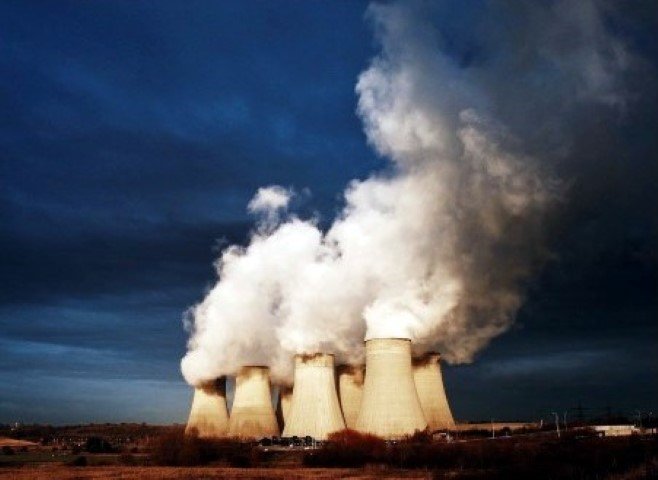
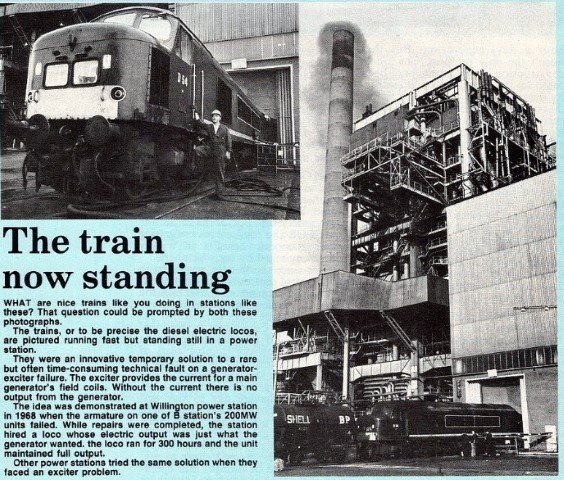
.jpg.64f0bb1e9774ee84a506397a0b30795f.jpg)
.jpg.f02a8b7ffcc941fe34ad3555cb327e6b.jpg)
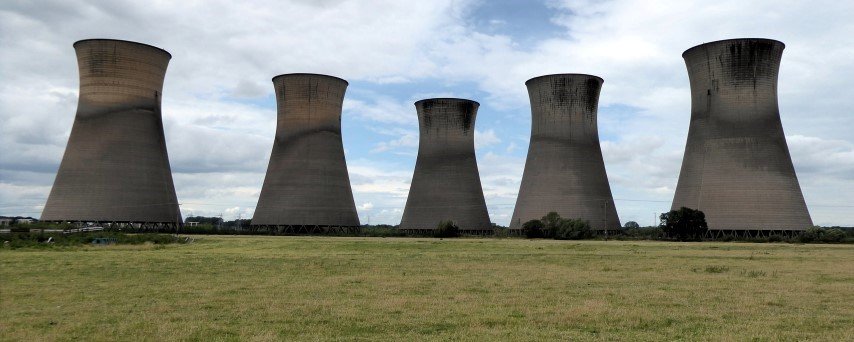
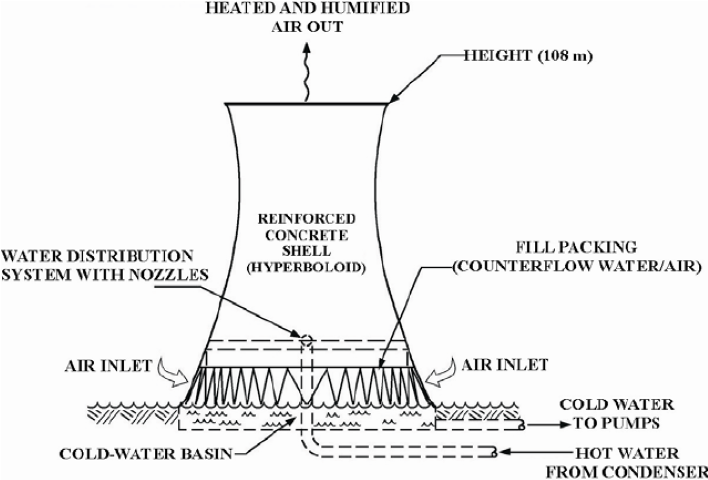
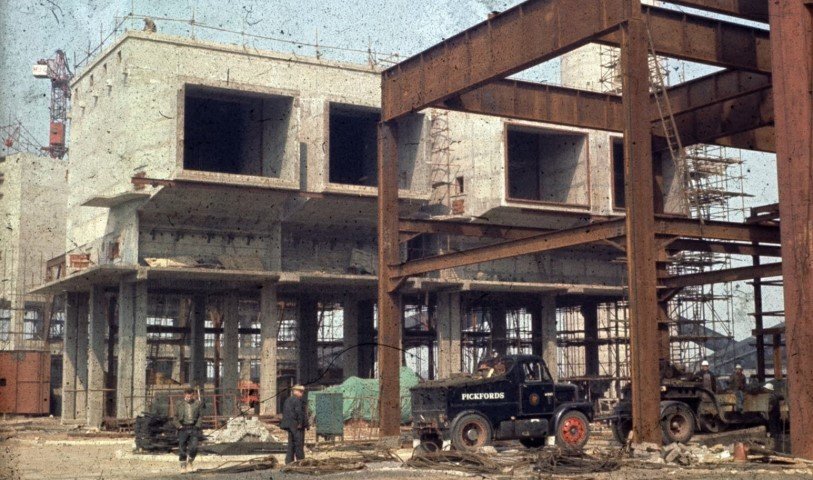
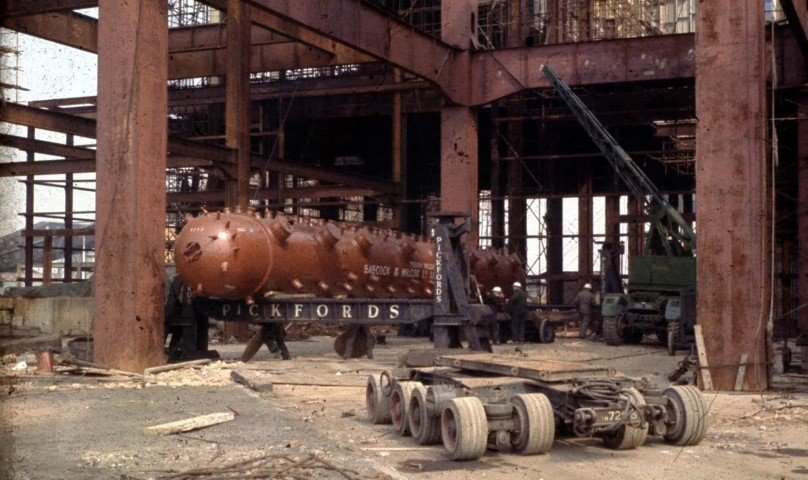
.jpg.6ed782f3c0da110f3b40cfb0d4218759.jpg)
.jpg.74479bf3ff5feb207062d4500a874743.jpg)
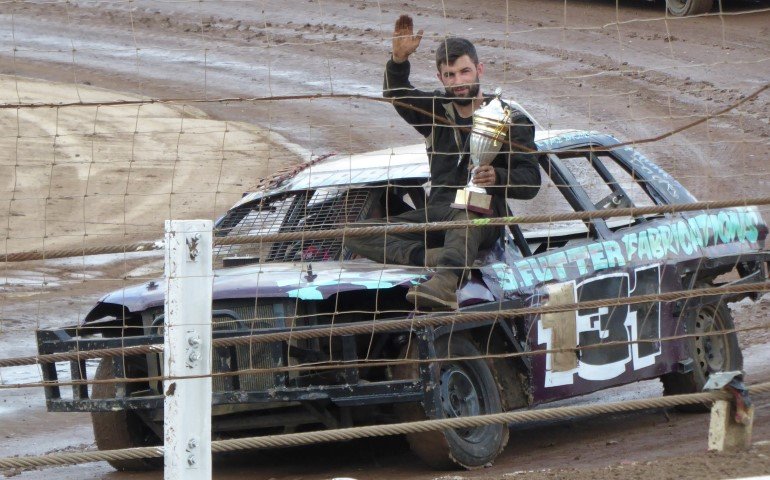
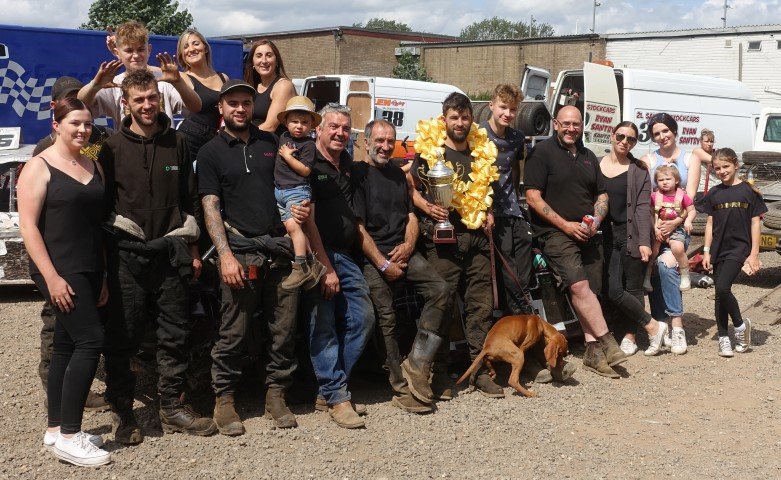
.jpg.5d775cfbdc2f8effd23b77e483ab6e53.jpg)
.jpg.267a8fa4453d0076482433818257c67f.jpg)
